Tame That Hairy Beast

Tame That Hairy Beast: Cleaning Tips Every Pet Owner Should Know


They are adorable and we love ‘em like they are our kids, but our sweet pets can be challenging to clean up after and can make it tough to keep our homes company clean. There’s pet hair and potty accidents. There are dirty paws and sharp nails. Some of us have messy eaters (not just four-legged, LOL) and some of us have chewers and shredders. Yes, our furry friends know how to make a mess. Being able to manage and even prevent these messes can make routine cleanup a lot easier and help keep your frustration levels in check. Perhaps it’s the shedding that drives you nuts or the kitty-litter scatter.  Maybe it’s funky pet odors or water bowl splashes. Everyone has pet-owner woes and we’re here to help you tame that hairy beast with these tips designed to keep your home as clean as it was before you had pets. Unless, of course, you’re an utter slob in which case we’ll need to talk to your mom LOL.

HAIR

  • Lint Roller. A lint roller is a great way to remove pet hair from your clothes, but you can also use it on couches, chairs, curtains, and other furnishings in your home. Lint rollers usually have a wide surface area and are effective at picking up pet hair. And BONUS TIP: did you know they are also great for cleaning dust from your lampshades? For the top 8 rollers that work great on pet hair, click here.

  • Furniture Covers. I absolutely cannot say, “No!” when my pup asks to snuggle on the sofa or curl up next to me in bed. If, like me, you can’t keep pets off your furniture, use covers to protect the fabric from damage and unwanted odors. Most furniture covers are designed to be easily removed and washed. Wash regularly to help maintain a clean and odor-free environment. The Spruce Pets rate these as their top 8 choices. In addition to protecting against pet hair, furniture covers can also guard against stains caused by spills, accidents, or tracked-in dirt. Choose a cover made from pet-friendly material that is durable and resistant to wear and tear. Avoid materials that may be easily punctured or torn by your pet’s claws.”
  • Vacuum & Sweep. Keep pet hair from taking over your home by vacuuming and sweeping regularly, maybe even daily. Last summer I cared for my brother’s two yellow labs for a month while he and his wife were traveling. As the owner of a 12-pound non-shedding dog, I was overwhelmed by the amount of hair. Fortunately, they had a very nice, specialized pet hair model vacuum cleaner which was a game changer. Some vacs are also available with pet hair attachments designed to handle shedding, even intense shedding. Here are the 7 best vacuums for removing pet hair according to RTINGS.com.
  • Hair Remover. Getting pet hair off your clothes, carpet, furniture, and out of your car can become an all-consuming challenge. But the right pet hair remover can make the job a lot simpler. You might even be able to wear that black shirt again. Here are the 8 best pet hair removers of 2024, tested and reviewed by The Spruce Pets.
  • Rubber Glove. If pet hair is set into your furniture, use a rubber glove to get rid of it. Simply dampen a rubber glove, something that you probably already have on hand for washing dishes, and run it over the furniture to attract and collect hair.

  • Brush daily and bathe regularly to help keep your place hair- and dust-free. Trim nails whenever they get too long to protect your floors and doors from scratching damage. It’s important to know how to cut your pet’s nails to avoid hurting them. If you’re a chicken like I am, consider going to a groomer or your veterinarian. Speaking of nails, keep your kitty from scratching your furniture by purchasing a scratching post. Cats scratch to mark their territory and sharpen their claws; offering designated scratching surfaces can redirect this behavior away from furniture and other areas of your home.

STINK

  • Baking Soda. Pets can be stinky leaving funky odors in their wake, especially in their favorite areas of the home. Baking soda has odor-neutralizing properties and can be used to absorb and eliminate unpleasant smells. Sprinkle it on carpets, furniture, and pet bedding, let it sit for 15 to 30 minutes, and then vacuum.
  • Wash Pet Bedding Regularly. Whether it’s your pup’s bed or your kitty’s tower, pet bedding must be cleaned regularly to prevent odors and pet hair buildup. Be sure to use pet-safe detergents! Consider using covers that can be easily removed and washed. My pup’s bed is small enough to toss in the laundry, but my brother’s 75-pound dogs have sleeping quarters almost as big as a twin bed, so a removable cover is a must. If you do have a cover that isn’t removable, sprinkle the bed with baking soda and let it sit for 10 to 15 minutes, then vacuum.
  • Quick Clean Up. Cleaning up pet messes promptly and effectively is essential for maintaining a clean and healthy living environment. Start by scraping up as much of the mess as possible. Then, clean the areas by scrubbing them with water and a pet-safe detergent. If odors remain, sprinkle the area with baking soda, let it sit, then vacuum.
  • Odor Control Litter. Let litter help control smells. Good Housekeeping tested and reviewed 20 litter brands to find the vest. Their top 11 picks are easy to scoop, control odors, and don’t stick so much to cats’ paws, which can lead to litter particles on the floor.

DRAINS

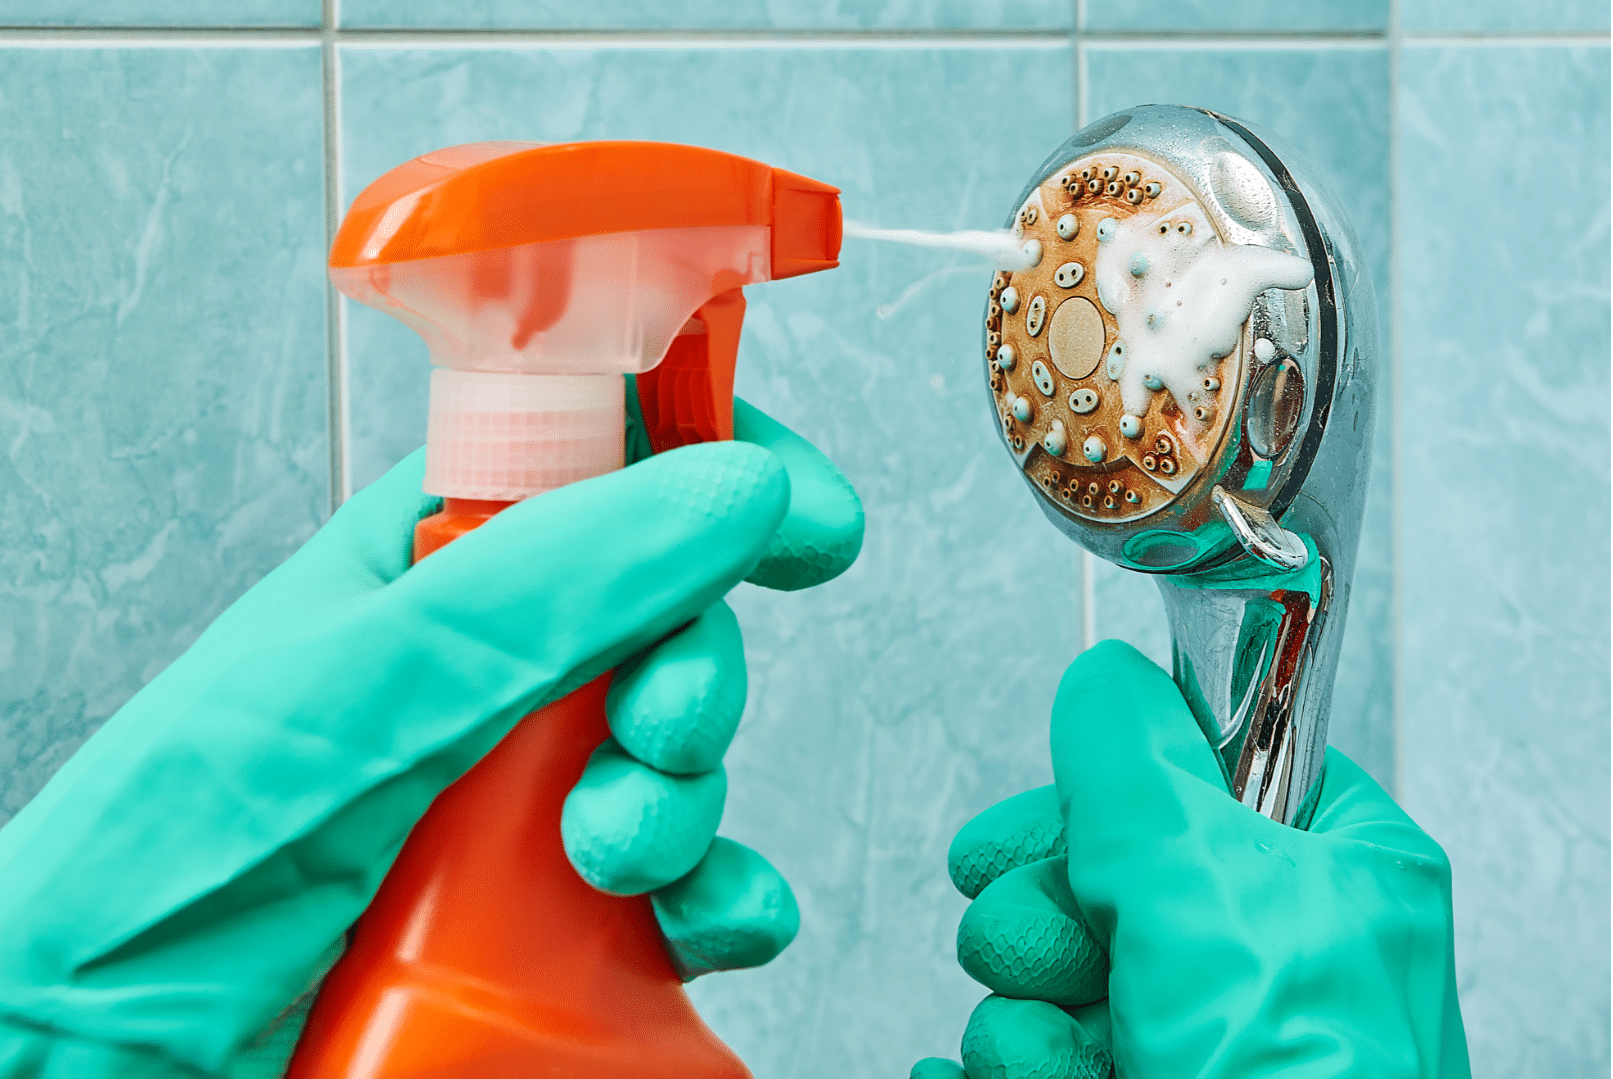
  • Protect Your Shower Drain. Getting pet hair in your shower during bath time is inevitable, but there are ways to minimize shedding for easier cleanup. Brush your pet before her bath to help remove loose fur. Be sure to use a grooming brush appropriate for your pet’s coat type to reduce shedding during the bath. Place a hair catcher over the drain, which keeps pet hair from causing clogs. It’s also very helpful in keeping your own hair out of the drain. Find the best ones here.

SPLATTER SCATTER

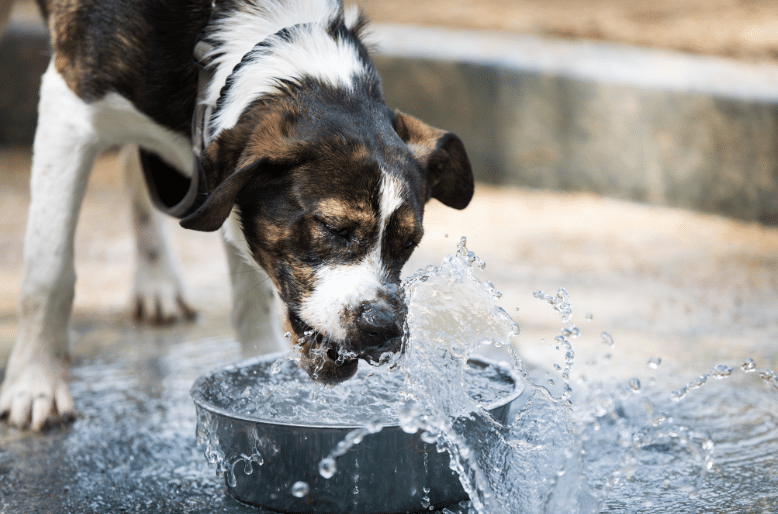
  • Food Mat. My little guy drinks like a crazy animal and splashes his water everywhere. One of my brother’s labs attacks her food bowl with such force, the food flies. A great resolution is to place a mat under their dish. Mats can catch any spills and make cleanup so much easier. Look for a mat that will be easy to clean. A non-skid mat will help prevent your pup from pushing bowls around.
  • Litter Mat. If you have a cat, you know they have a propensity for kicking litter out of their litter box. Keep it contained by using a litter mat, which is made with a mesh material designed to trap litter. These textured mats act like a doormat. Even the most well-behaved kitty will track litter granules out of the litter box. A good litter mat catches most of those bits before they spread throughout your house. Find New York Times Wirecutter’s top three litter mats here.
  • Litter Box. You can also avoid the spread of litter by choosing the right litter box. A litter box with higher sides prevents cats from kicking or scattering litter outside the box (does your cat love doing this?) People Magazine has tested and reviewed 15 of the best litter boxes.
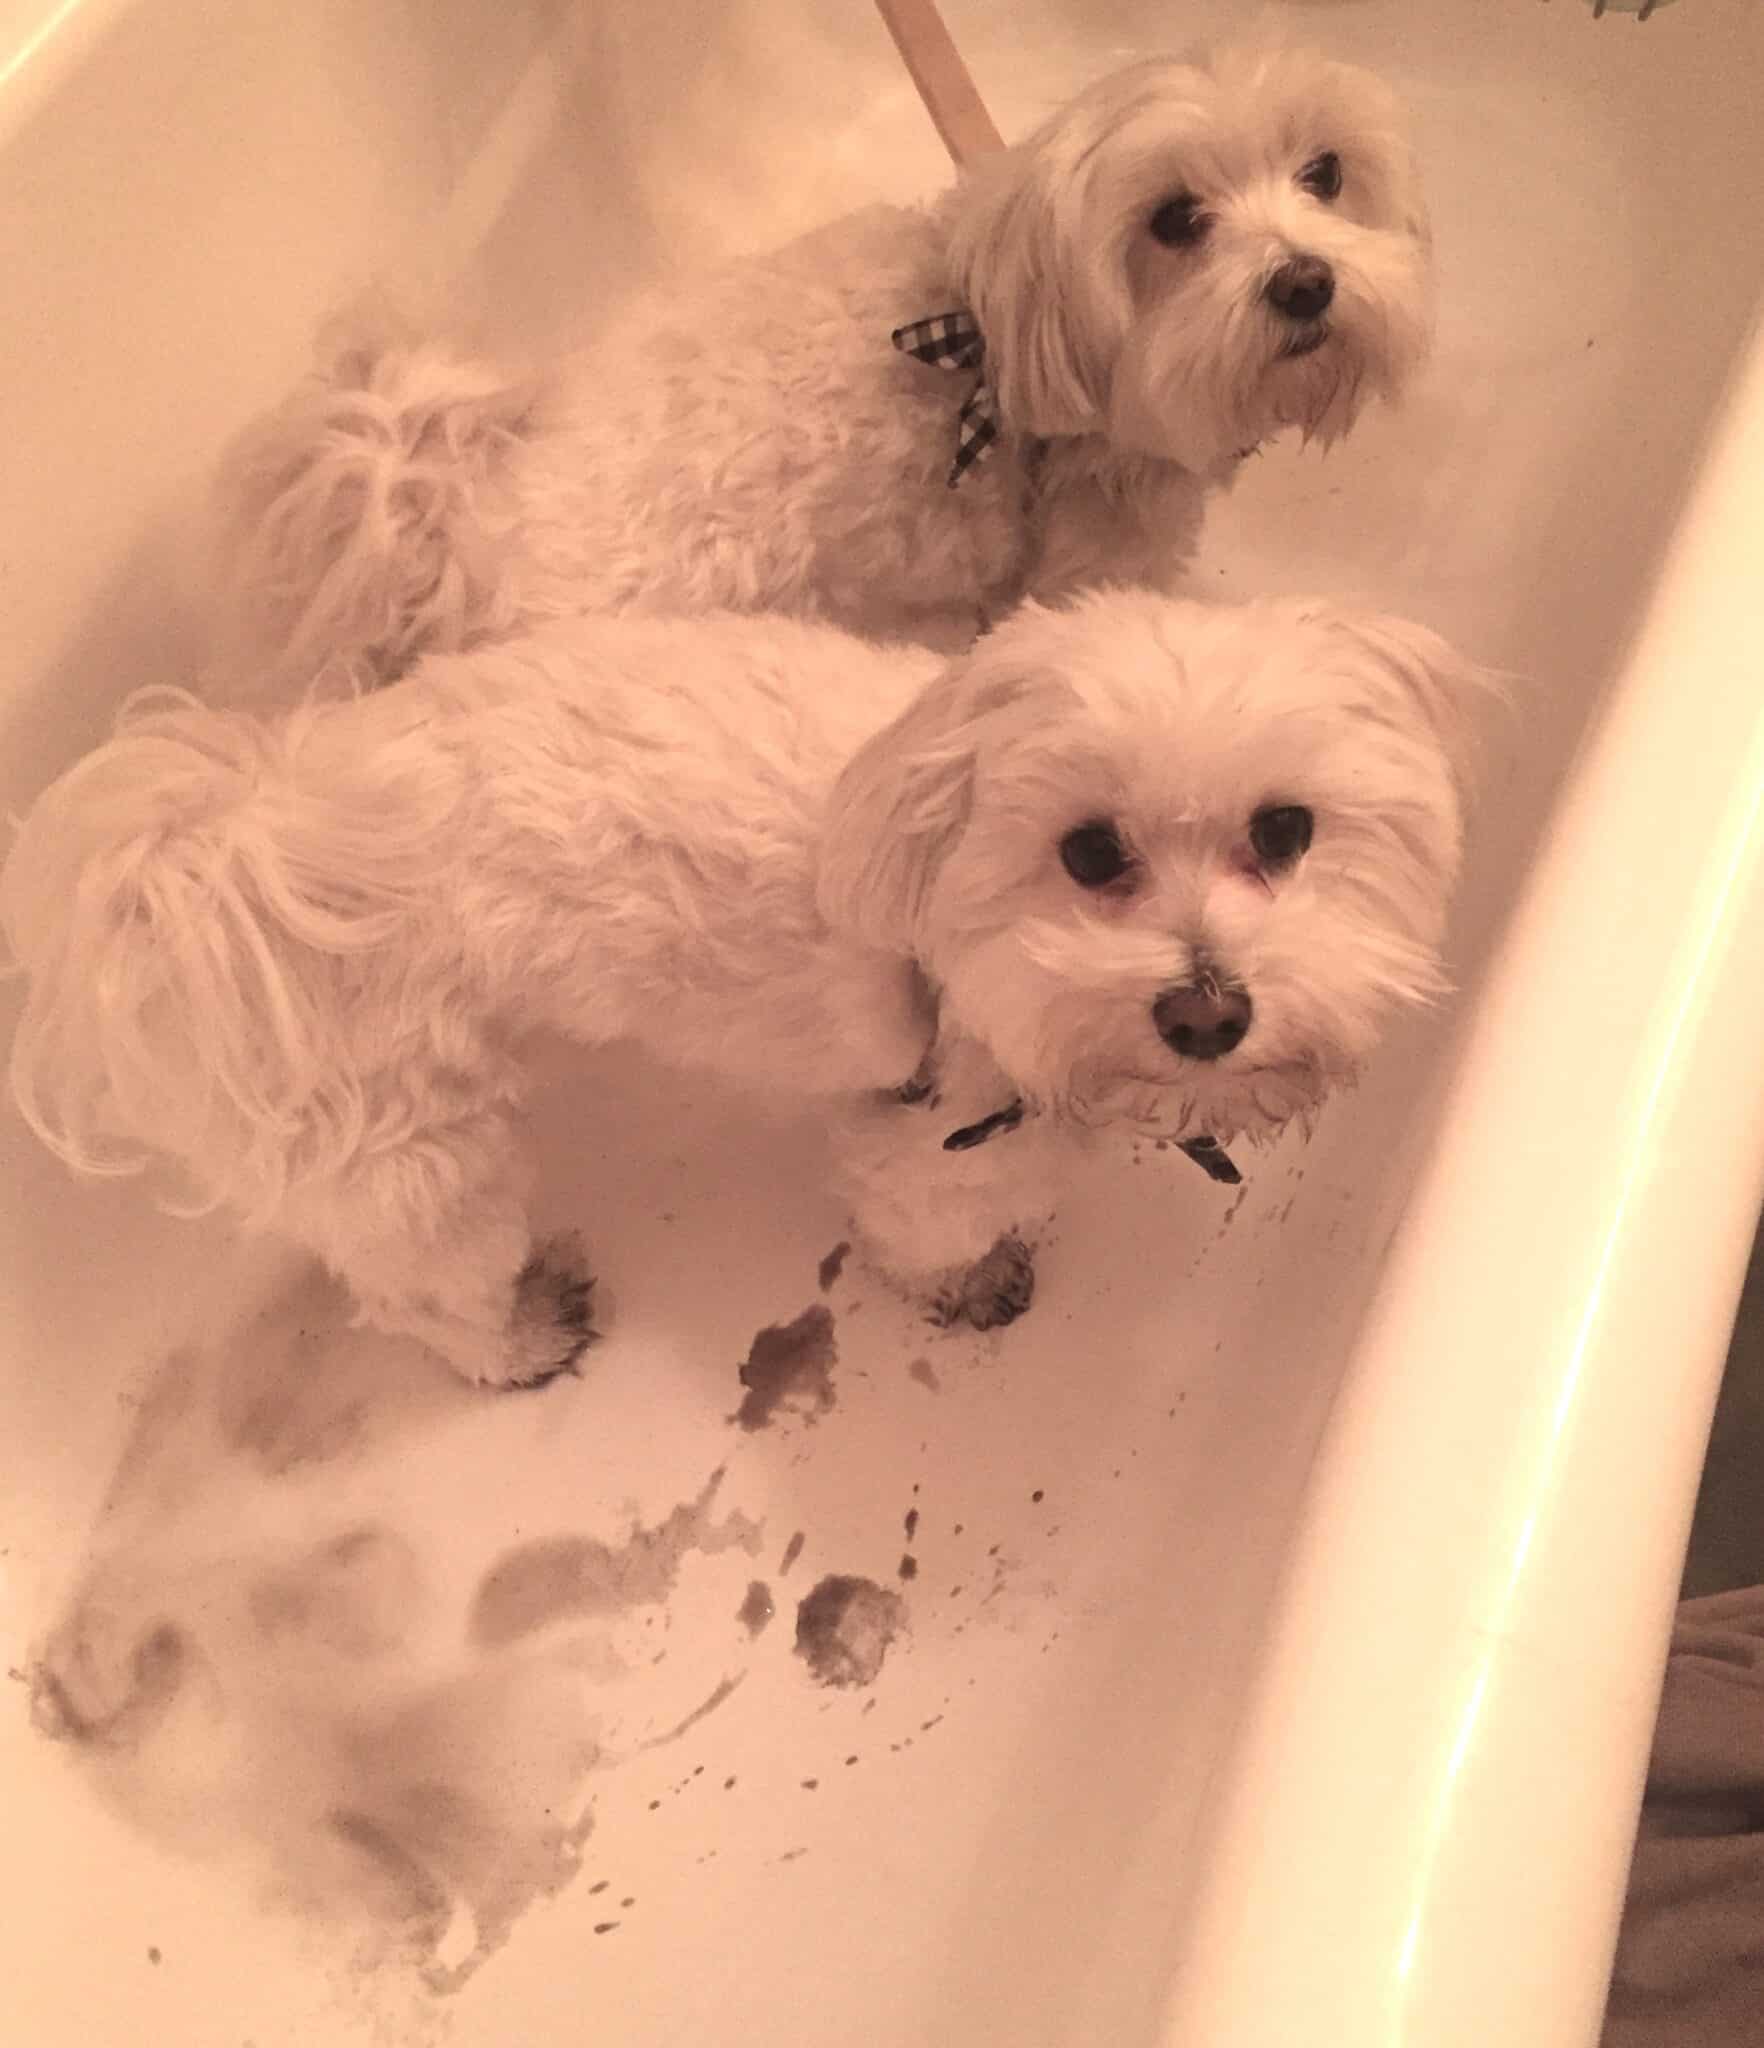
PAWS

  • Wipe your pet’s feet when they come inside. While it might not be necessary to wipe every time they come inside, it’s a must in certain instances. A walk during a rainstorm, after a storm when there are mud puddles, when there is snow on the ground, and when playing in the yard or dog park (where a little time may be spent digging) are all times when paws will get dirty. I once lived in the historic section of a small town, and that old neighborhood seemed to have decades of dust and dirt everywhere. Even when we stuck to the sidewalks, my pups (there were two then) would come home looking like they were wearing brown socks. Sometimes a wipe with a damp cloth will do the trick. Other times a foot wash is in order. With my short guys, sometimes it was a half bath involving feet, legs, bellies, and chests. Chewy has 10 top-rated wipes for dogs and Rover rates these wipes for cats.

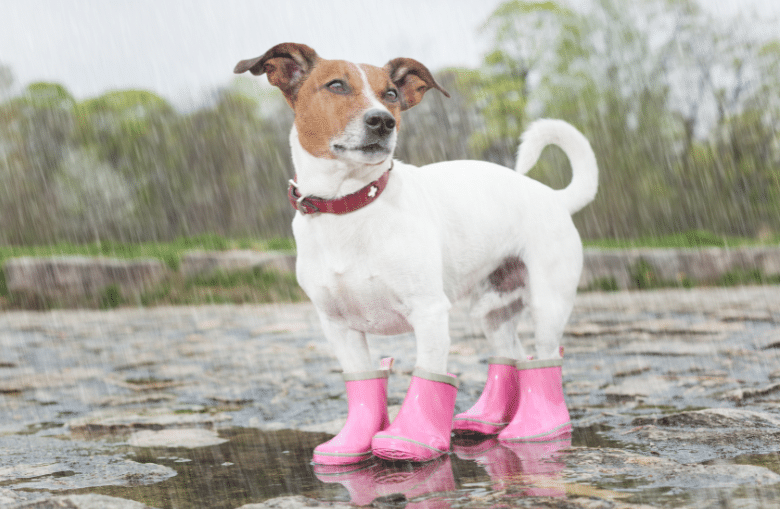
  • When it’s really mucky outside, boots make a world of difference. It took many tries for me to find the right foot cover for my pup; many dogs just don’t like wearing a boot (although they look SO CUTE!). After losing three of four adorable zip-up red boots with fur trim ($50 down the drain) in a snowstorm, I thought we were through with boots and any real chance of a successful walk in the snow. The game-changer for me – and Ollie – was Pawz Waterproof Boots. They are not only lightweight and waterproof; they also can’t be easily kicked off.

Imagine loving your pet unconditionally along with your nice, clean home free of all the dirt, hair, and stink your four-legged baby brings with him. Now you can. You’re welcome, and tell your dog we said, “Hi!”


.


New Year New You

Globally and nationally 2023 brought us wars, earthquakes, fires, the Hollywood writer’s strike, AI, a former president indicted, Twitter morphing into X, the George Santos bevy of lies, Damar Hamlin’s collapse, Alec Baldwin’s manslaughter charge, Barbenheimer, and Swelce. Then the year rushed to a close – as per usual – with a mashup of Halloween, Thanksgiving, Christmas, Hanukkah, Kwanza, and New Year’s. I, for one, am exhausted and ready to start 2024 fresh. On the right foot. Clear headed, and with a light heart. Here is a collection of ways you too can start the New Year on the right foot.

Say No to New Year’s Resolutions. Ahhhh, big sigh of relief. It’s like a get out of jail free card. Resolutions are too easy to break and can be overwhelming when you try to do too much too fast, so just say no.

Walk Every Day. Whether it’s 10 minutes or an hour, walking will give you more energy, lower anxiety levels, and lift your spirits. Walking in nature can be spiritual; a time to clear your mind. Walking on a treadmill at home or at the gym can provide you with the opportunity to connect with great music, a best-selling book, self-help guidance, or a trending podcast.

Commit to Eating Healthy. Cut back on ice cream, sweets, carbs, processed foods, and fast foods and your body will thank you. In today’s world we have plenty of healthy food options from the grocery, delivery services, and many places deliver right to your door. A better diet means you can say goodbye to heartburn, fatigue, and tight clothes.

Purge Your Closet. Here’s our post on how to do just that. If you haven’t worn something in over a year, chances are you are done with it. Treat yourself to a new look in the new year with a couple of new pieces that make you feel great when you put them on. Clothing can lift your mood when you put thought and energy into your style. As in, “Giiirl, you look good!”

Clean Out Your Pantry. Here’s some help cleaning your entire kitchen, and reorganizing it too. You may find something hidden in there with a use-by date of 2008 – YIKES! – so a purge will get you not only a clean pantry, but also prevent accidental food poisoning.  It’s a win-win! The general rule of thumb is: if you don’t remember when you bought something, and there’s no date on it, it’s best to toss.

Apologize. Review 2023. Do you owe anyone a heartfelt “I’m sorry”? If not, good for you. But if there is, do it. Don’t start the year with a heavy heart about something you said or did. Having negative things fill your mind makes life uncomfortable, and you may not even know where the discomfort is coming from. Make it right or let it go.

Finish It. Partially completed projects can weigh you down. Make a commitment to finish projects before starting new ones. You can only keep a few big things going on at the same time, and sometimes dealing with just one life-changing project can keep you occupied and overthinking for weeks. So finish at least one project before you start something new.

Plan Your Year. Get out your calendar, block out your vacation, you’re your reservations, book your family gatherings, give some thought to hosting parties, and be sure to put any big events on the calendar, so everyone in the house can see what’s coming up. Having something to look forward to helps make you happier. Not flying by the seat of your pants throughout the year can be so liberating!

Set Goals. I know what you’re thinking, but goals are not necessarily resolutions. Make ‘em simple ones or complex, but give yourself direction and then make a plan. Embrace the power of written goals. Having your goals in writing is so much more effective than those mental notes. You may not follow this road map exactly, but having something to guide you is better than wandering aimlessly. Even if you don’t achieve everything this year (and knowing that just makes you human), the simple knowledge that you are moving your life forward will be empowering.

Discover Your Sweet Spot. Find the place where your talents and passion intersect, and visit and engage in this place frequently. Promise yourself you will do what you love and not put if off because you’re busy working or are involved in the mundane tasks of life.

Be Satisfied. Choose to be content with what you have. Just because some influencer on Instagram suggests you NEED this or that, remember the cycle of “more is never enough” is destructive. Stuff won’t bring you happiness; connections with family and friends, communing with nature, fulfilling your heart by doing the things you love will bring you peace and joy.

In the new year, start off on the right foot with a new you of good habits. We wish each of you absolute success in making 2024 the best year yet with clear heads, loving hearts, and days filled with good health and happiness. Gushy, but we mean it!


Garbage Disposal Operation

When I was a kid, and I will be dating myself here, we had a big old white porcelain sink with two basins. I was the dishwasher and my dad was the disposer of garbage. I washed the dishes because whenever my mom did the dishes, she broke at least one thing. My siblings and I used to joke that she filled the sink with hot, soapy water, added everything that was dirty (dishes, glasses, pots and pans), and stirred the lot with a big stick. A strainer in the sink caught any bits of food (or broken glass LOL). Once everything was washed and rinsed, I emptied the strainer into the trash for my father to take out. Good times. Today we have garbage disposals which are, when used properly (and in my humble opinion), a wonder of the world and saviors of dads everywhere. Because garbage disposals operate virtually trouble-free when used properly.

How many things operate virtually trouble-free when used properly? Best of all, they get rid of the muck when you wash dishes by hand, and the food scraps generated during food prep. But these scraps can get tricky if you try and dispose of the wrong thing. And a meal prep with a broken garbage disposal is no one’s idea of a good time in the kitchen.

Here are some helpful procedures and tips that will lead to a long life for your disposal and easy operation for you.

How To Operate Your Garbage Disposal

  1. Run a steady stream of cool water into the sink before turning on the garbage disposal.
  2. Flip the disposal switch to the “on” position before placing any food waste into the disposal.
  3. Gradually feed food waste into the disposal. Avoid putting large amounts of food waste all at once as this may slow the grinding process. Keep hands away from the inside chamber.
  4. Once the food waste has been broken down, turn the disposal off. It usually takes only a few seconds to grind food waste, although it depends on the quantity and type of food waste. The sound of the disposal will change when there is no more food waste in the grind chamber.
  5. Let water run for one or two minutes to flush the drainpipe.

Sounds easy enough, right? But my mother thought her method of washing dishes was easy, and we all know how that turned out. Although the device is easy to use, please take note of the following:

PRECAUTIONS

  • Never put your hand down a disposal when it is running.
  • Do not use hot water when operating a disposal.
  • Never try to put too much through a disposal at once. Slow and steady wins the race.

IN OR OUT?

Garbage disposals are designed to handle just about any type of everyday food waste.  But the topic of what not to put in a garbage disposal is alive and well, usually based on myths and old family stories rather than facts.

A good rule of thumb is: if you can’t eat it, neither can your disposal. Everything you put in your disposal should be biodegradable. But here is a more comprehensive list from the makers of InSinkErator Disposals which contains a few caveats.

Disposals can quickly and efficiently grind most everyday food wastes, including leftover meats, vegetables and fruits, as well as food preparation waste.  The key to keeping a disposal working properly is to follow the proper operation steps and avoid filling the disposal with too much food waste at one time. But do not put these foods in the disposal:

THE LIST OF NEVERS

  • Grease, fats, or oils
  • Fibrous materials (cornhusks, artichokes, potato skins, celery, onion skins, carrot tops, banana peels, tea bags, etc.)
  • Shellfish shells (clams, oyster) or nutshells
  • Expandable foods (rice, pasta, bread)
  • Eggshells, coffee grounds (see below)
  • Hard materials (bones, fruit pits, cigarette butts, wood, glass, plastic, anything metallic)
  • Drain cleaners or bleach
  • Dishcloths

ABOUT FAT, GREASE, AND OILS

These items should never go in your disposal. Instead, put used grease, fat, and oil into a small container like a small bowl or rinsed tin can and refrigerate. Once the fats solidify, toss in the trash.

 ABOUT COFFEE GROUNDS AND EGGSHELLS

Neither of these materials is harmful to a disposal, and will pass through without a problem.  However, problems can arise with household plumbing – especially if it is older, or has not been cleared in some time.

Both coffee grounds and eggshells are sedimentary in nature, if too much is placed in at one time, or if the plumbing is restricted, it can create a clog or a ‘slow drain’ situation.  Too help avoid any problems, feed these materials into the disposer gradually, and utilize a strong flow of cold water to help flush it through the pipes. Or, toss these items in the trash or compost them.

ONGOING

  • Grind a citrus peel or put baking soda down the drain to keep the disposal odor free.
  • Grind ice cubes to clean the unit walls and blades.
  • Place  the disposal cover or sink strainer over the drain opening when the disposal is not in use, and leave in this position to prevent foreign material from accidentally dropping into disposal.

 TROUBLESHOOTING

If the motor has stopped due to overloading, turn the disposal off.  Wait three to five minutes, and then push the red reset button (located under the sink on the unit itself).  Then follow normal operating procedure.

If the disposal has jammed, turn the power switch to the “off” position before attempting to remove an object.  With tongs, remove any objects that might be obstructing the free movement of the blades.  In many cases, you can insert a broom handle into the mouth of the disposal and turn it in a circular pattern to free the blades.

When movement is restored to the blades, push the reset button on the disposal unit.  Then follow normal operating procedure.

Of course, if you are a resident in a Fath Properties community, and ever run into an issue you cannot resolve yourself, a member of our professional, efficient maintenance team will be happy to help! Just call your leasing office and we will schedule a friendly service tech to come to your apartment home to make everything right.


Your Local Hero

Distilled White Vinegar. Your New Local Hero.

Trending: ecofriendly everything.

Are your social media feeds brimming with ads for new products designed to do a better job of cleaning all kinds of specific items with minimal packaging waste? I know mine are. We could all spend a fortune and clutter up our storage spaces with products galore. Seems counterintuitive, doesn’t it?

How about an alternative? It’s nothing new, newfangled, expensive, or “only available on line”. In fact, I’d be willing to bet you have a bottle in your cupboard. Let me reintroduce you to your new local hero: distilled white vinegar.

My admittedly dusty bottle of white vinegar sat in the back of my cabinet unused for ages. Not quite sure why I bought it; it just seemed like one of those must-have pantry staples.  But then when I moved into an old (circa 1896) apartment in the historic district of Newport, KY and my bathtub drain ran super slow, Google taught me that white vinegar would keep my drain running clear. More on that later.  That Google search opened my eyes to the almost magic trickery of distilled white vinegar which, as it turns out, is a workhorse in the kitchen, bathroom, garden, and more! Bonus: it’s cheap.

Here are just a few of the tricks white vinegar has up its sleeves:

All-Purpose Cleaning Solution. In a spray bottle, combine 1 cup of distilled white vinegar with 3 cups of water and use on just about everything. Don’t love the smell of vinegar? Let vinegar sit in a jar with strips of lemon zest and a spring of fresh thyme for a week or two in a sunny spot, then strain. Mix with water as described above. This can be done with any herb or fragrant plant like lavender or eucalyptus, just avoid anything that colors the vinegar if you plan on using it on a white carpet.

IN THE KITCHEN

Stinky Sink Drain. To keep kitchen drains fresh, pour 1 cup of distilled white vinegar down the drain once a week. Let it sit for 30 minutes and then rinse with cold water. Ahhh, fresh!

Dishwasher. Pour a small amount of white vinegar into the rinse-aid dispenser of your dishwasher. This will help prevent a cloudy residue on your glasses and keep cutlery-free of smears and streaks. And, once a year or so, more often if you have hard water, pour a cup of vinegar into an empty dishwasher and run it on a short cycle to remove lime and soap build-up.

Stainless Steel Cookware. Scrub with a mixture of white vinegar and salt.

Cutting Boards. Undiluted white vinegar cleans and disinfects cutting boards, especially those made of wood.

Microwave. To remove smells or cooked on food, combine ¼ cup of distilled white vinegar and 1 cup of water in a microwave-safe container. A slice of lemon will add a fresh, clean scent. Microwave on high until the mixture comes to a boil and steam forms on the window. Let cool slightly, then wipe away any food residue.

IN THE LAUNDRY

Stain Treatment.  For removing stains like mustard, ketchup, tomato sauce, grass, and underarm deodorants, spray a little white vinegar onto the stain before laundering. Soaking whites in vinegar will help bring back their whiteness.

And just like in your dishwasher, vinegar helps to break down detergent when added to the rinse cycle, making clothes fresher, more colorful—and it gets rid of funky towel mildew. One cup should be plenty; add less when using a front-loading washing machine.

WARNING: Never add vinegar when using chlorine bleach; it will create noxious chlorine gas, a potentially deadly compound.

Laundry Softener. If you’ve run out of fabric softener, simply add about three tablespoons (or a scant ¼ cup) to your washing machine dispenser. Your clothing will be softer, but won’t smell like vinegar because of the limited measurement.

IN THE BATHROOM

Window/Mirror/Shower Door Wash.  Spray the all-purpose solution on the glass surface and wipe it off with a clean, lint-free cloth or a balled-up piece of newspaper (does anyone still read the newspaper?).

Clean Faucets & Showerheads. White vinegar is effective in removing lime scale especially when mixed with hot water. Wrap your showerhead in a plastic bag of warm, white vinegar and secure it with a rubber band. Let it soak for an hour before rinsing it clean. Spray faucets, let sit for a bit, then wipe clean. If your toilet bowl, bathtub, or sink has lime deposits from hard water, soak or spray vinegar onto the grit. It should loosen the deposits enough to remove them easily.

Tile & Grout. Spray full strength white vinegar on mildewed or scummy grout and tile. Wait for about an hour, and scrub with a soft bathroom scrub brush.

Keep Drains Clear. To keep your sink or bathtub drain running clear, use a funnel to pour a half cup of baking soda down the drain followed by one cup of white vinegar. The concoction will foam up like crazy, so this can be a fun “science experiment” with the kids. Let sit until the foaming action stops, then rinse with hot water (this step should be kid-free). Not only will it clear your slow running drain, but it will also destroy any odor-causing bacteria.

IN OTHER PLACES

Pet Potty Accidents. Clean and refresh the soiled area by spraying vinegar. This may also deter your pet from soiling the same area. Read more in our blog post about cleaning carpet stains here.

Remove Stickers. Who hates price tag stickers??  They are a pet peeve of mine. I especially hate it when a price sticker is placed on the glass of a picture frame or in a very conspicuous place on a pretty vase. Dab white vinegar on the spot and let it sit for a minute or two. Afterward, it will be easy for you to scrape away the excess paper and gunk. And much less expensive than Goo Gone.

Relieve Sunburn Pain. No one ever plans a sun burn, so aloe is usually not close at hand. Instead, soak a washcloth in a 50/50 solution of distilled white vinegar and water and dab on your sunburn. Reapply as the washcloth warms. Or, add 2 cups to your bathwater.

Fresh Flowers. Add a few tablespoons of vinegar to your flower water to make your flowers last longer. When the water gets cloudy, dump it out and repeat.

So there you have it. Well not all of it, because the uses for white vinegar go on and on!

In closing, I’ll mention that vinegar is an acidic liquid originally created from wine gone bad. Wine gone bad is a very, very sad thought until you think of all the easy, effective, and inexpensive things that can be done with it.

Now go buy a gallon. Who doesn’t need a hero right now?

Resources: https://facty.com, www.foodandwine.com, www.thespruce.com


Get Your Place Vacation Ready

How to prep your place for time away from home.

PREP YOUR PLACE FOR TIME AWAY

Your car is gassed up, your bags are packed, and you’re ready to head off for some R & R. But wait! Be sure your place is properly prepped for your time away, so you don’t return to anything unpleasant. For your peace of mind, here’s a handy checklist to follow so you won’t spoil even a moment by worrying about what you may have left undone at home. Getting your place vacation ready is the key.

SHARE your travel plans with the management of your apartment, condo, homeowners’ association, or a trusted neighbor in the event there’s an emergency. Better to be safe than sorry in this crazy world of ours. And if there’s an emergency, chances are you will want to be found. (Except for work. Don’t tell them a thing. LOL.

HOLD the mail. Visit your local post office or stop the mail online. This is such a great service for when you are on vacation, on a business trip, or will be spending time away for any reason. As an added bonus, you can schedule the day you want all your mail delivered to your home.

INSTALL a timer on one or more lights so it looks like someone is home. Programmable timers let you randomize the daily on/off times.

SET your A/C and heating system’s thermostat. When the weather is cold, set the heat to at least 50 degrees (to prevent pipes from freezing) and when it’s hot outside, set the air conditioning to 85 degrees.

SHUT OFF the water. Not really necessary for shorter trips, but if you will be away for an extended period, close the valves to your washing machine, dishwasher, ice maker, and toilets to prevent potential leaks.

ADJUST your blinds, shades, and/or curtains. Don’t completely close your window coverings if you don’t normally. Instead, close them partially to block the view while giving an “at-home” appearance. Tilting mini blind slats up will let in light but prevent snooping eyes. And you don’t want to completely close all window coverings. Remember mold and mildew thrive in dark places.

LOCK all doors and windows, and your car if you’re leaving it behind. This is a critical step for getting your place vacation ready!

PAY your bills. Sewer, electric, gas, rent, car payment, phone, internet, etc. Be sure to make any upcoming payments to keep your credit in good standing. With online banking, you can set payments to occur when they are due even if you’re away. Gotta love technology, right?

WATER your plants. Consider a Plant Nanny to self-water while you are away, or check out this DIY plant watering system.

TOSS any fresh-cut flowers, which could start to smell if left in your home.

CLEAN your kitchen and bathroom. Wash dirty dishes, clean the sink trap, and pour vinegar down your garbage disposal so you don’t come home to yucky smells, bugs, or mildew.

CHECK to ensure the oven and stove are turned off. Don’t embarrass yourself by having to call a friend or neighbor to go check. Prep your place for time away!

EMPTY the trash. Take the trash to the dumpster so you don’t come home to a horrible stench or unwanted pests.

CLEAR the fridge and pantry. Eat or toss leftovers and perishables. Check those expiration dates! Rotting potatoes smell unbelievably gross. Onions, potatoes, and garlic may sprout, so toss them, too.

FREEZE a microwave meal for when you return home tired and hungry. Especially if you’ll be arriving late.

WASH, dry, fold, and stow everything in your laundry basket. Damp workout clothes can smell really nasty if left unwashed and spread the smell to everything else in your hamper. Don’t forget that last peek into the washing machine. Wet or even damp clothes sitting for a week or more will reek and only create more work for you once you return home with all your dirty vacation clothes.

UNPLUG small appliances, such as your toaster and coffeemaker, hair dryer, and curling wand.

MAKE your bed up with fresh sheets. This one is my favorite way to get my place vacation ready. You’ll love it too when you arrive home exhausted and get to sleep in a neat clean bed instead of a tangle of dusty sheets. It will be like being back in your hotel room! (If only).

Now that your place is perfectly prepared for your time away, pack your bags, leave your cares behind, and enjoy your vacation!


Spring Cleaning Extravaganza – Bathrooms


In the wee hours last Monday morning, most folks in the USA grumbled as we lost an hour of sleep during the annual “spring forward” time change reminding me that we’re ever closer to the Spring Equinox on March 20. This Spring Cleaning Extravaganza’s intention was that we would welcome spring with a tidy, spotless, well-organized home and a light heart ready to embrace the season. Thus far our journey has made our windows and blinds sparkling and dust free, dust has been removed from every nook and cranny in our home, and our bedrooms have become beautiful, calm, clean, and relaxing havens. Next, we’ll tackle what is arguably the worst room in the house to clean – the bathroom. Our spring cleaning extravaganza continues with tips, tricks, and a checklist to help you make your bathroom sparkling clean.

Think happy thoughts trying to undermine the gag factor of bathroom cleaning, and assemble the usual suspects – aka cleaning supplies and products.

SUPPLIES 

Click the links to find the best product in each category. You’re welcome.

PROCESS

Clean The Slate

  • Remove everything from the bathroom counter, shelves, ledges, back of the toilet and place in a basket. Place the basket outside the bathroom.
  • Remove any bath mats and/or bath rugs, the shower curtain and its liner, and all towels. Launder as per manufacturer’s instructions.
  • Move the trashcan, scale, and anything else that sits on the floor.

Dust Top to Bottom

  • Dust vents with a dry rag, or vacuum cleaner detachment (a compressed air cleaner really gets in there).
  • Wipe off all ledges, windowsills, and shelves with a dry rag.
  • Dust light fixture covers and the shower curtain rod.

Wipe It Down

  • Wipe all bathroom surfaces with a wet, soapy sponge or spray multi-purpose cleaner on the below items, let sit for a minute, and then wipe residue with a clean, wet sponge or paper towel:
    • Vents (careful not to get vent interior wet)
    • Sink bowl and faucets
    • Walls
    • Light switches
    • Countertops (don’t forget the underside of ledges)
    • Showerhead, faucets (don’t forget the aerator – where the water comes out), and handles
    • Shelves
    • Toilet base, back, seat. handle (now is a good time to tighten base and seat bolts if loose)

Scrub The Gunk

  • Use a bleach/water combo (¾ cup bleach to a gallon of water), disinfectant spray, or DIY baking soda solution on your tile and grout shower walls and/or shower floor to scrub away any visible mildew, mold, or discoloration. TIP: remove water from the wall tile and tub with a squeegee after every shower and leave your shower curtain open until the tub area is dry. This will help to prevent the grown of mold and mildew. Move tips for cleaning your shower are here! Detailed tips for keeping grout and tile clean are here.
  • Wipe your porcelain tub with a Mr. Clean Magic Eraser Bath. It works great on hard soap scum.
  • Use a wet soapy sponge to wipe down shower curtain rod and rings.
  • Using multi-purpose cleaner or DIY baking soda scrub, thoroughly scrub sink bowl, drain, and faucet.
  • Use your bristle brush with bathroom cleaner to scrub the shower head. Be sure to scrub the aerator where the water sprays out. See tips for descaling below in the Miscellaneous section.
  • Scrub toilet bowl, seat, and area around the bolts with bowl. TIP: to prevent an accumulation of liquid in your brush holder, let the brush hang over the bowl with the seat closed until dry.

Shine

  • Using glass cleaner and paper towels to clean and shine all windows, mirrors, glass surfaces, light fixture covers, cabinet handles, doorknobs, and hinges.
  • Spray inside and outside of shower doors with glass cleaner and wipe clean with a squeegee.

Floor & Baseboards

  • Use a Swiffer dry or a vacuum to collect all loose hair and dust from the floor.
  • Wipe down baseboards (a used dryer sheet works great on this job!)
  • Remove the floor vent and vacuum both sides of the vent along with the airway below.
  • Wipe the doorstop.
  • Wet mop the floor with a Swiffer Wet or mop, then let dry.

Sanitize

  • Spray disinfectant such as Microban 24 Bathroom Cleaner on hard, non-porous surfaces like you countertop, shower stall, bathtub, toilet exterior, sink basin, faucets, handles, and doorknobs.

Miscellaneous

  • Unclog the drains, if necessary. A monthly treatment with white vinegar and baking soda keeps drains clear. Simply sprinkle about 1/2 cup of baking soda in your tub and/or sink drain, then pour a cup or two of white vinegar on the baking soda. This will cause a bubbling reaction (which your kids will love) and will clear a slow drain. Rinse with hot water.
  • Wash the toilet brush and its holder in hot, soapy water.
  • Empty the medicine cabinet (if you’re lucky enough to have one) and discard expired medications and cosmetics.
  • Restock the hand soap.
  • Throw your toothbrush caddy and soap dish in the dishwasher.
  • Clean makeup brushes.
  • Descale the showerhead
    • If your metal showerhead is clogged with scaly mineral deposits, place it in a pot with a solution of one part vinegar to eight parts water, bring it to a boil, and simmer for 15 minutes. If you don’t want to take the shower head down, or if the shower head is plastic, fill a zipper bag with a solution of equal parts vinegar and hot water, tie it around the showerhead and soak.
  • Clean and organize drawers and cabinet under the sink.
    • Toss out expired sunscreen and old cosmetics
    • Vacuum wipe it clean with a damp cloth
    • Treat yourself to inexpensive trays or bins to help keep these spaces tidy.
  • Clean the filter on your hair dryer
  • Apply Rain-X to shower doors
  • Clean your toothbrush holder
    • If dishwasher-safe, just pop it in with a load of your dishes, or hand-wash it with hot soapy water, rinse, and wipe it with a disinfecting wipe.

Whew! We did it!! Now comes the easy part. Put out fresh soap, towels, and rugs; rehang the shower curtain and its liner. Place all your personal grooming tools back in their designated spots, and redecorate the room with the pretty things you love on shelves and counters. Don your sunglasses because the glare of your sparkling clean bathroom will be blinding.  LOL.


Beautiful Bedrooms – Spring Cleaning Extravganza


Our Spring Cleaning Extravaganza Continues With Bedrooms

So far on our spring cleaning journey we’ve made our windows and blinds sparkling and dust free, and dust has been removed from every nook and cranny in our home. Next, we’ll tackle each room one at a time starting with a deep cleaning of the place where we spend a third of our life – the bedroom. Today we’ll make our bedroom beautiful.

Just as with our dusting segment, we’ll be cleaning top to bottom in our bedroom/s. Let’s get started!

Step 1. GATHER SUPPLIES

Combine these ingredients and pour them in a spray bottle:

    • 2 cups water.
    • 1/2 cup white or cider vinegar.
    • 1/4 cup rubbing alcohol 70% concentration.
    • 1 to 2 drops of orange essential oil for smell (optional)
  • Glass Cleaner
  • Baking Soda
  • Essential Oils Did you know? Lavender oil is a sleep aid. Read more here.
  • Furniture polish Be sure to read labels and use one appropriate for your furniture.
  • Depending on the type of floors you have, a vacuum or Swiffer wet and dry.
  • Clothing donation bags or storage boxes

Step 2. CLEAR ANY CLUTTER

  • Gather and toss any trash into the trash bag/can.
  • Remove clutter on all visible surfaces, including shelves, dresser top, night stands, floor, bed, chair, desk. Put anything that’s just out of place away. If items belong in another room, place them in the basket to address later.
  • Organize drawers and closets removing any items ready to donate, store, sell, or toss. Place those items in donation bags, storage boxes, and/or your trash as appropriate. A good rule of thumb for most items: if you haven’t worn it in the last year, get rid of it.

Step 3. DUST

  • If you’ve already completed the Great Dusting segment of our Spring Cleaning Extravaganza, lightly dust any accumulation since then (and good for you!).
  • If you’re just now dusting, use your Swiffer to dust the ceiling, walls, and doors (both sides, top, and trim). Remember to start at the top an work your way down.

Step 3. WASH

  • Wash down walls with your Swiffer Wet.
  • Wash your doors, doorknobs, and light switches using a damp microfiber cloth.

Step 4. CLEAN LIGHT FIXTURES

  • Dust lampshades with the lint roller.
  • Clean lightbulbs, lamps, and any light fixture with the Swiffer duster or microfiber cloth. Be sure light bulbs are cool before cleaning. If bulbs are especially grimy, use a bit of your household cleaner and wipe with a paper towel or microfiber cloth.
  • Wash any glass globes in hot soapy water and hand dry to avoid spots.

Step 5. CLEAN WINDOWS AND WINDOW COVERINGS

  • If you’ve already completed the Windows and Blinds segment of our Spring Cleaning Extravaganza, you can skip this step. YAY!
  • If not, follow the above link for tips and tricks on achieving sparkling clean windows.

Step 6. THE BED

Of course, the point of our spring cleaning extravaganza is a beautiful bedroom! The bed is key. See inspiration for your beautiful bedroom at the end of this post.

  • Remove and wash all bed linens, including pillows, mattress toppers, blankets, comforters, and bed skirts. Be sure to check tags to make sure everything is washable. You may need to set some items aside for dry cleaning or to take to the laundry where there are jumbo washers and dryers. Did you know that some of these places will do the laundry for you for a per pound fee?
  • Sprinkle your mattress with baking soda and let it sit for 10 minutes, then vacuum it up.
  • Rotate and flip your mattress. Note that you may not be able to flip a pillow-top mattress. It’s a real rip as being able to flip gives the mattress a longer life (but the luxury of the pillow-top may be worth it).
  • Dust the bedframe and headboard, including the backside. Use the vacuum and upholstery brush if it’s super dusty or if your headboard is upholstered.

Step 7. SHINY THINGS

  • Polish any mirrors or glass, including glass on picture frames. Polish any glass decorative items.

Step 8. GO LOW

  • Dust baseboards using the used dryer sheets, and wash if needed.
  • Vacuum underneath/behind your furniture.

Step 9. POLISH

  • Polish all furniture pieces as appropriate. Follow the instructions for the type of furniture polish/ furniture you have. You can ruin  the furniture’s finish by using the wrong cleaning product on it. When in doubt, consult the furniture manufacturer or Google it.

Step 10. FLOORS

  • Sweep, vacuum, shampoo, or mop your floors depending on the type of floor you have. If you have carpet that has wine stains, read our Out, Damned Spot post for removal tips.
  • Don’t forget to get underneath the bed and any other furniture with legs.

Step 11. RELOCATION

  • Take trash to the bin.
  • Relocate basket of runaway clutter to the room/s where the items belong.

Step 12. THE FROSTING ON THE CAKE

  • Make the bed with your fresh, clean linens. I love to iron the sheets (or maybe just the pillowcases) because it makes the bed look so pretty and makes the pillowcases feel softer next to my face.
  • Consider a wee splurge to add a sweet finishing touch to your now spotless bedroom – a candle, scented diffuser, a pretty toss pillow (Because you can never have too many pillows. I gently remind my partner of this fact whenever he says, “We’re birthin’ pillows in here!!”)

Spring Cleaning Extravaganza Beautiful Bedroom Complete! Now look! We’ve a fresh clean bedroom just waiting for a night of sweet dreams (or other fun things.)

Looking for a bit of beautiful bedroom inspiration? We got you covered.


Leave No Surface Undusted. Spring Cleaning Extravaganza II

Spring Cleaning Extravaganza II. Leave No Surface Undusted.


In our Spring Cleaning Extravaganza I, the bold announcement was made that over the next couple of months, I will be sharing my spring-cleaning and tidying journey with you. I am ever hopeful that this commitment will keep me on track to achieve my goals before the days are too beautiful to spend inside fussing about with the Swiffer duster and the Vietnam Vets donation bags. I am also hopeful that you will share this journey with me so that you, too, can welcome spring with a tidy, spotless, well-organized home and a light heart ready to embrace the season. Whole house dusting is phase two of our spring cleaning extravaganza! Learn tips and tricks to leave no surface undusted.

Last time, we worked on letting the sunshine in by cleaning windows and blinds. I am  so glad those awful tasks have been marked as completed on my To Do List. And, admittedly, I am feeling quite proud of this accomplishment. #patontheback.

While dusting, buffing, and polishing the windows, I considered how the rest of this ordeal should proceed. Room by room or job by job? I think the way to go is job by job, then once everything is clean and organized, we can spend one day putting a spit shine on the whole place. So this time?

Dusting. It’s phase two of our spring cleaning extravaganza.

Can you really clean and organize anything in your home if there’s a thin (ok, maybe in some places thick, layer of dust. It’s so easy when doing routine dusting to just focus on the flat surfaces – coffee table, night stands, shelves – and overlook the more challenging spots like cold air returns, the leaves on plants (real and/or artificial), baseboards behind large pieces of furniture – you get the idea.

As I mentioned in my last post, I consider myself a fairly tidy person. But working my way through this spring cleaning proved that it’s so easy to overlook so many things! Here are my tips and tricks to leave no surface undusted.

First, let’s get organized.

SUPPLIES

PROCESS

First, and most importantly, do not allow yourself to become distracted by ADCD – Attention Deficit Cleaning Disorder.

I, for one, suffer significantly from this “disorder”, so have first-hand knowledge of this disruption. How many times have I started dusting in the living room, decided to go ahead and put a morning coffee mug left on the coffee table in the dishwasher, and the next thing I know I am mopping the kitchen floor. Geesh.

Okay, back to business. We will leave no surface undusted!

  1. Plan your route. Perhaps start in the bedroom/s, move to the bathroom/s, then hallway, dining room, living room, kitchen.
  2. In each room, start at the top.
    1. With a long handled duster, clean all the dust webs from the space where wall meets ceiling.
    2. Dust cold air returns.
    3. Remove any artwork from the walls and clean not only the art, but also the wall behind it.
    4. Remove all items from flat surfaces. Dust the surface. Polish with wood cleaner or glass cleaner as appropriate.
    5. Dust all items removed from flat surfaces. Polish any glass or shiny surfaces with glass cleaner and paper towels or microfiber cloths.
    6. Pay special attention to lamps. Dust the bulb, the base, and the cord. Use the lint roller to remove dust from the inside and outside of the shade.
    7. Clean live plants. Use warm water and a soft cloth to remove dust from live plants. Alternatively, place your plants in the shower and wash them down being careful not to wash soil down the drain. Dry leaves with a soft cloth to prevent water spots. Use damp paper towels to wipe down plant pots.
    8. Clean artificial plants and floral arrangements. This is where those dryer sheets come in handy! Dryer sheets will do a great job removing dust even from those leaves in the back that haven’t been dusted for a while. It’s so quick and easy!

  1. Use glass cleaner on all mirrors and picture frame glass.
  2. Dust all light fixtures and use class cleaner to polish the globes. Don’t forget to dust the light bulbs.
  3. Run the duster over the front and back of all doors, the top of the door, and the door frame.
  4. Be sure to dust the back of any picture frames. The lint roller will come in handy if they have a velvety surface.
  5. If you have candles – real or battery operated – dust the indentation around the wick and the entire candleholder. If your candle is in a lantern, use glass cleaner and paper towels to clean the glass and all surfaces.
  6. Dust bed frames, and legs of all furniture. If your headboard is fabric, clean with the lint roller or hand held vacuum.
  7. Pull furniture away from the walls and using your long handled duster, clean the back of the furniture and the wall and baseboard behind the furniture.
  8. Dust curtain rods.
  9. Use the lint roller to remove dust from curtains. Don’t forget to clean the back of the curtain!
  10. In the bathroom, dust the top of the shower curtain rod, the towel rods, the toilet paper holder, the water lines to the toilet, the sides and front of the cabinets, and the light fixtures.
  11. Be sure to dust all books, CDs, and DVD cases.
  12. Dust the back of all electronics including the TV/s.
  13. Dust all light fixtures and use class cleaner to polish the globes. Don’t forget to dust the light bulbs.
  14. Run the duster over the front and back of all doors, the top of the door, and the door frame.
  15. Dust all baseboards.

Mission accomplished: we leave no surface undusted. End your dusting session by cleaning up and tossing any used paper towels, disposable dusters, lint roller sheets, dryer sheets, and wash any dusting and microfiber cloths.

Take a deep breath and pat yourself on the back for a great day’s work! I did.

Next up: bathrooms.


Spring Cleaning Extravaganza!

Why a Spring Cleaning Extravaganza? Well, despite the prediction of Punxsutawney Phil last Tuesday that we’re in for another six weeks of winter, seemingly a predilection of his, this writer is itching for spring. So many wonderful things come with that glorious season: longer days, the return of robins (for those that still fly south for the winter), bulbs bursting forth from the once frozen soil, skies forming a brilliant blue dome overhead, ditching our dark, cold weather gear in favor of clothing that floats on the body, comfort in spending time out of doors, and so much more! Like a spotless home that will allow me to really enjoy spring guilt free!

I, for one, am so ready to get ready for spring. As the daylight gradually lasts longer, and there are more sunny days than cloudy ones, evidence of winter doldrums punch me in the face almost daily. Short, gloomy winter days brought with them a perfect cover for the dust webs and grimy corners along with the uncanny ability to overlook overstuffed closets and untidy drawers and cabinets. Now don’t get me wrong – at first glance my place looks pretty good. Just don’t move any of the pictures on the dresser, swipe your finger on the slats of my blinds, or peek below the crisper drawer in my fridge.

Over the next two months, I will share my spring-cleaning and tidying journey with you in a Spring Cleaning Extravaganza! Hopefully this commitment will keep me on track to achieve my goals before the days are too beautiful to spend inside fussing about with the Swiffer duster and the Vietnam Vets donation bags. And perhaps you will share this journey with me so that you, too, can welcome spring with a tidy, spotless, well-organized home and a light heart ready to embrace the season.

Let’s get started!

Throwing back the curtains and opening up the blinds has to come first. With cleaning windows and blinds, the sun can come streaming in exposing all those tasks we’ll need to tackle next.

Windows first.

How I hate washing windows! For me, it’s the worst cleaning job in the house. Except maybe for mini blinds. A true glutton for punishment, I’m doing both. Today. It’s the launch of oour spring cleaning extravaganza!

The thing that makes washing windows so awful is that so often they almost look worse after you’ve washed them because of streaking. So what is the best way to clean windows without streaking?

According to Pella, the folks who are known for their windows, a microfiber cloth is ideal but a gentle and clean paper towel can work as well. Rub from multiple directions to help avoid streaking. If you find that you still have streaks after you’ve cleaned your window, simply rinse with clear water to help remove any of the remaining cleaning solution. Check out their YouTube video!

Hmm. I think we need more details.

SUPPLIES

PROCESS

Indoors

  1. When cleaning windows from inside your apartment, place a drop cloth on the floor to catch any water drips.
  2. Pour cleaning solution (water mixed with liquid dishwashing detergent) into a plastic spray bottle, then spray the interior surfaces of the window.
  3. Immediately after spraying, clean the glass with a terrycloth rag, followed by a quick wipe down with the micro-fiber towel.

Outside (if you can safely reach)

  1. Fill bucket with clean water and add a small amount of liquid dishwashing detergent.
  2. Wipe down the window frame using a wet (not dripping) terrycloth rag.
  3. Dip your window scrubber into the water bucket, then wring out the excess water.
  4. Clean the glass with the scrubber to remove all dust and dirt.
  5. Wipe the window glass dry with a rubber squeegee. Hold the edge of the squeegee at about a 30 degree-angle to the glass, then make a horizontal pass across the window.
  6. Use a terrycloth rag to wipe the squeegee dry after every pass. If you’d prefer to wipe down vertically, start by using a dry cloth or end of the squeegee to create a dry edge along the top of the window glass.
  7. Place the squeegee on the dry edge and pull straight down, cleaning the glass.
  8. Use a micro-fiber towel to wipe down the glass one last time.
  9. To clean windows with divided lites (panes), use the scrubber to first wash the glass, and then squeegee the glass clean. Only this time, hold a terrycloth rag against the bottom end of the squeegee to catch water and protect the muntins.

Read more about attaining streak free glass here!

Blinds next.

It’s so easy to forget about (IGNORE?) the need to clean your blinds. It’s pretty easy to not really see the dirt adorning the slats. I mean, when you open your blinds, do you actually look at the slats or are you looking out the window to check the weather? Then one day when you’re opening or closing them, you see – really see – the dust bunnies and the grime. Thankfully, this oft-forgotten task really isn’t so bad if you’re strategic. Here’s how to clean blinds the quick and easy way as part two of phase one of our spring cleaning journey.

SUPPLIES

Ohhh, look! You already have some of these supplies organized from your window-cleaning project!

  • Microfiber cloth – read all about microfiber cloths here.
  • Vacuum and upholstery attachment
  • Clean sock
  • White vinegar
  • Optional: Mini blind duster* link this one, just $9 from The Container Store, or this one, just $7.80 from Walmart.

* Note:  The special blinds duster isn’t necessary, but makes quick work of dusting blinds especially if you incorporate this task into your regular cleaning schedule. You’ll find it will save time in the long run by allowing you to clean multiple blades at once quickly and easily.

PROCESS

  1. Close the blinds and gently wipe them down with a microfiber cloth starting at the top and wiping side-to-side. Hold the bottom of the blind in your other hand so it’s pulled out from the window. Adjust the blinds to open them, and run the microfiber cloth over them again. Then close them the opposite way and repeat.
  2. Vacuum up any dust and debris with your vacuum attachment.
  3. For stuck-on dirt or stains, mix a solution of equal parts white vinegar and water. Dip a clean sock (finally a use for that old sock with the hole in the toe!) into your cleaning solution. Wring it out until the sock isn’t dripping wet, then slip onto your hand. Use your fingers to run over each blind blade tightly. Leave the blinds open to dry thoroughly.
  4. For deep cleaning, remove them from the window and place them in a bathtub filled with warm water and a squeeze of dish soap. Let them soak for an hour. Rinse and hang them outside until they’re completely dry.

Read more, including the “Do’s and Don’ts” of blind cleaning, and how to incorporate cleaning those blinds in your cleaning routine here.

Now that we’ve let the sun shine in, we’ll tackle the rest of the place! Stay tuned for phase two of our spring cleaning extravaganza.


Is Your Toaster Toasted?

According to Kitchen Infinity, no matter how much you shelled out for your toaster, it will survive an average of six to eight years. You can extend the life of your toaster by cleaning it regularly to remove excess breadcrumbs and additional food particles.

The factors that affect the lifespan of a toaster include:

  • Frequency of use: How often you use your toaster affects how long it lasts. Frequent use of a toaster can wear out the lever or door hinges over time.
  • Maintenance and upkeep: If you maintain your toaster, it will last longer. This includes cleaning the toaster out between uses.
  • Initial quality: The initial quality of the toaster affects how long it lasts. Stainless steel toasters tend to last longer than plastic toasters.
  • Type of use: The type of foods you cook in your toaster can also affect its longevity. If you frequently use your toaster to defrost foods or make cookies, it may wear out faster.

Whether you’re using it to warm up a quick breakfast pastry or perfect a slice of wheat toast, you count on your toaster to deliver the goods. The cost of a toaster ranges from $20-$400. Smaller, two-slice toasters are on the lower end of the range, whereas larger toasters with more cooking functions may cost even more.

How do you know when it’s time to clean your toaster? Well, if you peer into the slots and see enough crumbs to bread a chicken cutlet, it’s long overdue. We recommend cleaning the crumb tray once a week or whenever you see a buildup of crumbs. Otherwise, you’re looking at a potential fire hazard, so it’s important to take a moment every now and then to clean them out.

Wirecutter’s Michael Sullivan has been testing toasters since 2016 (think of all the delicious buttery toast!).  In 2021, he partnered with Elvin Beach, associate professor of practice, and his students in the Department of Materials Science and Engineering at Ohio State University to figure out why newer toasters seem to fail so quickly. Through their research and testing, he learned even more about how to clean toasters and help prolong their lifespan.

‌If you follow this blog and try our cleaning tips, chances are good that you already have everything you need on hand to get the job done (YAY!) and here’s how to do it.

SUPPLIES

  • A clean pastry brush: A soft-bristle pastry brush is best for gently removing the crumbs that cling to the sides of a toaster’s heating elements (don’t use a silicone pastry brush).
  • A long-handled, clean, paintbrush: Any thin brush with a long handle (like those used for watercolors) will help you sweep away crumbs in hard-to-reach crevices.
  • Paper towels or a clean cloth: For wiping down and polishing your toaster.
  • Dish soap: A drop is all you need to remove grease buildup or grime on the sides of your toaster and crumb tray. Try Seventh Generation Natural Dish Liquid or Dawn Liquid Dish Soap.
  • A sponge: Any sponge, such as our faves Scotch-Brite Heavy Duty Scrub Sponge or a Scotch-Brite Dobie pad (which is gentler and doesn’t scratch stainless steel), can be used to wipe down the sides of your toaster and crumb tray.
  • Bar Keepers Friend (for stainless steel toasters): A mixture of Bar Keepers Friend and a bit of water will polish the exterior and keep it looking like new.
  • Micro-fiber cloth: for a perfect polish and shiny finish.

TIME

You’ve got the time. Promise. It will only take a couple of minutes to clean your toaster. Brushing away crumbs inside the slots or wiping down the exterior of your toaster will take a few minutes more.

PROCESS

Unplug
Before you attempt to clean the toaster, always unplug it first. Inserting anything except food into a toaster while it is plugged in can cause an electrical shock or a fire. Once the toaster is unplugged, allow it to cool completely before beginning to clean.

Shake
Move the toaster to a trash can or hold over a sink with a garbage disposal. If the appliance has a removable tray in the bottom or a bottom that opens, open it and use a pastry brush to remove crumbs from the toaster and into the trash can. Don’t be tempted to flip your toaster upside down and bang on the sides to get crumbs out. According to research done by The Ohio State University, such treatment can easily break the delicate solder joints and cause an electronic component to give out.

Mix
In a sink or dishpan, mix a solution of warm water and dishwashing liquid. If the toaster has a removable crumb tray, submerge only the tray in the soapy water and wash it well with a sponge or dishcloth. Rinse the tray with clear water and dry with an absorbent cloth.

Degrease
Choose a dishwashing liquid that contains a degreaser for the best cleaning results. See our picks in the Supply List. The degreaser will cut through any build-up more quickly and with less elbow grease than regular dishwashing liquid.

Brush
With the crumb tray removed, use the pastry brush to reach any crumbs still clinging to the interior of the toaster. Do not put your fingers inside the slots or you risk damaging your fingers and the interior components. If possible, work from both the top and bottom of the appliance.

Exterior
Dip a sponge or dishcloth in the soapy water to wipe down the exterior of the toaster. Wring out most of the water so the sponge is just damp. Pay extra attention to dials or levers on the controls, as well as handles. Wash removable dials in the soapy solution.

When the exterior is clean, wipe down with a sponge dipped in clear water to remove any soapy residue. Dry the appliance well with a soft, microfiber cloth.

Shine
To make the exterior of a stainless steel toaster shine, use a commercial stainless steel cleaner or dampen a clean cloth with a bit of distilled white vinegar. Wipe down the exterior to remove smudges and leave a streak-free shine.

Reassemble
To finish the cleaning process, replace the crumb tray, reset the dials to your favorite setting, and plug-in the toaster.

FREQUENCY

If you use your pop-up toaster daily, weekly cleaning is best to remove crumbs and any food residue that could cause a burnt taste or a fire. Since toaster ovens are used for much more than making toast, they need cleaning more often. If you only use the oven to make toast, weekly cleaning is sufficient. However, if you heat foods or broil other foods, the oven—especially the food tray— should be cleaned after every use.

TIPS

Trim a reusable oven liner to fit a toaster oven’s crumb tray. This will make cleaning easier when spills happen.

  • Eliminate crumbs that can prevent bread from popping up. Clean toasters and toaster ovens regularly to prevent residue from interfering with internal mechanisms.
  • Do not place plastic bags of bread or bagels near the appliances. The heat from a toaster can quickly melt the plastic. If you forget and a plastic bag has accidentally melted onto the finish of a toaster, remove as much plastic as possible using a wooden or plastic scraper. Unplug the appliance and allow it to cool before removing the remaining plastic. Then sprinkle baking soda on a damp sponge and scrub the area. Wipe away with a clean damp sponge and repeat until no more plastic is coming off. To remove the final discoloration, dip a cotton ball in acetone-based nail polish remover. Rub the area with the cotton ball and use a fresh ball as the plastic is transferred. Lastly, wipe down the area with a water-dampened soft cloth to rinse the area.

Toasters can be used for so many things from making breakfast toast or waffles, to lunchtime BLTs and a plethora of other toasty sammies, to toasted crostini for your happy hour smacks. Slightly stale bread gets new life when toasted. So be good to your toaster and it will be good to you. A clean appliance will produce tastier (and safer) toast. Now let’s get toasty! Or toasted.

RESOURCES: Wirecutter, ahs.com, The Spruce, KitchenInfinity

Streak-free Glass

Unlike the streaking fad of the 1970’s, streaky glass has never been in vogue. Rather, streaky windows, glass tabletops, and mirrors is a frustrating result when cleaning your home. So often, no matter how much cleaner you spray on the surface and how you wipe it away, it seems almost impossible to leave a streak-free, shining surface in place. But guess what? Streak-free glass is possible and using the proper method will even take you less time to achieve the results you desire. Cleaning glass without leaving streaks and doing so efficiently? Win, win!

The Cleaner

Most commercial glass cleaners will do the trick when it comes to cleaning glass mirrors. One of the most effective and popular options is Windex glass cleaner, but you can also use Method if you want a natural and non-toxic formula.

Another option is to make your own glass cleaner. All you need is distilled water, distilled white vinegar, and a spray bottle. Learn to make your own distilled water here. Use distilled rather than tap or filtered water as hard water could be the cause of the streaks and grime left behind. Hard water has an accumulation of dissolved minerals such as calcium and magnesium that are culprits when it comes to streaks. Mix the distilled water and distilled white vinegar in a 50/50 ratio for a non-toxic and antibacterial cleaner for a fraction of the price of store-bought cleaners.

The Wipe

When cleaning windows, mirrors, and other glass surfaces, paper towels – while convenient – are not your friend. Most paper towels leave behind lint that becomes obvious on shiny surfaces like mirrors and glass top tables. Trying using a microfiber cloth or a squeegee instead. Neither leave behind lint, and you can toss the t-shirt in the wash when you’re done, and both are reusable making them more environmentally-friendly. Old newspapers, if you can find them, will also provide you with a lint-free experience. Newspaper doesn’t hold up well against the wet cleaner for very long, so have plenty on hand.

The Technique

Before you begin, make sure your surface is free of dirt, dust, crumbs, and goo. Vacuum or dust around window and mirror frames as you don’t want dirt mixing with your cleaner. Got sticky substances clinging to your glass? Don’t try and clean these up with glass cleaner, because they can smear and create even more of a mess. Instead, use plastic to scrape off any substances before you start cleaning. A plastic utensil, card, or a plastic paint scraper should do the trick and won’t scratch the glass. For especially stubborn areas, dab with a bit of liquid dish soap. Let it sit for bit, then wipe the dish soap and the goo away.

A good glass cleaning tip is to start at the top of the mirror or window and work your way down. This way, when the cleaner drips, you’ll be able to wipe it up efficiently as you work your way down.

Did you know that when you spray cleaner directly on the glass, you use more product than you actually need? And, if your cleaner produces too many suds while cleaning your glass, you’re more prone to leave behind streaks.  Spray the window cleaner directly on your microfiber cloth, newspaper, or t-shirt instead of the glass. This helps avoid drips that can leave streaks. Plus, you’ll find that you actually need less cleaner than you think you’ll need for a streak-free shine.

Be careful not to get cleaner on window and/or mirror wood frames, as it can damage or warp the wood over time.

When it comes to cleaning windows, mirrors, and glass tabletops effectively and achieving the ultimate streak-free glass , remember that it’s not always going to come out perfectly. (Nothing is ever perfect, right?) Even if you’ve used a microfiber cloth, distilled water, and a small amount of product, there could still be streaks left behind.

The good news is that these streaks can be removed by using a dry cloth and and buffing them out. Streaks disappear quickly when you use light, fast strokes over the span of the table, mirror, or window. Microfiber cloths work like magic! Best of all, this takes only a few seconds.

The Result

Clean, streak-free glass while fully clothed.

Cleaning As DIY Preventative Maintenance

Cleaning as DIY Preventative Maintenance

It’s never any fun when stuff in your home doesn’t work the way it should. Of course, if you live in an apartment, there’s maintenance service to handle any issues. However, there’s still a certain degree of effort on your part – making the call, taking time to be a home (if you are uncomfortable having maintenance in your apartment when you’re not there), and securing pets. If you own your place, it’s finding a trustworthy contractor, scheduling service, taking time off to be at home, paying the bill, and the inevitable wait for service. But if doing some simple things around your home could prevent future hassles, why not incorporate cleaning as DIY preventative maintenance into your routine? Today we’ll review some simple, easy, and effective things you can do to save yourself from future maintenance headaches.

Freshen Dishwasher

Are hard water stains, greasy deposits, or drainage issues plaguing your dishwasher? Follow these easy three steps every three months to ensure your dishwasher smells nice and works effectively.

  1. To deep clean your dishwasher, remove any foreign material you find from the drain.
  2. Place a small, dishwasher-safe bowl full of white vinegar on the top rack and run a complete wash cycle on the hottest setting.
  3. Then sprinkle a handful of baking soda across the bottom of your dishwasher and run for a short hot water cycle.

Dust Fridge Coils

Condenser coils help cool refrigerant as it flows, maintaining the refrigerator’s temperature. If the coils get coated in dust and dirt, it becomes difficult for them to do their job, forcing the condenser to work harder to cool the refrigerant. When this happens, you may hear the refrigerator making noise as the condenser runs constantly. You may also notice these additional problems:

  • Extra energy usage and higher utility bills
  • Refrigerator doesn’t cool sufficiently
  • Condenser malfunctions

It’s recommended that you clean condenser coils every 6 months (more often if you have pets). Here’s how to clean refrigerator coils with the right methods and equipment.

  1. Unplug the fridge.
  2. Locate the coils. They are typically located on the back of the refrigerator or in the front behind a base grille or kick plate.
  3. If the coils are in the back, move fridge away from the wall. If there’s any resistance, don’t force the fridge to move as you may damage vinyl flooring.
  4. Use the hose attachment to vacuum in around the coils.
  5. Vacuum any loosened dust from the floor.
  6. Plug the fridge back in and push back into place.

Check HVAC Filter

Dirt and debris in your filter can obstruct airflow, increasing the workload of your system. By replacing the filter regularly, you can reduce wear and tear on your air conditioner while allowing the free movement of air for improved indoor comfort. To make sure your furnace and air conditioner run smoothly, check the filter periodically especially if you have shedding pets. Signs your filter might be ready for a change include:

  • Your AC is cold enough
  • Your electric bill has increased
  • There’s more dust near your air vents
  • Your HVAC closet is dusty

When vacuuming or dusting, don’t forget to dust your air vents and cold air returns.

Check For Leaks

When cleaning your apartment, be sure to watch for water around the toilet and under sinks which may indicate a leak. Do call your leasing/management office if you see any water where it doesn’t belong so the leak can be addressed before it becomes serious. If you own your place, now’s the time to find a reliable plumber or handyperson.

Fix Slow Drains

Don’t you hate it when you’re showering and the water starts backing up around your ankles? Then when the water finally drains, there’s a soap-scummy mess left to clean up. Most of the time, a slow bathroom sink drain or tub drain is a result of soap scum build up and/or hair clogs. Preventative maintenance is these areas is quick, easy, and inexpensive. Simply follow these steps:

  • Let the hot water run for a minute to warm up pipes
  • Pour about ½ cup of baking soda down the drain. If you have a pop up drain closure, use a funnel or a piece of paper to guide the baking soda into the drain.
  • Pour in one cup of white vinegar. It will fizz up like a science experiment; if you have kids (or are a kid a heart), they will love to watch this process.
  • Let sit for about 10 minutes.
  • Rinse with hot water.

Perform this preventative maintenance once every month or so to keep your drains flowing.

Clean Kitchen Filter

Whether you have a range hood or microwave above your stove, it’s important to clean the buildup of cooking grease on a periodic basis to keep the vent or microwave fan working properly. If you’ve never cleaned it, or haven’t cleaned it in a while, be forewarned: it won’t be pretty. Greasy buildup is, well, gross. Here’s how to get rid of the yuck:

  • Remove the filter
  • Fill your sink with boiling water
  • Add a generous squirt of de-greasing dish soap, like Dawn, and add ¼ cup baking soda. Swish with a wooden spoon or something with a handle so as to not burn your hand.
  • Submerge the greasy filter
  • Soak for about 10 minutes
  • Scrub with a non-abrasive scrub brush adding more dish soap if needed
  • Rinse thoroughly in hot water
  • Dry with paper towels or a clean cloth
  • Replace the filter

If you cook a lot, especially on the stove top, cleaning your vents once a month is a good maintenance strategy.

Garbage Disposal

When your disposal is working well, it’s such a great convenience. When it’s not, it’s a real pain. Using your disposal properly can prevent the headache of a backup.

DOs

  • Keep a steady flow of cold water during and after every use
  • Clean periodically by running a small amount of ice through the unit
  • Grind lemon peels to keep the disposal smelling fresh

DON’Ts

  • Don’t use hot water when actively using the disposal
  • Don’t fill the disposal before running. The unit will operate more efficiently if you add small amounts of food at a time.
  • Don’t use any harsh chemicals or cleaning products in the unit.
  • Don’t put anything in the disposal besides food

FOOD DON’Ts

It has been said that you shouldn’t put items in your disposal that you cannot eat. You know, like bones. Or paper towels. But there are some foods that will wreak havoc if you try to get rid of them in the disposal. Never put the following foods in your disposal:

  • Fruit pits
  • Fibrous veggies like asparagus, corn husks and celery
  • Coffee grounds (instead, sprinkle a thin layer of coffee grounds in the garden)
  • Starchy foods like potato peels and pasta
  • Grease and fat (a great way to get rid of grease and fat is to place in a bowl in the fridge. Once it hardens, you can pop it out of the bowl and into the trash.)

Now look at you, you are now on your way to becoming a DIYer with simple cleaning as DIY preventative maintenance. Feels empowering, right?


How To Clean Mini Blinds

How To Clean Mini Blinds


Not all cleaning jobs are created equal. Some are quick, easy, and satisfying – like removing all the toothpaste and water splatters from the bathroom mirror and polishing it up to a flawless and streak-free thing of beauty.  Others are ones we dread because they are hard (washing windows), time consuming (cleaning grout), or kinda gross (duh, the toilet). Once of my least favorite is cleaning mini blinds. They kind of tick all the Dreaded Chores boxes: hard, time consuming, and (especially in the case of kitchen blinds), kinda gross. The moment I start, I begin to think, “Will I EVER finish this job?!?”

Like windowsills, light switch plates, and ceiling fan blades, it’s easy to forget about (IGNORE?) the need to clean your blinds. It’s sometimes so easy not to really see the dirt. I mean, when you open your blinds, do you actually look at the slats or are you looking out the window to check the weather? Then one day when you’re opening or closing them, you see – really see – the dust bunnies and the grime. After doing a bit of research, I discovered this oft-forgotten task really isn’t so bad if you’re strategic. Here’s how to clean blinds the quick and easy way.

What You’ll Need:

  • Microfiber cloth – read all about microfiber cloths here.
  • Vacuum and upholstery attachment
  • Clean sock
  • White vinegar
  • Optional: Mini blind duster like this one, just $9 from The Container Store, or this one, just $7.80 from Walmart.

How to Clean Blinds:

  1. Close the blinds and gently wipe them down with a microfiber cloth starting at the top and wiping side-to-side. Hold the bottom of the blind in your other hand so it’s pulled out from the window. Adjust the blinds to open them, and run the microfiber cloth over them again. Then close them the opposite way and repeat.
  2. Vacuum up any dust and debris with your vacuum attachment.
  3. For stuck-on dirt or stains, mix a solution of equal parts white vinegar and water. Dip a clean sock (finally a use for that old sock with the hole in the toe!) into your cleaning solution. Wring it out until the sock isn’t dripping wet, then slip onto your hand. Use your fingers to run over each blind blade tightly. Leave the blinds open to dry thoroughly.
  4. For deep cleaning, remove them from the window and place them in a bathtub filled with warm water and a squeeze of dish soap. Let them soak for an hour. Rinse and hang them outside until they’re completely dry.

Note:  The special blinds duster isn’t necessary, but makes quick work of dusting blinds especially if you incorporate this task into your regular cleaning schedule. You’ll find it will save time in the long run by allowing you to clean multiple blades at once quickly and easily.

Dos and Don’ts

  • DO cleaning your blinds when you dust, so at least once a week.
  • DO remember to dust blinds before you vacuum or sweep, so you won’t have to vacuum again.
  • DON’T spray air freshener, hairspray, or any other spray near your blinds as dust will stick to the residue and take cleaning blinds fairly easy to hard, time-consuming, and gross.
  • DON’T clean the dust with water (unless you’re doing the deep clean soak). Dry dust first with a microfiber cloth that will catch the dust. Adding water to a dusty surface tends to make a bigger mess.

Okay, so maybe cleaning the blinds can come off the dreaded task list, because that doesn’t sound too bad. Better that cleaning grout or toilets for sure.

It’s National Clean Out Your Fridge Day

Stinky refrigerator?

I am not happy with whomever invented Clean Out Your Fridge Day which is “celebrated” on November 15. Do we really need to be reminded that although the rest of our place looks presentable, there’s probably something creepy, hairy, stinky, and unknown lurking in the back corner of the crisper drawer? Clearly, we do, or this day would not exist. My fridge is like my closet. It will go for weeks – dare I say months – looking tidy and clean and then suddenly, out of seemingly nowhere, it looks like elves performed some horrible mischief in the night. My once neat, organized, color-coded (yes, I am THAT girl) closet is a sloppy wreck with clothes falling off the hangers and the fridge contains mysterious science-fair-like “stuff”. And it’s not like cleaning either the fridge or the closet is hard; it’s just an annoyance and an awful way to spend a Saturday morning when you could be brunching on eggs benedict and sipping mimosas. So what is one to do? As in the words of a dear friend of mine, “Just git ‘er done”. Here’s a few tips on making this god-forsaken process a wee bit less miserable.

Preparation

Obviously, you have to remove all food from the fridge to clean it. Short on counter space? Set up a little folding table or use a few chairs. I am pretty successful with just removing food from one section at a time, cleaning it, and putting it back before moving on. For a complete, and uber-thorough clean (completely emptying), put your food in a cooler. You’ll need at least enough room to hold a shelf’s worth of stuff. Make sure your kitchen sink is empty, too. While you’re at it, put the recycling bin and trash can nearby as you’ll likely be tossing expired items and items that no longer resemble food.

Supplies

You won’t need much: white vinegar and/or dish soap; a spray bottle or a big bowl; a sponge and/or a scrubby; and paper and/or microfiber towels — all or most of which you probably already have on hand (whew).  The vinegar breaks down grease and grime, and when mixed with hot water in a spray bottle (or bowl, or dishpan, or bucket), it becomes a food-safe cleaner that’s perfect for any gunk that might have accumulated on refrigerator shelves. The other items on the list will help you wipe, scrub, dry, and shine.

The Process

While some people have enough counter space (is there ever really enough?!?) to completely empty their refrigerators before cleaning, I find  working one shelf at a time is often the best method, because you don’t want to leave your perishables out for too long.

  • Start at the top.
  • Remove everything from a shelf and see just how messy you (or those darn elves!) have been.
  • If there are spills, carefully remove the glass from the frame or brackets, or the shelf itself (depending on your fridge) and clean both sides, as well as the edges, with the vinegar solution.
  • Dry with paper or microfiber towels.
  • Wash the frame that holds the glass before replacing the entire shelf. For that, I usually head to the sink and use dish soap and hot water.
  • If there aren’t any caked-on spills that require shelf removal, simply run a scrubby sponge under hot water. Give the shelf and fridge walls an initial scrub to loosen any gunk. Then, spray it all down with cleaner and give it another scrub, before wiping everything clean with a microfiber cloth.

NOTE: When you’re not actively working in the fridge, keep the door closed to keep everything as cool as possible.

Doors and Drawers

Refrigerator drawers often accumulate debris, especially if they’re used for produce. For a deep clean, remove the drawers and wash them in the kitchen sink with soap and water. If they won’t fit in your sink, spray and wipe them clean, and dry them before putting them back. While the drawers are removed, wipe down the walls and “floor” of the fridge with the vinegar cleaner. Use the same method for the shelves inside the doors.

Put Stuff Back Clean

Now that your fridge is sparkling (and you realize it wasn’t THAT BAD to clean), be sure to wipe down jars, containers, and condiment bottles so you don’t bring gunk back into the fridge. Even if they don’t appear dirty, it’s a good idea to give container bottoms a quick wipe with a damp sponge or paper towel, especially if the shelf was sticky. If any bottles or jars have accumulated a little goo on the outside, rinse them under warm water then wipe them clean and dry. If gunk has accumulated around the seal or the edges of the cap, take the lid off and wash it more thoroughly in the sink. Check all expiration dates and toss anything that’s expired (like the sriracha I just threw away from 2017. Yikes.)

Wipe Down the Outside

Once everything is back in your sparkling fridge, use a clean microfiber cloth and the vinegar spray to wipe down the outside of the doors, including the edges and seals, and don’t forget the handles! The worst area will undoubtedly be to top of the fridge as it tends to collect greasy residue from cooking and dust. I like keeping a kitchen towel on top that can just be thrown in the wash. If you have a stainless steel fridge, spray on a cleaner specially made for stainless steel and polish with a microfiber towel for a streak-free finish.

Keep It (and Yourself) Fresh

You did it and you lived to tell the tale! Enjoy your super-clean fridge. For a while, anyway. If you want to keep it smelling fresher longer, stick an open box of baking soda on one of the shelves. Now treat yourself to brunch with a bloody Mary. You deserve it.