Clean Clothes Closets Are A Beautiful Thing


I have a [rich] friend with an absolutely dreamy closet. It’s an entire room! The décor is all fresh, bright white and features a beautiful chandelier, make up table with a mirror featuring multiple light settings,  comfy side chair, elegant floor-length mirror, shoe shelves, purse cubbies, and even a dress form to display her wedding gown. Did I mention the wine fridge stocked with bubbly? Like I said, dreamy. Living in a significantly more modest home, mine is just a wall closet with less-than elegant bi-fold doors which sometime jump off track. So dreamy is a bit out of reach. However, that doesn’t mean my closet can’t be beautiful – as in beautifully organized.  Here’s how I turned my smallish, modest, messy closet into a clean clothes closet — beautiful, tidy, and well-organized storage for my clothes and shoes.

Remove Everything

I know what you’re thinking…..aaarrrggghhh!!! Same here. Took me a few weekends to work up the courage to turn a small messy closet into a huge messy pile of STUFF.

A good idea is to follow the advise of Sarah Giller Nelson, Professional Organizer and Owner of Less is More:

“Work in smaller blocks of time. Set a timer for 30 minutes to two hours, select a clothing type to go through and declutter until the time is up.”

Try it, it works (thank heavens).

Take out EVERYTHING, including hangers, and put it all on your bed. Now you can’t go to sleep until you finish the project, giving you no excuse to stop until you’re done. This will also give you a visual of the space available in your closet so you can see what will fit comfortably as you put back pieces you want to keep.

Vacuum and Dust

Tackle your now vacant closet with your vacuum and utilize its attachment to clean up dust webs and that black hole between the carpet and the wall where all manner of stuff collects. Then use your Swiffer duster to clean those top corners and the shelves. Leave the door open so the closet can air out.

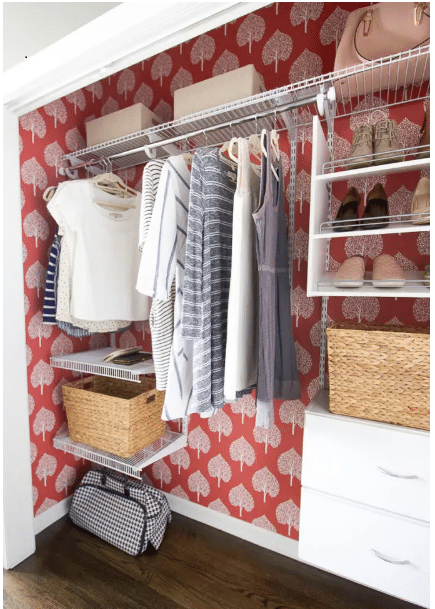
If you want to kick it up a notch, consider some beautiful peel and stick wallpaper and/or some motion-sensor strip lights. Here are the 10 best peel and stick papers and below is an example of a wallpapered closet.

Sort The Pile Into Four Groups

Once you’ve put an item into a pile, don’t second guess yourself! Keep going so you don’t lose momentum.

  1. Items you love and wear all the time. Again quoting Sarah Giller Nelson, Professional Organizer and Owner of Less is More:

“Hold your wardrobe to a very high standard. When we look good, we feel good, and you deserve to always feel your best. When decluttering, be very picky and honest.”

Try to avoid the temptation keep everything and thoughts like, “but it’s still good”! Here are some ideas to help you figure out what should stay in your closet.

  • Layering pieces that are good for any season.
  • Things you want and have actually worn in the last year.
  • Clothing and accessories you can incorporate with any trend.
  • Staple and everyday pieces that you wear seasonally.

How to Decide Which Clothes to Keep

If you’re still wondering, “what should I keep in my closet?” then answer the following questions:

  • Would I buy this, or wear this, today?
  • Does this fit my lifestyle?
  • When was the last time I wore this?
  • When will I wear this in the next few months?

Try the Marie Kondo Method. She asks:

“Does this item bring me joy?”

That’s the main question famous Japanese organizing consultant Kondo says to ask yourself when decluttering your closet. So, as you’re cleaning out your clothes, think about each item. Does a certain top make you feel less than your best? If it doesn’t make you feel good, you’re not going to wear it. There’s no point in letting it take up space in your closet.

Kondo also says to think about what you want to keep, not what you want to get rid of. Shift your thoughts to focus on items you truly love instead of worrying about some old clothes you don’t want.

  1. Damaged items. If you’re like me, you have a few garments in your closet that you’re hesitant to discard because you once loved them. But now you can’t wear them because they’ve shrunk, are pilled, torn, or faded. The zipper no longer works. A button is missing. There’s a food stain that just won’t wash out. These items can’t be donated because of their condition. Be brave and toss. All is not lost for these old faves though! Think recycle/reuse! Turn soft t-shirts in to polishing cloths, turn fleecy items into dust cloths.


  1. Maybe items. Try these on. So they look great on you? Do they still fit? Have you worn them in the last year? Put these clothes aside for two weeks. As Kristen Ziegler, Organizing Expert from Minima suggests:

“Be bold. Most people wear the same few items over and over, so just let the rest go.”

  1. Donate / Sell pile. Clothes in this pile should be in good, clean condition. There are many place where you can donate clothes, like Goodwill or Vincent DePaul. If the garments are work clothes, consider Dress For Success. Some organizations will even pick up donations from your home like Volunteers of America, and here are eight more! If you’d like to cash in on some of these clothes, you can bring them to a local consignment shop or sell online at a number of different places. For a how-to along with the five best online shops, visit NerdWallet.

Uniform Hangers

Not only will uniform hangers make your closet look uber organized,  and become a clean clothes closet, they can also save space! And, new hangers don’t need to break the bank. I like flocked hangers as clothing doesn’t slip off. Think lightweight hangers for shirts, heavier for hang-able sweaters and blazers, skirt and pants hangers, and heavy duty hangers for jackets and coats. If space is at a premium, consider hangers that hold multiple pieces.

Sort by Category

Put all your shirts, pants, skirts, dresses, jackets together in groups. You can even sort by color so it becomes super-easy to locate particular garments. Store your clothes in a way that compliments your daily routine.

For example, if you work out every day, try putting athletic wear near the front of your closet with the items you regularly wear to work. Your more casual weekend clothes don’t need prime real estate because you won’t need to access them quickly as you’re rushing out the door during the week.

Five Fast Tips

Need more help creating a clean clothes closet? Still have questions about making decisions about the items you’re still unsure about?

  1. The One-Year Rule

Has it been more than a year since you’ve worn it? Then you probably won’t ever wear it. Don’t hold onto a T-shirt or a pair of shoes hoping you’ll use it again and don’t try to convince yourself you will someday. It’s time to let it go. Stop letting it take up valuable space.

  1. Force Yourself to Wear the Maybes

Wear clothes that you’re still on the fence about. How do you feel in them? Do they make you feel good? Will you ever wear it again? Can you find a way to style it?

  1. One Thing In, One Thing Out

From clean closet forward, get rid of something every time you bring something new home to help you prevent future clutter.

  1. The Hanger Trick

When you’re putting your clothes back in your closet, make sure all your hangers are facing the same way. After you wear an item, turn the hanger around when you put it back. Wait a month, then take note of which hangers are still facing the original way. Reevaluate your need for these clothes and consider donating them. This will help you keep your closet clutter in check.

  1. Slow and Steady

If the idea of spending several hours cleaning out your closet  to make a beautifully clean clothes closet is just too overwhelming, try making it part of your daily routine. Set up a donation box in or near your closet and aim to put five items in every day.

Hopefully, this leads you to a less cluttered and more organized closet. Hoping it leads me to getting rid of “good” suits I bought for work years ago that haven’t been out of the closet in ages. I am most certainly afflicted with the “but it’s still good!” mentality. Working on changing that to “it’s still good – for someone else.”

Now back to dreaming of a beautiful, clean clothes closet large enough to hold a wine cabinet full of bubbly…

Your Local Hero

Distilled White Vinegar. Your New Local Hero.

Trending: ecofriendly everything.

Are your social media feeds brimming with ads for new products designed to do a better job of cleaning all kinds of specific items with minimal packaging waste? I know mine are. We could all spend a fortune and clutter up our storage spaces with products galore. Seems counterintuitive, doesn’t it?

How about an alternative? It’s nothing new, newfangled, expensive, or “only available on line”. In fact, I’d be willing to bet you have a bottle in your cupboard. Let me reintroduce you to your new local hero: distilled white vinegar.

My admittedly dusty bottle of white vinegar sat in the back of my cabinet unused for ages. Not quite sure why I bought it; it just seemed like one of those must-have pantry staples.  But then when I moved into an old (circa 1896) apartment in the historic district of Newport, KY and my bathtub drain ran super slow, Google taught me that white vinegar would keep my drain running clear. More on that later.  That Google search opened my eyes to the almost magic trickery of distilled white vinegar which, as it turns out, is a workhorse in the kitchen, bathroom, garden, and more! Bonus: it’s cheap.

Here are just a few of the tricks white vinegar has up its sleeves:

All-Purpose Cleaning Solution. In a spray bottle, combine 1 cup of distilled white vinegar with 3 cups of water and use on just about everything. Don’t love the smell of vinegar? Let vinegar sit in a jar with strips of lemon zest and a spring of fresh thyme for a week or two in a sunny spot, then strain. Mix with water as described above. This can be done with any herb or fragrant plant like lavender or eucalyptus, just avoid anything that colors the vinegar if you plan on using it on a white carpet.

IN THE KITCHEN

Stinky Sink Drain. To keep kitchen drains fresh, pour 1 cup of distilled white vinegar down the drain once a week. Let it sit for 30 minutes and then rinse with cold water. Ahhh, fresh!

Dishwasher. Pour a small amount of white vinegar into the rinse-aid dispenser of your dishwasher. This will help prevent a cloudy residue on your glasses and keep cutlery-free of smears and streaks. And, once a year or so, more often if you have hard water, pour a cup of vinegar into an empty dishwasher and run it on a short cycle to remove lime and soap build-up.

Stainless Steel Cookware. Scrub with a mixture of white vinegar and salt.

Cutting Boards. Undiluted white vinegar cleans and disinfects cutting boards, especially those made of wood.

Microwave. To remove smells or cooked on food, combine ¼ cup of distilled white vinegar and 1 cup of water in a microwave-safe container. A slice of lemon will add a fresh, clean scent. Microwave on high until the mixture comes to a boil and steam forms on the window. Let cool slightly, then wipe away any food residue.

IN THE LAUNDRY

Stain Treatment.  For removing stains like mustard, ketchup, tomato sauce, grass, and underarm deodorants, spray a little white vinegar onto the stain before laundering. Soaking whites in vinegar will help bring back their whiteness.

And just like in your dishwasher, vinegar helps to break down detergent when added to the rinse cycle, making clothes fresher, more colorful—and it gets rid of funky towel mildew. One cup should be plenty; add less when using a front-loading washing machine.

WARNING: Never add vinegar when using chlorine bleach; it will create noxious chlorine gas, a potentially deadly compound.

Laundry Softener. If you’ve run out of fabric softener, simply add about three tablespoons (or a scant ¼ cup) to your washing machine dispenser. Your clothing will be softer, but won’t smell like vinegar because of the limited measurement.

IN THE BATHROOM

Window/Mirror/Shower Door Wash.  Spray the all-purpose solution on the glass surface and wipe it off with a clean, lint-free cloth or a balled-up piece of newspaper (does anyone still read the newspaper?).

Clean Faucets & Showerheads. White vinegar is effective in removing lime scale especially when mixed with hot water. Wrap your showerhead in a plastic bag of warm, white vinegar and secure it with a rubber band. Let it soak for an hour before rinsing it clean. Spray faucets, let sit for a bit, then wipe clean. If your toilet bowl, bathtub, or sink has lime deposits from hard water, soak or spray vinegar onto the grit. It should loosen the deposits enough to remove them easily.

Tile & Grout. Spray full strength white vinegar on mildewed or scummy grout and tile. Wait for about an hour, and scrub with a soft bathroom scrub brush.

Keep Drains Clear. To keep your sink or bathtub drain running clear, use a funnel to pour a half cup of baking soda down the drain followed by one cup of white vinegar. The concoction will foam up like crazy, so this can be a fun “science experiment” with the kids. Let sit until the foaming action stops, then rinse with hot water (this step should be kid-free). Not only will it clear your slow running drain, but it will also destroy any odor-causing bacteria.

IN OTHER PLACES

Pet Potty Accidents. Clean and refresh the soiled area by spraying vinegar. This may also deter your pet from soiling the same area. Read more in our blog post about cleaning carpet stains here.

Remove Stickers. Who hates price tag stickers??  They are a pet peeve of mine. I especially hate it when a price sticker is placed on the glass of a picture frame or in a very conspicuous place on a pretty vase. Dab white vinegar on the spot and let it sit for a minute or two. Afterward, it will be easy for you to scrape away the excess paper and gunk. And much less expensive than Goo Gone.

Relieve Sunburn Pain. No one ever plans a sun burn, so aloe is usually not close at hand. Instead, soak a washcloth in a 50/50 solution of distilled white vinegar and water and dab on your sunburn. Reapply as the washcloth warms. Or, add 2 cups to your bathwater.

Fresh Flowers. Add a few tablespoons of vinegar to your flower water to make your flowers last longer. When the water gets cloudy, dump it out and repeat.

So there you have it. Well not all of it, because the uses for white vinegar go on and on!

In closing, I’ll mention that vinegar is an acidic liquid originally created from wine gone bad. Wine gone bad is a very, very sad thought until you think of all the easy, effective, and inexpensive things that can be done with it.

Now go buy a gallon. Who doesn’t need a hero right now?

Resources: https://facty.com, www.foodandwine.com, www.thespruce.com


Spring Cleaning Extravaganza – Kitchens

Spring Cleaning Extravaganza – Kitchen

We’ve sped through the backstretch and are rounding the corner to the finish line in this final edition of our Spring Cleaning Extravaganza! We’re oh-so-close to a tidy, spotless, well-organized home that will allow us to embrace the spring season and be well-prepared for summer fun. Thus far our journey has made our windows and blinds sparkling and dust free, dust has been removed from every nook and cranny in our home, and our bedrooms have become beautiful, calm, clean, and relaxing havens, and our bathrooms are gleaming. Next, we’ll tackle what is arguably the most time consuming room in the house to clean – the kitchen – with our spring cleaning extravaganza – kitchen edition.

As always we’ll begin by assuming the usual suspects aka cleaning supplies.

SUPPLIES

THE CABINETS

  • Empty cabinets and drawers. Do one section at a time.
  • Vacuum accumulated dust, and dirt from the shelves and drawers.
  • Dab a microfiber cloth with a mild cleanser. Wipe down the shelves and the inside and outside of the door. Use a clean toothbrush to treat the corners and other small crevices. Let dry completely before restocking.
  • Wipe down cabinet hardware or remove knobs/handles and wash in hot, soapy water.
  • Wash any storage bins, silverware trays, and drawer dividers and thoroughly dry.
  • As you restock shelves and drawers, consider tossing any chipped or cracked items. Organize everything neatly. Toss any pantry goods, spices, and other foodstuffs that have expired or exceeded their shelf life.

THE BACKSPLASH

Some of us have some kind of tile between the counter and upper shelves; others have wall surface. Whatever you have, this space can get grimy and greasy from cooking and splattered during food preparations. Cooking is messy!

  • Remove outlet- and switch-plate covers and place in hot soapy water. Wash, rinse, set aside to dry. If the covers aren’t too dirty/greasy, use an all-purpose cleaner and paper towel.
  • Soften grease and grime with warm water, then clean with a sponge soaked in warm, soapy water, and finally dry with a dishtowel to avoid any leftover residue that would attract dirt and grime. For stubborn stains, use a baking soda spot treatment or a spritz of distilled white vinegar.

THE STOVE AND OVEN

Stovetop

  1. Remove control knobs and drip pans and soak in hot sudsy water.
  2. Use hot, soapy water to clean the stovetop and control panel. If your stove has a glass top, apply glass top cleaner with a soft cloth or sponge. Buff with a clean, dry, microfiber cloth.
  3. Shine all surfaces with Windex and a clean paper towel.
  4. Rinse and dry knobs and replace them on the control panel.

Oven

  1. Mix about 3 tablespoons of baking soda, a bit of water, and some white vinegar in an oven-safe dish until it forms a paste.
  2. Dab the dirtiest areas with the mixture.
  3. Place the remaining mixture in the center of your center oven rack.
  4. Turn the oven to around 212 degrees Fahrenheit.
  5. Leave the mix in for around 45 minutes.
  6. Turn the oven off and allow it to cool for a bit.
  7. Wipe down the oven with a wet sponge to easily remove build up. Rinse the sponge frequently.
  8. With a freshly rinsed sponge, use clean water to give the oven interior a final rinse.

Oven door glass

  1. Mix a paste of baking soda and water and apply a thick layer to the glass.
  2. Allow to sit for 20 minutes.
  3. Use a scraper to remove the crud.
  4. Wipe the glass with white vinegar to neutralize any remaining baking soda.
  5. With a freshly rinsed sponge, use clean water to give the oven interior a final rinse.

Oven drawer

  1. Empty the drawer and vacuum away all loose dirt and crumbs.
  2. Wipe clean with all-purpose cleaner and a paper towel.

Vent hood

  1. Wipe it down with an all-purpose cleaner or hot soapy water.
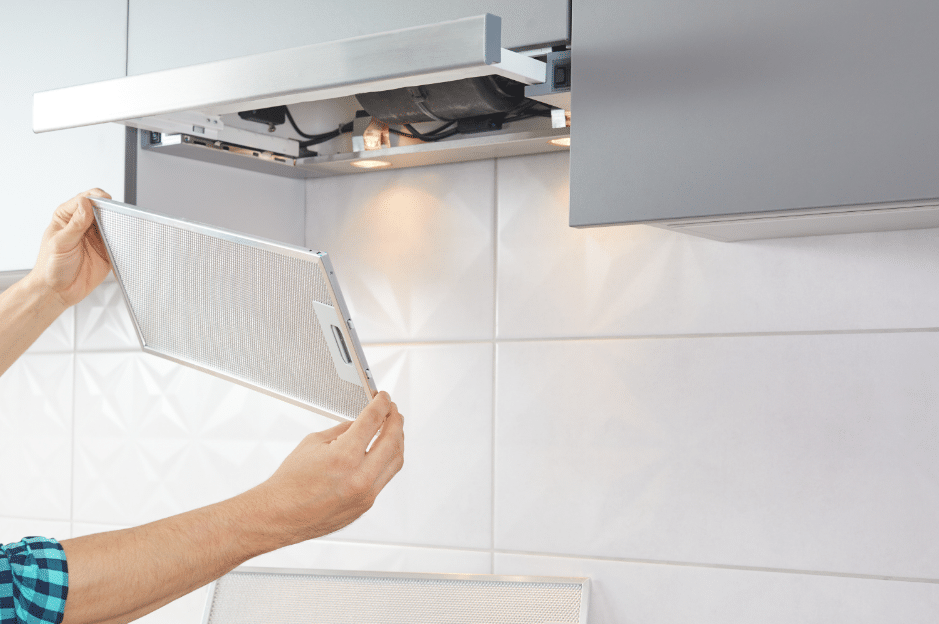
  2. Remove vent filters and wash in hot soapy water. Rinse well. Allow to air dry before reinstalling.

Microwave

  • Fill a microwave-safe bowl with two cups of water and two tablespoons of vinegar or freshly squeezed lemon juice.

Tip: Add a small wooden spoon to the bowl or place a toothpick in the mixture. This will allow bubbles to form against the wood as the water heats up, preventing the water from becoming superheated and “exploding” into a boil.

  • Place the mixture in the microwave, close the door, and microwave on high for three minutes. Wait an additional 15 minutes without opening the door.
  • Using potholders carefully remove the bowl from the microwave and set it aside—don’t pour it out just yet.
  • Remove the turntable tray to wash it in hot soapy water in the sink.
  • Dampen a clean microfiber cloth with the vinegar mixture and wipe down the interior of your microwave. Use a non-scratch scrubbing pad for any stubborn spots or hard-to-reach crevices.
  • Spray an all-purpose cleaner onto a clean cloth and wipe down the control panel, sides, top, and bottom. (Never spray directly onto the control panel.)

THE FRIDGE

For a complete, in-depth how-to for cleaning your fridge, please visit to our blog post dedicated to that subject here.  In a nutshell:

  • Start at the top.
  • Remove everything from a shelf and see just how messy you (blame the kids! Blame your S.O. Blame the dog!) have been.
  • If there are spills, carefully remove the glass from the frame (or brackets, depending on your fridge) and clean both sides, as well as the edges, with the vinegar solution.
  • Dry with paper or microfiber towels.
  • Wash the frame that holds the glass before replacing the entire shelf. For that, I usually head to the sink and use dish soap and hot water.
  • If there aren’t any caked-on spills that require shelf removal, simply run a scrubby sponge under hot water. Give the shelf and fridge walls an initial scrub to loosen any gunk. Then, spray it all down with cleaner and give it another scrub, before wiping everything clean with a microfiber cloth.

NOTE: When you’re not actively working in the fridge, close the door to keep everything as cool as you can.

  • Remove the drawers and wash them in the kitchen sink with soap and water. If they won’t fit in your sink, spray them down, wipe them clean, and dry them before putting them back. While the drawers are removed, wipe down the walls and “floor” of the fridge with the vinegar cleaner. Use the same method for the shelves inside the doors.
  • Wash down all items you removed from the fridge to clean it. Check all expiration dates and toss anything that’s expired.
  • Use a clean microfiber cloth and vinegar spray to wipe down the outside of the doors, including the edges and seals, and don’t forget the handles! The worst area will undoubtedly be to top of the fridge as it tends to collect greasy residue from cooking and dust. I like keeping a kitchen towel on top that can just be thrown in the wash.
  • Clean under the fridge.
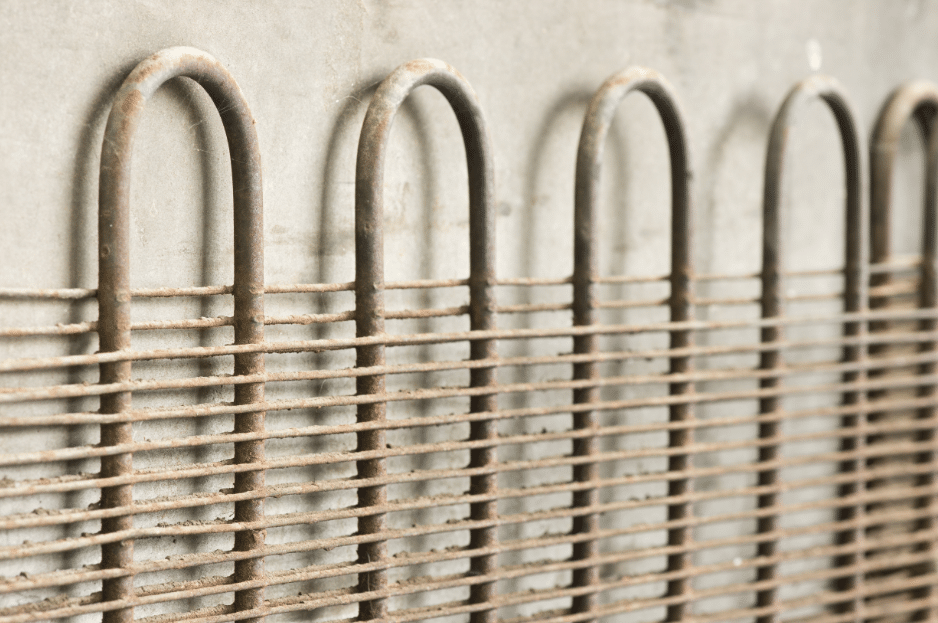
  • Vacuum the coils on the back of the fridge.


THE DISHWASHER

Filters

  • If you have a removable filter, make a habit of regularly checking the cover at the bottom, underneath the twirling spray arm. Although the holes let food through, the filter is designed to block larger, harder debris. Cleaning is easy: just pick the pieces out by hand.
  • If you have a removable filter, there is generally a circular piece at the bottom that can be turned when you want to clean the fine-mesh basket strainer underneath. The circular piece often fits into a flat piece of metal mesh with coarser holes that lifts out for cleaning.
  • Clean each part by rinsing it out in the opposite direction from the way the water flows when the dishwasher is running. An old toothbrush or sponge can loosen debris, along with soaking in soapy water or vinegar. Once you’ve removed the mesh, clean the area underneath.

Air Gap

  • The air gap is next to the sink, higher than the dishwasher, and has a liftoff cover. Below that is a part that’s plumbed to both the drain line from the dishwasher and a drain line that connects to the sink.
  • Remove the cover and clean debris from the plastic part underneath.

Nozzles

  • Clean nozzles on the spray arms by removing each arm (most dishwashers have upper and lower ones). Use a narrow wire, a pick, or sturdy needle to clean out the holes while running water thought the central opening on the arm.

Exterior

  • A dishwasher usually cleans the interior on its own, but the exterior is up to you. You can never go wrong by simply wiping away food spatters with a soft, slightly damp cloth, then drying the surface with a second soft cloth.

GARBAGE DISPOSAL

The easiest job you’ll do all day!

  • Sprinkle a half-cup of baking soda into the opening of the garbage disposal.
  • Pour in a cup of white vinegar and allow it to sit for 10 minutes.
  • Turn on the garbage disposal and allow hot water to rinse away the baking soda mixture.
  • As an alternative to baking soda and vinegar, use chopped citrus peels.
  • Pour in two cups of ice and a cup of salt, and then run the disposal to clean the blades.
  • Using a soapy sponge, wash the disposal’s rubber splashguard (also known as a gasket or baffle).

THE SINK

I always do the sink last as you’ll need it for every other step of the kitchen spring cleaning.  There’s a clean sink and then there’s a sparkling clean sink. To me, the kitchen is not really clean unless the sink is gleaming. Follow these steps once a month to keep your sink looking like you have a maid. Before you get started, clean your dish drying rack. Place it in a sink full of hot, soapy water and give it a good scrub with your scrub brush.

  • Generously sprinkle Bar Keepers Friend across the bottom of the sink(s).
  • Use a sponge to scrub the walls and bottom of the sink, and the faucet. Get in the tiny space between the sink and the counter and in the openings to the drain and garbage disposal. Don’t forget to wash the sink drainer and disposal cover.
  • Rinse with clear water.
  • Use your sponge to blot up the water until the sink and faucet are just about dry.
  • Spray with stainless steel cleaner.
  • Polish with a dry paper towel or microfiber cloth.

process for cleaning a stainless steel sink

COUNTERS

  • Wash counters with hot soapy water or all-purpose cleaner. Then dry with a paper or cloth towel.

FLOORS

  • If you have a washable rug, now is the time to wash and dry according to manufacturer’s instructions.
  • Vacuum or sweep floors.
  • Clean baseboards and any quarter round trim. A used dryer sheet works great in removing dust. Use soapy water and a sponge to remove any built-up dirt.
  • Damp mop with Swiffer Wet or your mop and cleaning solution of choice.


And that, ladies and gents is that. We’ve crossed the finish line of our spring cleaning extravaganza with this kitchens edition. At least until the next person comes home with dirty shoes, leaves toothpaste residue in the bathroom sink, or is less than neat while making dinner. But that’s our wonderful, messy lives with the people we care about. At least deep down our home is clean – and with that – our minds clear of “must-clean clutter”.

Thanks for sharing this spring cleaning journey with me!


Spring Cleaning Extravaganza – Bathrooms


In the wee hours last Monday morning, most folks in the USA grumbled as we lost an hour of sleep during the annual “spring forward” time change reminding me that we’re ever closer to the Spring Equinox on March 20. This Spring Cleaning Extravaganza’s intention was that we would welcome spring with a tidy, spotless, well-organized home and a light heart ready to embrace the season. Thus far our journey has made our windows and blinds sparkling and dust free, dust has been removed from every nook and cranny in our home, and our bedrooms have become beautiful, calm, clean, and relaxing havens. Next, we’ll tackle what is arguably the worst room in the house to clean – the bathroom. Our spring cleaning extravaganza continues with tips, tricks, and a checklist to help you make your bathroom sparkling clean.

Think happy thoughts trying to undermine the gag factor of bathroom cleaning, and assemble the usual suspects – aka cleaning supplies and products.

SUPPLIES 

Click the links to find the best product in each category. You’re welcome.

PROCESS

Clean The Slate

  • Remove everything from the bathroom counter, shelves, ledges, back of the toilet and place in a basket. Place the basket outside the bathroom.
  • Remove any bath mats and/or bath rugs, the shower curtain and its liner, and all towels. Launder as per manufacturer’s instructions.
  • Move the trashcan, scale, and anything else that sits on the floor.

Dust Top to Bottom

  • Dust vents with a dry rag, or vacuum cleaner detachment (a compressed air cleaner really gets in there).
  • Wipe off all ledges, windowsills, and shelves with a dry rag.
  • Dust light fixture covers and the shower curtain rod.

Wipe It Down

  • Wipe all bathroom surfaces with a wet, soapy sponge or spray multi-purpose cleaner on the below items, let sit for a minute, and then wipe residue with a clean, wet sponge or paper towel:
    • Vents (careful not to get vent interior wet)
    • Sink bowl and faucets
    • Walls
    • Light switches
    • Countertops (don’t forget the underside of ledges)
    • Showerhead, faucets (don’t forget the aerator – where the water comes out), and handles
    • Shelves
    • Toilet base, back, seat. handle (now is a good time to tighten base and seat bolts if loose)

Scrub The Gunk

  • Use a bleach/water combo (¾ cup bleach to a gallon of water), disinfectant spray, or DIY baking soda solution on your tile and grout shower walls and/or shower floor to scrub away any visible mildew, mold, or discoloration. TIP: remove water from the wall tile and tub with a squeegee after every shower and leave your shower curtain open until the tub area is dry. This will help to prevent the grown of mold and mildew. Move tips for cleaning your shower are here! Detailed tips for keeping grout and tile clean are here.
  • Wipe your porcelain tub with a Mr. Clean Magic Eraser Bath. It works great on hard soap scum.
  • Use a wet soapy sponge to wipe down shower curtain rod and rings.
  • Using multi-purpose cleaner or DIY baking soda scrub, thoroughly scrub sink bowl, drain, and faucet.
  • Use your bristle brush with bathroom cleaner to scrub the shower head. Be sure to scrub the aerator where the water sprays out. See tips for descaling below in the Miscellaneous section.
  • Scrub toilet bowl, seat, and area around the bolts with bowl. TIP: to prevent an accumulation of liquid in your brush holder, let the brush hang over the bowl with the seat closed until dry.

Shine

  • Using glass cleaner and paper towels to clean and shine all windows, mirrors, glass surfaces, light fixture covers, cabinet handles, doorknobs, and hinges.
  • Spray inside and outside of shower doors with glass cleaner and wipe clean with a squeegee.

Floor & Baseboards

  • Use a Swiffer dry or a vacuum to collect all loose hair and dust from the floor.
  • Wipe down baseboards (a used dryer sheet works great on this job!)
  • Remove the floor vent and vacuum both sides of the vent along with the airway below.
  • Wipe the doorstop.
  • Wet mop the floor with a Swiffer Wet or mop, then let dry.

Sanitize

  • Spray disinfectant such as Microban 24 Bathroom Cleaner on hard, non-porous surfaces like you countertop, shower stall, bathtub, toilet exterior, sink basin, faucets, handles, and doorknobs.

Miscellaneous

  • Unclog the drains, if necessary. A monthly treatment with white vinegar and baking soda keeps drains clear. Simply sprinkle about 1/2 cup of baking soda in your tub and/or sink drain, then pour a cup or two of white vinegar on the baking soda. This will cause a bubbling reaction (which your kids will love) and will clear a slow drain. Rinse with hot water.
  • Wash the toilet brush and its holder in hot, soapy water.
  • Empty the medicine cabinet (if you’re lucky enough to have one) and discard expired medications and cosmetics.
  • Restock the hand soap.
  • Throw your toothbrush caddy and soap dish in the dishwasher.
  • Clean makeup brushes.
  • Descale the showerhead
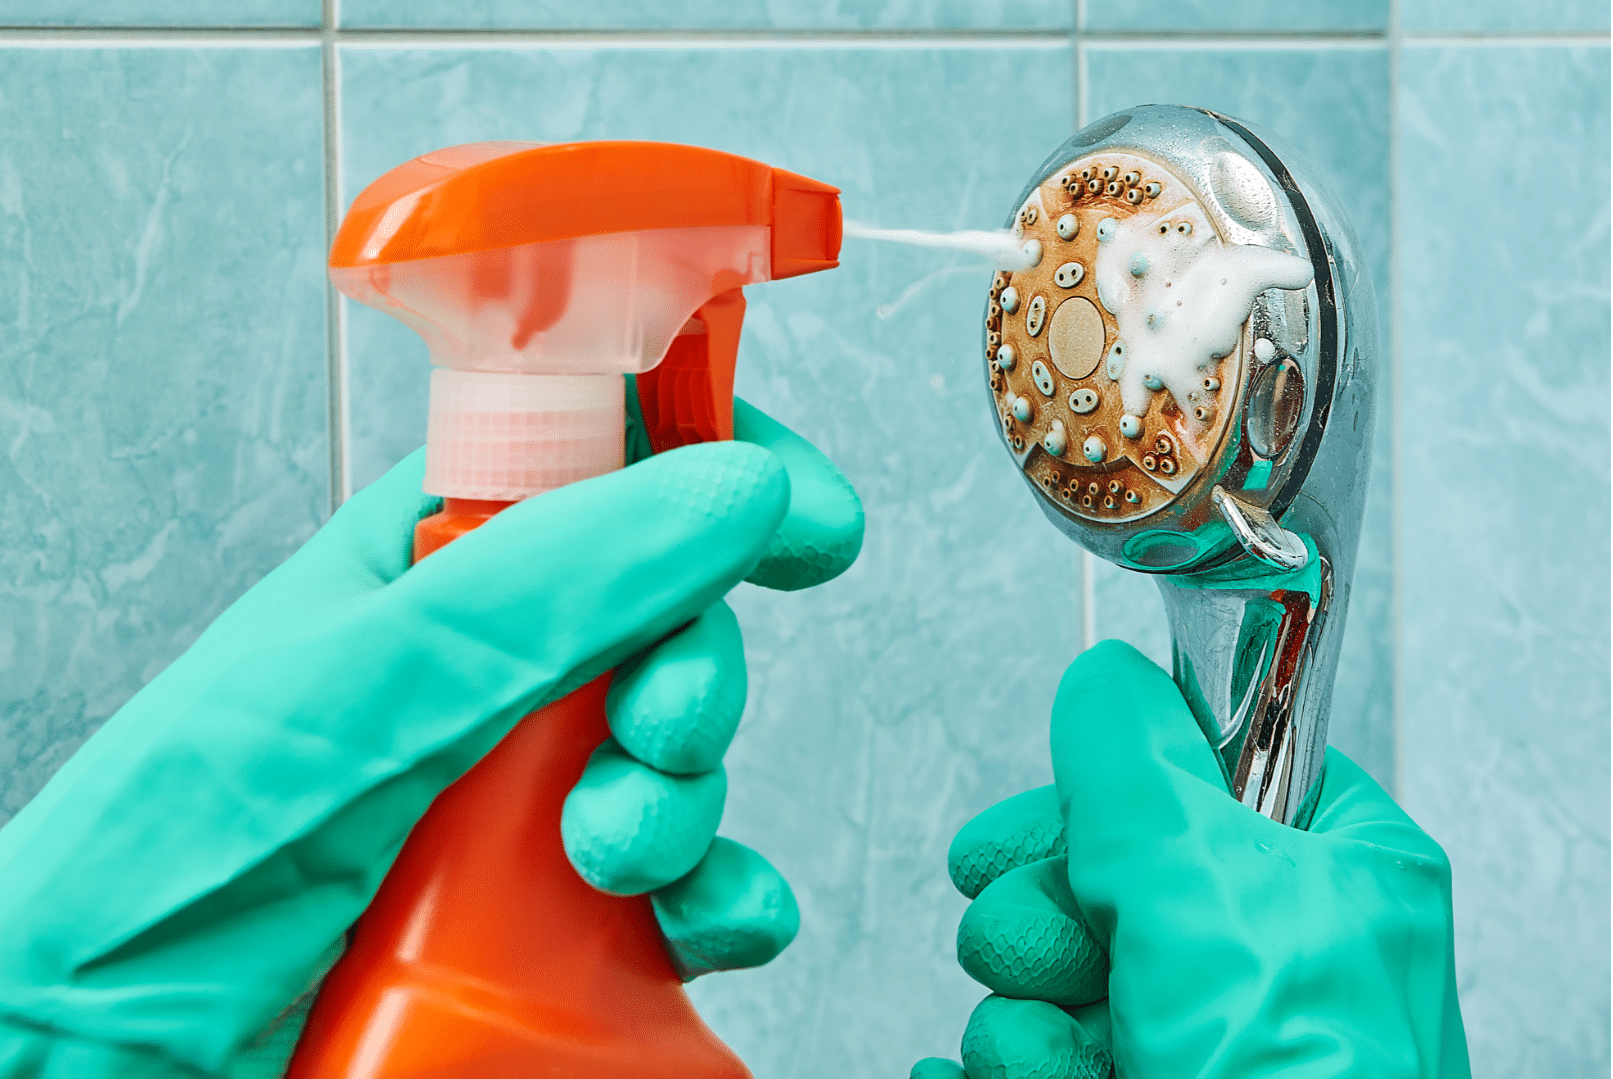
    • If your metal showerhead is clogged with scaly mineral deposits, place it in a pot with a solution of one part vinegar to eight parts water, bring it to a boil, and simmer for 15 minutes. If you don’t want to take the shower head down, or if the shower head is plastic, fill a zipper bag with a solution of equal parts vinegar and hot water, tie it around the showerhead and soak.
  • Clean and organize drawers and cabinet under the sink.
    • Toss out expired sunscreen and old cosmetics
    • Vacuum wipe it clean with a damp cloth
    • Treat yourself to inexpensive trays or bins to help keep these spaces tidy.
  • Clean the filter on your hair dryer
  • Apply Rain-X to shower doors
  • Clean your toothbrush holder
    • If dishwasher-safe, just pop it in with a load of your dishes, or hand-wash it with hot soapy water, rinse, and wipe it with a disinfecting wipe.

Whew! We did it!! Now comes the easy part. Put out fresh soap, towels, and rugs; rehang the shower curtain and its liner. Place all your personal grooming tools back in their designated spots, and redecorate the room with the pretty things you love on shelves and counters. Don your sunglasses because the glare of your sparkling clean bathroom will be blinding.  LOL.


Beautiful Bedrooms – Spring Cleaning Extravganza


Our Spring Cleaning Extravaganza Continues With Bedrooms

So far on our spring cleaning journey we’ve made our windows and blinds sparkling and dust free, and dust has been removed from every nook and cranny in our home. Next, we’ll tackle each room one at a time starting with a deep cleaning of the place where we spend a third of our life – the bedroom. Today we’ll make our bedroom beautiful.

Just as with our dusting segment, we’ll be cleaning top to bottom in our bedroom/s. Let’s get started!

Step 1. GATHER SUPPLIES

Combine these ingredients and pour them in a spray bottle:

    • 2 cups water.
    • 1/2 cup white or cider vinegar.
    • 1/4 cup rubbing alcohol 70% concentration.
    • 1 to 2 drops of orange essential oil for smell (optional)
  • Glass Cleaner
  • Baking Soda
  • Essential Oils Did you know? Lavender oil is a sleep aid. Read more here.
  • Furniture polish Be sure to read labels and use one appropriate for your furniture.
  • Depending on the type of floors you have, a vacuum or Swiffer wet and dry.
  • Clothing donation bags or storage boxes

Step 2. CLEAR ANY CLUTTER

  • Gather and toss any trash into the trash bag/can.
  • Remove clutter on all visible surfaces, including shelves, dresser top, night stands, floor, bed, chair, desk. Put anything that’s just out of place away. If items belong in another room, place them in the basket to address later.
  • Organize drawers and closets removing any items ready to donate, store, sell, or toss. Place those items in donation bags, storage boxes, and/or your trash as appropriate. A good rule of thumb for most items: if you haven’t worn it in the last year, get rid of it.

Step 3. DUST

  • If you’ve already completed the Great Dusting segment of our Spring Cleaning Extravaganza, lightly dust any accumulation since then (and good for you!).
  • If you’re just now dusting, use your Swiffer to dust the ceiling, walls, and doors (both sides, top, and trim). Remember to start at the top an work your way down.

Step 3. WASH

  • Wash down walls with your Swiffer Wet.
  • Wash your doors, doorknobs, and light switches using a damp microfiber cloth.

Step 4. CLEAN LIGHT FIXTURES

  • Dust lampshades with the lint roller.
  • Clean lightbulbs, lamps, and any light fixture with the Swiffer duster or microfiber cloth. Be sure light bulbs are cool before cleaning. If bulbs are especially grimy, use a bit of your household cleaner and wipe with a paper towel or microfiber cloth.
  • Wash any glass globes in hot soapy water and hand dry to avoid spots.

Step 5. CLEAN WINDOWS AND WINDOW COVERINGS

  • If you’ve already completed the Windows and Blinds segment of our Spring Cleaning Extravaganza, you can skip this step. YAY!
  • If not, follow the above link for tips and tricks on achieving sparkling clean windows.

Step 6. THE BED

Of course, the point of our spring cleaning extravaganza is a beautiful bedroom! The bed is key. See inspiration for your beautiful bedroom at the end of this post.

  • Remove and wash all bed linens, including pillows, mattress toppers, blankets, comforters, and bed skirts. Be sure to check tags to make sure everything is washable. You may need to set some items aside for dry cleaning or to take to the laundry where there are jumbo washers and dryers. Did you know that some of these places will do the laundry for you for a per pound fee?
  • Sprinkle your mattress with baking soda and let it sit for 10 minutes, then vacuum it up.
  • Rotate and flip your mattress. Note that you may not be able to flip a pillow-top mattress. It’s a real rip as being able to flip gives the mattress a longer life (but the luxury of the pillow-top may be worth it).
  • Dust the bedframe and headboard, including the backside. Use the vacuum and upholstery brush if it’s super dusty or if your headboard is upholstered.

Step 7. SHINY THINGS

  • Polish any mirrors or glass, including glass on picture frames. Polish any glass decorative items.

Step 8. GO LOW

  • Dust baseboards using the used dryer sheets, and wash if needed.
  • Vacuum underneath/behind your furniture.

Step 9. POLISH

  • Polish all furniture pieces as appropriate. Follow the instructions for the type of furniture polish/ furniture you have. You can ruin  the furniture’s finish by using the wrong cleaning product on it. When in doubt, consult the furniture manufacturer or Google it.

Step 10. FLOORS

  • Sweep, vacuum, shampoo, or mop your floors depending on the type of floor you have. If you have carpet that has wine stains, read our Out, Damned Spot post for removal tips.
  • Don’t forget to get underneath the bed and any other furniture with legs.

Step 11. RELOCATION

  • Take trash to the bin.
  • Relocate basket of runaway clutter to the room/s where the items belong.

Step 12. THE FROSTING ON THE CAKE

  • Make the bed with your fresh, clean linens. I love to iron the sheets (or maybe just the pillowcases) because it makes the bed look so pretty and makes the pillowcases feel softer next to my face.
  • Consider a wee splurge to add a sweet finishing touch to your now spotless bedroom – a candle, scented diffuser, a pretty toss pillow (Because you can never have too many pillows. I gently remind my partner of this fact whenever he says, “We’re birthin’ pillows in here!!”)

Spring Cleaning Extravaganza Beautiful Bedroom Complete! Now look! We’ve a fresh clean bedroom just waiting for a night of sweet dreams (or other fun things.)

Looking for a bit of beautiful bedroom inspiration? We got you covered.


Leave No Surface Undusted. Spring Cleaning Extravaganza II

Spring Cleaning Extravaganza II. Leave No Surface Undusted.


In our Spring Cleaning Extravaganza I, the bold announcement was made that over the next couple of months, I will be sharing my spring-cleaning and tidying journey with you. I am ever hopeful that this commitment will keep me on track to achieve my goals before the days are too beautiful to spend inside fussing about with the Swiffer duster and the Vietnam Vets donation bags. I am also hopeful that you will share this journey with me so that you, too, can welcome spring with a tidy, spotless, well-organized home and a light heart ready to embrace the season. Whole house dusting is phase two of our spring cleaning extravaganza! Learn tips and tricks to leave no surface undusted.

Last time, we worked on letting the sunshine in by cleaning windows and blinds. I am  so glad those awful tasks have been marked as completed on my To Do List. And, admittedly, I am feeling quite proud of this accomplishment. #patontheback.

While dusting, buffing, and polishing the windows, I considered how the rest of this ordeal should proceed. Room by room or job by job? I think the way to go is job by job, then once everything is clean and organized, we can spend one day putting a spit shine on the whole place. So this time?

Dusting. It’s phase two of our spring cleaning extravaganza.

Can you really clean and organize anything in your home if there’s a thin (ok, maybe in some places thick, layer of dust. It’s so easy when doing routine dusting to just focus on the flat surfaces – coffee table, night stands, shelves – and overlook the more challenging spots like cold air returns, the leaves on plants (real and/or artificial), baseboards behind large pieces of furniture – you get the idea.

As I mentioned in my last post, I consider myself a fairly tidy person. But working my way through this spring cleaning proved that it’s so easy to overlook so many things! Here are my tips and tricks to leave no surface undusted.

First, let’s get organized.

SUPPLIES

PROCESS

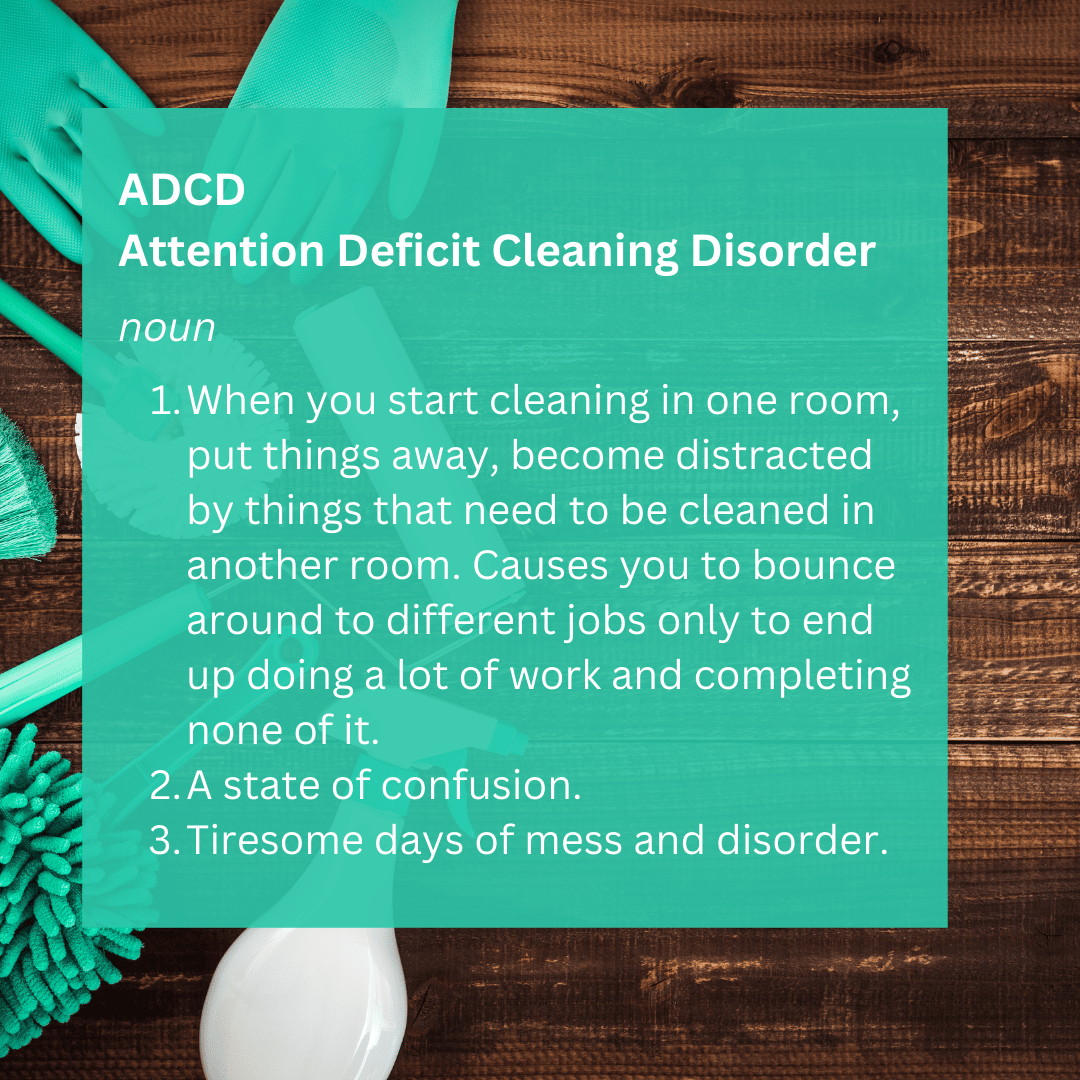
First, and most importantly, do not allow yourself to become distracted by ADCD – Attention Deficit Cleaning Disorder.

I, for one, suffer significantly from this “disorder”, so have first-hand knowledge of this disruption. How many times have I started dusting in the living room, decided to go ahead and put a morning coffee mug left on the coffee table in the dishwasher, and the next thing I know I am mopping the kitchen floor. Geesh.

Okay, back to business. We will leave no surface undusted!

  1. Plan your route. Perhaps start in the bedroom/s, move to the bathroom/s, then hallway, dining room, living room, kitchen.
  2. In each room, start at the top.
    1. With a long handled duster, clean all the dust webs from the space where wall meets ceiling.
    2. Dust cold air returns.
    3. Remove any artwork from the walls and clean not only the art, but also the wall behind it.
    4. Remove all items from flat surfaces. Dust the surface. Polish with wood cleaner or glass cleaner as appropriate.
    5. Dust all items removed from flat surfaces. Polish any glass or shiny surfaces with glass cleaner and paper towels or microfiber cloths.
    6. Pay special attention to lamps. Dust the bulb, the base, and the cord. Use the lint roller to remove dust from the inside and outside of the shade.
    7. Clean live plants. Use warm water and a soft cloth to remove dust from live plants. Alternatively, place your plants in the shower and wash them down being careful not to wash soil down the drain. Dry leaves with a soft cloth to prevent water spots. Use damp paper towels to wipe down plant pots.
    8. Clean artificial plants and floral arrangements. This is where those dryer sheets come in handy! Dryer sheets will do a great job removing dust even from those leaves in the back that haven’t been dusted for a while. It’s so quick and easy!

  1. Use glass cleaner on all mirrors and picture frame glass.
  2. Dust all light fixtures and use class cleaner to polish the globes. Don’t forget to dust the light bulbs.
  3. Run the duster over the front and back of all doors, the top of the door, and the door frame.
  4. Be sure to dust the back of any picture frames. The lint roller will come in handy if they have a velvety surface.
  5. If you have candles – real or battery operated – dust the indentation around the wick and the entire candleholder. If your candle is in a lantern, use glass cleaner and paper towels to clean the glass and all surfaces.
  6. Dust bed frames, and legs of all furniture. If your headboard is fabric, clean with the lint roller or hand held vacuum.
  7. Pull furniture away from the walls and using your long handled duster, clean the back of the furniture and the wall and baseboard behind the furniture.
  8. Dust curtain rods.
  9. Use the lint roller to remove dust from curtains. Don’t forget to clean the back of the curtain!
  10. In the bathroom, dust the top of the shower curtain rod, the towel rods, the toilet paper holder, the water lines to the toilet, the sides and front of the cabinets, and the light fixtures.
  11. Be sure to dust all books, CDs, and DVD cases.
  12. Dust the back of all electronics including the TV/s.
  13. Dust all light fixtures and use class cleaner to polish the globes. Don’t forget to dust the light bulbs.
  14. Run the duster over the front and back of all doors, the top of the door, and the door frame.
  15. Dust all baseboards.

Mission accomplished: we leave no surface undusted. End your dusting session by cleaning up and tossing any used paper towels, disposable dusters, lint roller sheets, dryer sheets, and wash any dusting and microfiber cloths.

Take a deep breath and pat yourself on the back for a great day’s work! I did.

Next up: bathrooms.


Spring Cleaning Extravaganza!

Why a Spring Cleaning Extravaganza? Well, despite the prediction of Punxsutawney Phil last Tuesday that we’re in for another six weeks of winter, seemingly a predilection of his, this writer is itching for spring. So many wonderful things come with that glorious season: longer days, the return of robins (for those that still fly south for the winter), bulbs bursting forth from the once frozen soil, skies forming a brilliant blue dome overhead, ditching our dark, cold weather gear in favor of clothing that floats on the body, comfort in spending time out of doors, and so much more! Like a spotless home that will allow me to really enjoy spring guilt free!

I, for one, am so ready to get ready for spring. As the daylight gradually lasts longer, and there are more sunny days than cloudy ones, evidence of winter doldrums punch me in the face almost daily. Short, gloomy winter days brought with them a perfect cover for the dust webs and grimy corners along with the uncanny ability to overlook overstuffed closets and untidy drawers and cabinets. Now don’t get me wrong – at first glance my place looks pretty good. Just don’t move any of the pictures on the dresser, swipe your finger on the slats of my blinds, or peek below the crisper drawer in my fridge.

Over the next two months, I will share my spring-cleaning and tidying journey with you in a Spring Cleaning Extravaganza! Hopefully this commitment will keep me on track to achieve my goals before the days are too beautiful to spend inside fussing about with the Swiffer duster and the Vietnam Vets donation bags. And perhaps you will share this journey with me so that you, too, can welcome spring with a tidy, spotless, well-organized home and a light heart ready to embrace the season.

Let’s get started!

Throwing back the curtains and opening up the blinds has to come first. With cleaning windows and blinds, the sun can come streaming in exposing all those tasks we’ll need to tackle next.

Windows first.

How I hate washing windows! For me, it’s the worst cleaning job in the house. Except maybe for mini blinds. A true glutton for punishment, I’m doing both. Today. It’s the launch of oour spring cleaning extravaganza!

The thing that makes washing windows so awful is that so often they almost look worse after you’ve washed them because of streaking. So what is the best way to clean windows without streaking?

According to Pella, the folks who are known for their windows, a microfiber cloth is ideal but a gentle and clean paper towel can work as well. Rub from multiple directions to help avoid streaking. If you find that you still have streaks after you’ve cleaned your window, simply rinse with clear water to help remove any of the remaining cleaning solution. Check out their YouTube video!

Hmm. I think we need more details.

SUPPLIES

PROCESS

Indoors

  1. When cleaning windows from inside your apartment, place a drop cloth on the floor to catch any water drips.
  2. Pour cleaning solution (water mixed with liquid dishwashing detergent) into a plastic spray bottle, then spray the interior surfaces of the window.
  3. Immediately after spraying, clean the glass with a terrycloth rag, followed by a quick wipe down with the micro-fiber towel.

Outside (if you can safely reach)

  1. Fill bucket with clean water and add a small amount of liquid dishwashing detergent.
  2. Wipe down the window frame using a wet (not dripping) terrycloth rag.
  3. Dip your window scrubber into the water bucket, then wring out the excess water.
  4. Clean the glass with the scrubber to remove all dust and dirt.
  5. Wipe the window glass dry with a rubber squeegee. Hold the edge of the squeegee at about a 30 degree-angle to the glass, then make a horizontal pass across the window.
  6. Use a terrycloth rag to wipe the squeegee dry after every pass. If you’d prefer to wipe down vertically, start by using a dry cloth or end of the squeegee to create a dry edge along the top of the window glass.
  7. Place the squeegee on the dry edge and pull straight down, cleaning the glass.
  8. Use a micro-fiber towel to wipe down the glass one last time.
  9. To clean windows with divided lites (panes), use the scrubber to first wash the glass, and then squeegee the glass clean. Only this time, hold a terrycloth rag against the bottom end of the squeegee to catch water and protect the muntins.

Read more about attaining streak free glass here!

Blinds next.

It’s so easy to forget about (IGNORE?) the need to clean your blinds. It’s pretty easy to not really see the dirt adorning the slats. I mean, when you open your blinds, do you actually look at the slats or are you looking out the window to check the weather? Then one day when you’re opening or closing them, you see – really see – the dust bunnies and the grime. Thankfully, this oft-forgotten task really isn’t so bad if you’re strategic. Here’s how to clean blinds the quick and easy way as part two of phase one of our spring cleaning journey.

SUPPLIES

Ohhh, look! You already have some of these supplies organized from your window-cleaning project!

  • Microfiber cloth – read all about microfiber cloths here.
  • Vacuum and upholstery attachment
  • Clean sock
  • White vinegar
  • Optional: Mini blind duster* link this one, just $9 from The Container Store, or this one, just $7.80 from Walmart.

* Note:  The special blinds duster isn’t necessary, but makes quick work of dusting blinds especially if you incorporate this task into your regular cleaning schedule. You’ll find it will save time in the long run by allowing you to clean multiple blades at once quickly and easily.

PROCESS

  1. Close the blinds and gently wipe them down with a microfiber cloth starting at the top and wiping side-to-side. Hold the bottom of the blind in your other hand so it’s pulled out from the window. Adjust the blinds to open them, and run the microfiber cloth over them again. Then close them the opposite way and repeat.
  2. Vacuum up any dust and debris with your vacuum attachment.
  3. For stuck-on dirt or stains, mix a solution of equal parts white vinegar and water. Dip a clean sock (finally a use for that old sock with the hole in the toe!) into your cleaning solution. Wring it out until the sock isn’t dripping wet, then slip onto your hand. Use your fingers to run over each blind blade tightly. Leave the blinds open to dry thoroughly.
  4. For deep cleaning, remove them from the window and place them in a bathtub filled with warm water and a squeeze of dish soap. Let them soak for an hour. Rinse and hang them outside until they’re completely dry.

Read more, including the “Do’s and Don’ts” of blind cleaning, and how to incorporate cleaning those blinds in your cleaning routine here.

Now that we’ve let the sun shine in, we’ll tackle the rest of the place! Stay tuned for phase two of our spring cleaning extravaganza.