Tools You Can (and will!) Use

When I was helping my daughter move into her first apartment, we quickly realized that not only was she going to need furniture, cookware, bedding, and towels (and so much more!), but she was also going to need some basic tools she could use. There were pictures to hang, a towel bar to install (unbelievably one was not provided in her bathroom), a shelf to add in her tiny kitchen, a curtain rod to install on the apartments lone, naked window, and hooks to install by her front door since her new home did not include a coat closet.

Yes, as a renter, her landlord would take care of any maintenance issue that arose in her apartment, but extras such as these would be up to us. So off we went to find everything she’s need for these and future DIY projects. I was determined to assemble a collection of tools she could use now that she could build on over time to carry her into future.

I don’t know about you, but I love going to the hardware store. Doesn’t matter if it’s a small, locally owned shop nearby such as my beloved Greive Hardware in Dayton, Ohio, a woman-owned store that employs retired men and teenagers, you could go there and buy two nails if that’s all you need. Or maybe a big box store where – unbelievably – all the employees seem to know the precise location of every item and will even walk you directly to it. So our expedition to find and create and apartment-sized tool kit was an exciting prospect.

In shopping around, we realized we had a few options:

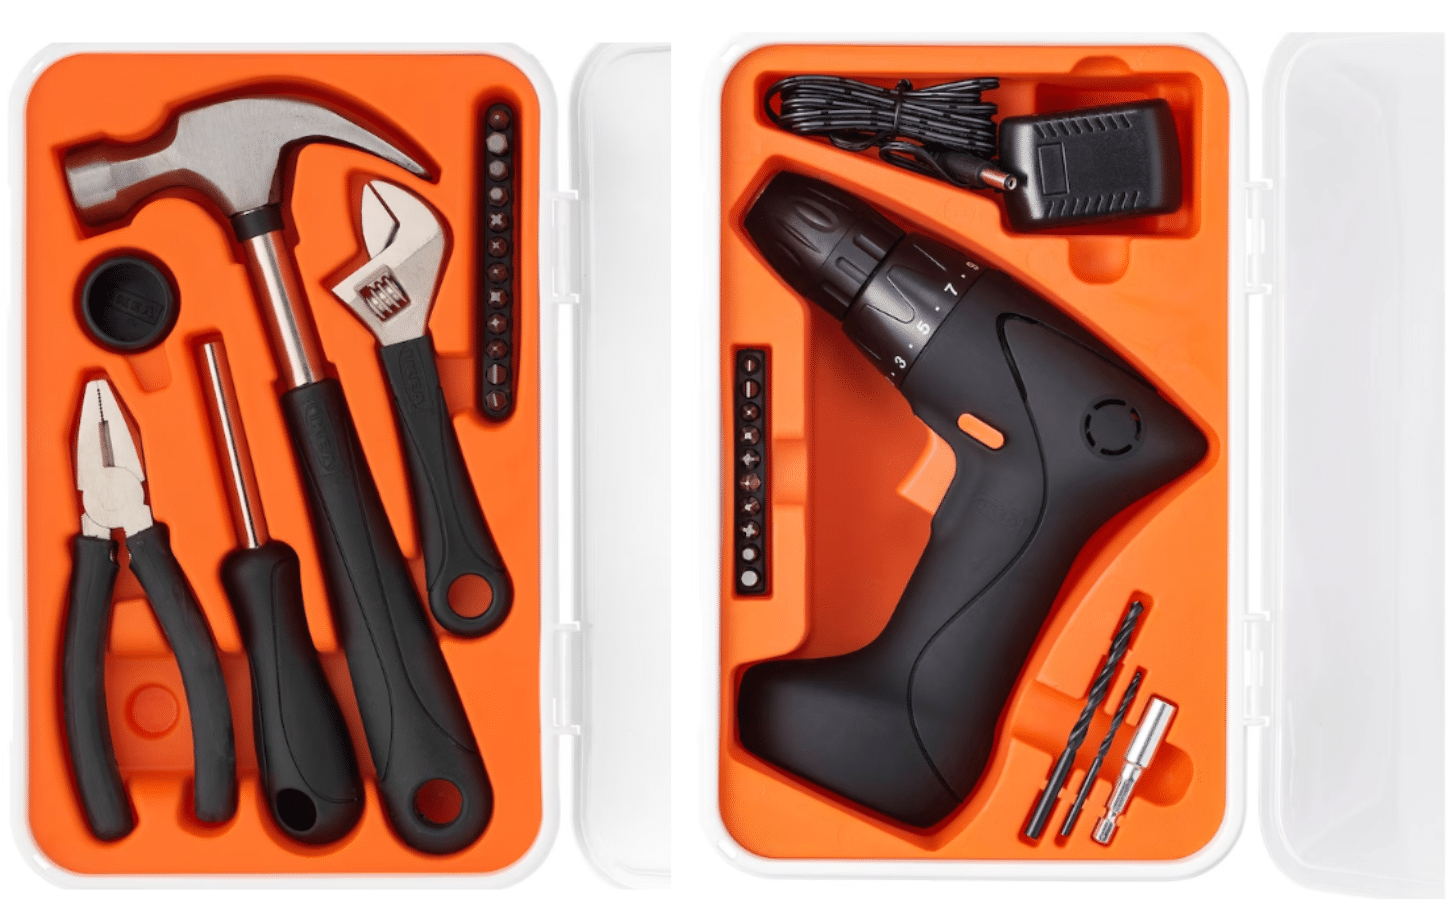
  • Purchase pre-assembled tool kits from IKEA where we were going anyway for furniture. They have a 17-piece toolkit for $13, and a small drill for $28, both in easy-to-store cases, and both available on line. PROS: inexpensive, easy to store, not all-inclusive. CONS: no room for additional items, like nails, hangers, and screws.


  • Purchase Wirecutter’s “best” all-in one kit for $49. PROS: great selection of tools included, easy to store. CONS: no room for additional items, like nails, hangers, and screws.

  • Purchase everything separately along with a toolbox. PROS: completely customizable. CONS: more time consuming to select individual items, room for additional items, like nails, hangers, and screws, ease of storage will depend on toolbox selected.

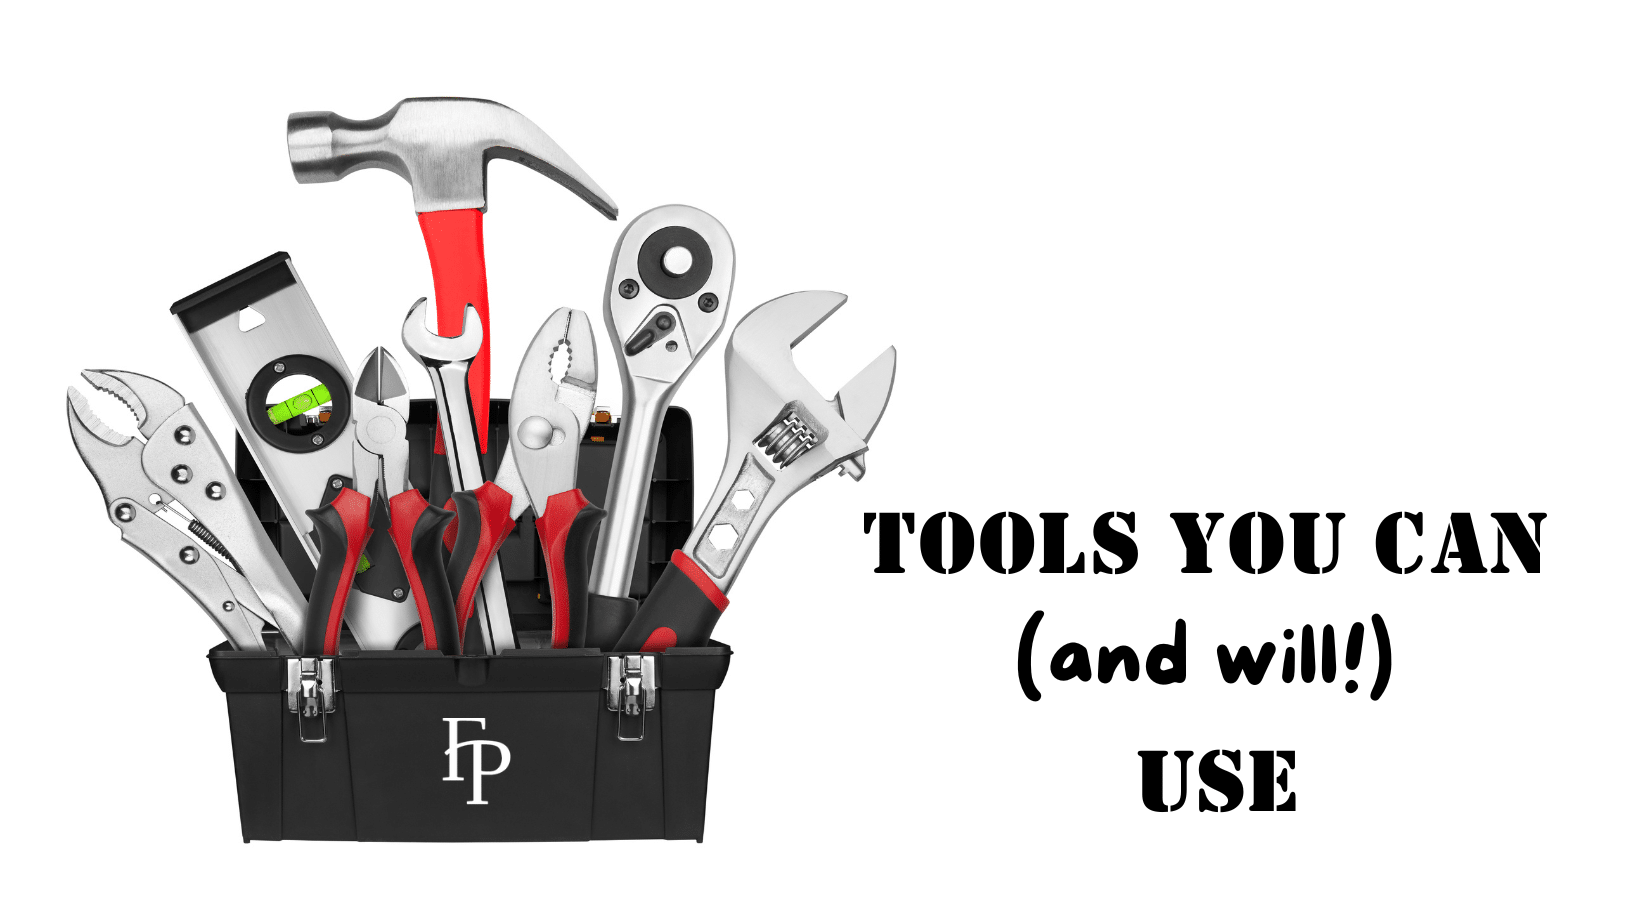
If you decide to completely customize the Tools You Can (and will!) Use, below are suggested items to include:

Power Drill. This small, wireless drill is a workhorse around the house! It will help you with small projects like screwing in a cute switch plate cover to large project like assembling furniture.

Screw Driver. Get just one, but make it a screwdriver with multiple bits. Because screws tend to loosen over time, a set of screwdrivers will be very useful around your apartment so you can easily tighten screws into place. Whether it’s a loose screw on a door handle, kitchen cabinet handle or furniture you assembled a while ago, you can easily take care of these issues with screwdrivers.

Hammer.  One basic hammer will see you through.

Duct Tape. Duct tape has So. Many. Uses.

Tape Measure. Invest in a good one and it will last you forever.

Extension Cord. Or two. Helpful when trying to plug in a lamp when the outlet is behind the bed.

Utility Knife. A utility knife is a godsend when trying to open a cardboard box!

Pliers.  You won’t regret this 3-piece set. Pliers are the workhorses of the toolbox: Invest in at least two: 8-inch needle-nose and 10-inch groove-joint pliers. Add locking pliers that allow you to apply more force when needed.

Level. Whether you buy a level for your toolkit or download a level app on your phone, a level keeps everything straight even when the world is a crooked mess. A small one should do you nicely for most apartment needs.

Scissors. Lose your scissors once and you’ll realize how often you use/need them. Keep a pair in your toolbox and another pair in your kitchen junk drawer. C’mon, admit it. Everyone has a junk drawer.

Assortment of fasteners, hooks, nails, and screws. Honestly, just buy them for each specific project. If you buy them in advance, the ones you have will never be the ones you need.

Pencil.  For marking measurements.

Safety goggles. Because you never know when something will go wrong safety goggles are a smart addition to your tool kit.

Toolbox or caddy.  I’ve owned toolboxes and caddies, and prefer something that allows me to see all my stuff at a glance. This one fits that bill and is not too big!

Step Stool. Foldable. Two-step if your ceilings are 8’; three-step if you have tall ceilings.

Now you’ve got the tools you can (and will) use, so go hang that picture, tighten that loose handle on your dresser, and add a light-blocking curtain to your bedroom window. You’ve got the tools; you’ve got the power.


.


Getting Rid of Spiders

Getting Rid of Spiders

Spring has arrived! Or has it? At this writing on March 29 we woke to a hard frost here in Ohio. (Mother Nature, you are a naughty girl and a tease.) Anyway, the arrival of [pseudo] spring is accompanied by the arrival of creepy crawlies. Earlier in March, we posted about getting rid of stinkbugs. Today, we’ll tackle getting rid of spiders. Personally, I don’t mind them so much as spiders deliver many benefits to both our ecosystem and inside our homes. They like to feast on pesky insects – and ones I really dislike – like roaches, aphids, moths, and earwigs. This spider feast helps keep their population in check. Did you know that if left alone, spiders will consume most of the insects in your home, providing effective home pest control? Yet there are those that have an intense dislike – shall we more accurately call it loathing? – of these eight-legged creatures such as two family members who, to prevent their public embarrassment, shall remain unnamed. I will say, however, that a video of their antics when stumbling across a spider of any size, could win me $10,000 on America’s Funniest Home Videos.

Back to the matter at hand.

Here are some methods to help control any spider population in your home:

  • Set spider traps. Sticky glue traps designed to catch and kill spiders can be effective if you place them in high-traffic areas. Here is a link to the best spider traps available in 2023. Warning: there’s a pic of a spider at the link along with the list. Keep traps away from kids and pets and be sure to check and change them often.
  • Remove webs. You can use a vacuum if yours has a hose attachment to remove spider webs. Remove the webs as soon as you see them. If there are any spiders in the web, toss or empty the vacuum cleaner bag or clean out the dirt compartment into a small trash bag and take to the dumpster.
  • Use essential oils. This is a great way to repel spiders without chemicals. Spritz the deterrent anywhere you’ve noticed spider activity. Reapply regularly.

  • Use vinegar. Distilled white vinegar is also an excellent natural spider repellent. Fill a spray bottle with a half and half mixture of vinegar and. Again, spray the mixture into the corners around your home. Reapply every few days.
  • Check window screens. If you leave your windows open during the day and/or evening, check your screens for tears or holes. If you’re in an apartment, let your management office know if your screens need repair.
  • Use store-bought insecticide. Use store-bought insecticides and spray treatments along the baseboards, in the corners of your home, and under furniture. These insecticides form a barrier that repels or kills spiders. They can be an effective method to deal with serious spider infestations. Keep in mind that many contain chemicals or toxins that are unsafe for kids and pets, so it’s important to use them carefully and to read all label directions.
  • Keep a tidy home. Read our Spring Cleaning Extravaganza – Dusting blog post for tips on getting your home thoroughly clean, then clean regularly. Clean homes make it harder for spiders to find hiding spots that allow them to take up residence.
  • Use a spider catcher. To rid your home of spiders without killing (squishing – ewww) them, buy a spider catcher. This clever device is a hand-operated wand designed to pick up spiders in gentle, flexible fibers, and hold them securely until you can release them outdoors. A spider catcher will be most effective if you use it in conjunction with home remedies like peppermint oil and vinegar.
  • Clean up leftovers. After prepping and eating meals, clean up promptly. Food crumbs and other kitchen messes will attract pests like ants and beetles, which will attract the spiders who eat them. Wipe your counters and tables regularly, and wash all dirty dishes within a few hours.
  • Declutter. Clutter provides hiding spaces for spiders. And you don’t want any jack-in-the-box surprises when hunting for that People Magazine. Toss old magazines, and newspapers (does anyone actually read a physical newspaper anymore?), mail, cardboard boxes, and piles of clothes.
  • Smart storage. Store items in airtight plastic containers instead of cardboard. In addition to preventing spiders from hiding inside the boxes, plastic bins will keep your belongings safe from dust, moisture, mold, and mildew.
  • Hand trap. Trap the spider in a jar or glass and set it free outside, but carefully look at the markings. Learn to identify dangerous spiders here. If it does not appear to be a poisonous spider, place a cup or container over it, and then carefully slide a piece of paper or a note card under the mouth of the container. Keeping the paper in place with your hand, quickly flip over the container so the spider lands at the bottom and then walk it outside at least 10 feet from your house to let it go. Never attempt to pick up brown recluses or black widows.

NOTES

  • Foggers are ineffective at getting rid of spiders.
  • Spider trapsare non-toxic and cost-effective, but can be less effective against larger infestations.
  • Spider sprays kill on contact and are easy to use, but leave a residue.
  • Natural spider repellent is non-toxic but requires more frequent reapplication.
  • Keep cats or even frogs as pets, since they hunt spiders. If you live in an apartment, alert your local management office if you adopt a cat as pet fees may apply.
  • Remove vegetation within eight feet of the perimeter of your home. Shrubs, trees, and ivy provide shelter for spiders and harbor insects they use for food.

Wishing you a spring and summer of complete and spider-free enjoyment of your home – unless of course, you wish to train them like researchers at the University of Manchester who trained a regal jumping spider named “Kim” to leap on demand. It’s the first time a spider has been successfully trained to jump. Here’s how they did it.

Shout out to AJ Wright for the inspo!


Is Your Toaster Toasted?

According to Kitchen Infinity, no matter how much you shelled out for your toaster, it will survive an average of six to eight years. You can extend the life of your toaster by cleaning it regularly to remove excess breadcrumbs and additional food particles.

The factors that affect the lifespan of a toaster include:

  • Frequency of use: How often you use your toaster affects how long it lasts. Frequent use of a toaster can wear out the lever or door hinges over time.
  • Maintenance and upkeep: If you maintain your toaster, it will last longer. This includes cleaning the toaster out between uses.
  • Initial quality: The initial quality of the toaster affects how long it lasts. Stainless steel toasters tend to last longer than plastic toasters.
  • Type of use: The type of foods you cook in your toaster can also affect its longevity. If you frequently use your toaster to defrost foods or make cookies, it may wear out faster.

Whether you’re using it to warm up a quick breakfast pastry or perfect a slice of wheat toast, you count on your toaster to deliver the goods. The cost of a toaster ranges from $20-$400. Smaller, two-slice toasters are on the lower end of the range, whereas larger toasters with more cooking functions may cost even more.

How do you know when it’s time to clean your toaster? Well, if you peer into the slots and see enough crumbs to bread a chicken cutlet, it’s long overdue. We recommend cleaning the crumb tray once a week or whenever you see a buildup of crumbs. Otherwise, you’re looking at a potential fire hazard, so it’s important to take a moment every now and then to clean them out.

Wirecutter’s Michael Sullivan has been testing toasters since 2016 (think of all the delicious buttery toast!).  In 2021, he partnered with Elvin Beach, associate professor of practice, and his students in the Department of Materials Science and Engineering at Ohio State University to figure out why newer toasters seem to fail so quickly. Through their research and testing, he learned even more about how to clean toasters and help prolong their lifespan.

‌If you follow this blog and try our cleaning tips, chances are good that you already have everything you need on hand to get the job done (YAY!) and here’s how to do it.

SUPPLIES

  • A clean pastry brush: A soft-bristle pastry brush is best for gently removing the crumbs that cling to the sides of a toaster’s heating elements (don’t use a silicone pastry brush).
  • A long-handled, clean, paintbrush: Any thin brush with a long handle (like those used for watercolors) will help you sweep away crumbs in hard-to-reach crevices.
  • Paper towels or a clean cloth: For wiping down and polishing your toaster.
  • Dish soap: A drop is all you need to remove grease buildup or grime on the sides of your toaster and crumb tray. Try Seventh Generation Natural Dish Liquid or Dawn Liquid Dish Soap.
  • A sponge: Any sponge, such as our faves Scotch-Brite Heavy Duty Scrub Sponge or a Scotch-Brite Dobie pad (which is gentler and doesn’t scratch stainless steel), can be used to wipe down the sides of your toaster and crumb tray.
  • Bar Keepers Friend (for stainless steel toasters): A mixture of Bar Keepers Friend and a bit of water will polish the exterior and keep it looking like new.
  • Micro-fiber cloth: for a perfect polish and shiny finish.

TIME

You’ve got the time. Promise. It will only take a couple of minutes to clean your toaster. Brushing away crumbs inside the slots or wiping down the exterior of your toaster will take a few minutes more.

PROCESS

Unplug
Before you attempt to clean the toaster, always unplug it first. Inserting anything except food into a toaster while it is plugged in can cause an electrical shock or a fire. Once the toaster is unplugged, allow it to cool completely before beginning to clean.

Shake
Move the toaster to a trash can or hold over a sink with a garbage disposal. If the appliance has a removable tray in the bottom or a bottom that opens, open it and use a pastry brush to remove crumbs from the toaster and into the trash can. Don’t be tempted to flip your toaster upside down and bang on the sides to get crumbs out. According to research done by The Ohio State University, such treatment can easily break the delicate solder joints and cause an electronic component to give out.

Mix
In a sink or dishpan, mix a solution of warm water and dishwashing liquid. If the toaster has a removable crumb tray, submerge only the tray in the soapy water and wash it well with a sponge or dishcloth. Rinse the tray with clear water and dry with an absorbent cloth.

Degrease
Choose a dishwashing liquid that contains a degreaser for the best cleaning results. See our picks in the Supply List. The degreaser will cut through any build-up more quickly and with less elbow grease than regular dishwashing liquid.

Brush
With the crumb tray removed, use the pastry brush to reach any crumbs still clinging to the interior of the toaster. Do not put your fingers inside the slots or you risk damaging your fingers and the interior components. If possible, work from both the top and bottom of the appliance.

Exterior
Dip a sponge or dishcloth in the soapy water to wipe down the exterior of the toaster. Wring out most of the water so the sponge is just damp. Pay extra attention to dials or levers on the controls, as well as handles. Wash removable dials in the soapy solution.

When the exterior is clean, wipe down with a sponge dipped in clear water to remove any soapy residue. Dry the appliance well with a soft, microfiber cloth.

Shine
To make the exterior of a stainless steel toaster shine, use a commercial stainless steel cleaner or dampen a clean cloth with a bit of distilled white vinegar. Wipe down the exterior to remove smudges and leave a streak-free shine.

Reassemble
To finish the cleaning process, replace the crumb tray, reset the dials to your favorite setting, and plug-in the toaster.

FREQUENCY

If you use your pop-up toaster daily, weekly cleaning is best to remove crumbs and any food residue that could cause a burnt taste or a fire. Since toaster ovens are used for much more than making toast, they need cleaning more often. If you only use the oven to make toast, weekly cleaning is sufficient. However, if you heat foods or broil other foods, the oven—especially the food tray— should be cleaned after every use.

TIPS

Trim a reusable oven liner to fit a toaster oven’s crumb tray. This will make cleaning easier when spills happen.

  • Eliminate crumbs that can prevent bread from popping up. Clean toasters and toaster ovens regularly to prevent residue from interfering with internal mechanisms.
  • Do not place plastic bags of bread or bagels near the appliances. The heat from a toaster can quickly melt the plastic. If you forget and a plastic bag has accidentally melted onto the finish of a toaster, remove as much plastic as possible using a wooden or plastic scraper. Unplug the appliance and allow it to cool before removing the remaining plastic. Then sprinkle baking soda on a damp sponge and scrub the area. Wipe away with a clean damp sponge and repeat until no more plastic is coming off. To remove the final discoloration, dip a cotton ball in acetone-based nail polish remover. Rub the area with the cotton ball and use a fresh ball as the plastic is transferred. Lastly, wipe down the area with a water-dampened soft cloth to rinse the area.

Toasters can be used for so many things from making breakfast toast or waffles, to lunchtime BLTs and a plethora of other toasty sammies, to toasted crostini for your happy hour smacks. Slightly stale bread gets new life when toasted. So be good to your toaster and it will be good to you. A clean appliance will produce tastier (and safer) toast. Now let’s get toasty! Or toasted.

RESOURCES: Wirecutter, ahs.com, The Spruce, KitchenInfinity

Energy Saving Tips For Winter

Winter Energy Savings Tips

Old Man Winter has come a’ knocking on our doors a bit early this year It’s a cold reminder to take steps to keep ourselves warm and cozy without breaking the bank paying for utilities. It’s especially important now, as inflation has driven up the cost of just about everything.

Start by taking a walk around your apartment. I know, I know, you know your apartment like the back of your hand. But this time, instead of admiring your decorating skills or making a checklist of cleaning chores to do, look closely at things that can affect your ability to keep your place comfortable even on the coldest days.

Furniture

Look at the placement of your furniture. Make sure all furnishings are away from heat registers and vents to allow for proper circulation. Check the areas behind your sofa, bed, dresser, and other large pieces to be sure they are not blocking precious warm airflow. A rule of thumb is to allow at least eight inches of space around your registers to ensure good air circulation.

Windows

Double check to make sure all windows are shut tightly. Locking your windows can provide an extra bit of snug fit. Even double paned windows can feel cold when it’s frigid outside. It is normal for windows and the area around them to feel cold to the touch since glass is not a good insulator.

A rolled towel on the windowsill can help the window feel less chilly especially if the window frame is metal.  Keep your blinds open on sunny days to let as much warmth in as possible, but do close them tightly once the sun goes down. Adding an extra layer such as a plastic barrier or a draft blocking curtain can really help. Insulated drapes and curtains are the best way to minimize the effect of this cold air on your apartment’s temperature. This can really help you save on energy expenses this winter.

If, after taking these steps, there are still noticeable drafts around your windows, please call your leasing office and request the maintenance crew come to check them out.

Doors

Check for drafts around any exit doors. If you feel a draft, you may need new weather stripping or a new door sweep. Your maintenance team can help you with that. Even with a good door sweep, you may still feel a bit of chilly air coming in.  A door snake can really make a difference in stopping this cold air from sneaking in.

Outlets

Cold air can also find it’s way into your home through the outlets and switch plates on exterior walls. Really! Fortunately, there’s a product for that (of course). You can also check with your utility company as some of them will provide these foam insulators at no charge.

Wall Air Conditioner Unit

If you have a wall AC unit, make sure the vent(s) are in the ‘closed’ position and that there is not air seeping in around the units.

Baseboard Registers

If you have baseboard registers, make sure the metal flap inside is lifted all the way up and that you can see inside the register. This flap acts as a vent; if it is resting down on the front panel, the heat cannot escape.

Thermostat

 If you have a forced air system, make sure your thermostat is set on ‘Heat’ and ‘Auto’. You can also be like my Dad and turn the heat down to 60 degrees at night. Sounds awful at first, but sleeping in a cool room in flannel jammies and under a warm comforter or cozy blanket can provide you with a surprisingly great night’s sleep while saving on your heating expense. Thanks, Dad, for this winter energy-saving tip!

Attire

You’ve heard the saying Dress For Success. In the winter, it becomes Dress For Warmth. Another winter energy-saving tips is to get cozy at home by wearing seasonal attire like wool sweaters, heavy shirts (flannel!), sweatshirts, warm pants, wooly socks, and fluffy slippers. Maybe a Snuggie?? Top this with a furry throw and you’ll be all set. Dress up/thermostat down/save money!

Fido & Fluffy

Let’s not forget our furry friends this winter! Make sure your pup or kitty has a cozy spot to snuggle in on chilly nights. Maybe that spot is your lap, or maybe it’s a cozy bed, a kitty cave, or a warm sweater.

Make my Dad proud, keep warm and cozy, save on your utility bills, and know that spring will come!


Garbage Disposals

Garbage disposals operate virtually trouble-free when used properly.  These helpful procedures and tips will lead to a long life for your disposal and easy operation.

When running your garbage disposal…

  • Turn cold water to maximum flow position.
  • Flip the switch to the “on” position.
  • Push refuse through the splashguard keeping hands away from the inside chamber.
  • Continue to run the disposal until the grinding sound stops, and then flip the switch to the “off” position.
  • Continue to run cold water for two to three minutes to be sure all of the waste particles have been flushed away.

Below are some DO’s and DON’T(s) for disposal usage

 DO:

  • Grind a citrus peel or put baking soda down the drain to keep the disposal odor free.
  • Run plenty of cold water during and after operation.
  • Grind coffee grounds.

 DON’T:

  • Never put your hand down a disposal when it is running.
  • Do not use hot water when operating a disposal.
  • Never try to put too much through a disposal at once.
  • Never put any of the following items into a disposal

Fibrous materials (cornhusks, artichokes, etc.)
Clam, oyster, or nutshells
Fruit/vegetable pits or seeds
Rice
Pasta
Eggshells
Bones
Drain cleaner
Tea bags, potato or banana peels, celery, tomatoes
Grease
Wooden objects
Glass, china, plastic
Metal objects (bottle caps, aluminum foil, tin cans, utensils)
Dishrags

If the motor has stopped due to overloading, turn the disposal off.  Wait three to five minutes, and then push the reset button (located under the sink on the unit itself).  Then follow normal operating procedure.

If the disposal has jammed, turn the power switch to the “off” position before attempting to remove an object.  With tongs, remove any objects that might be obstructing the free movement of the blades.  In many cases, a broom handle can be inserted into the mouth of the disposal and turned in a circular pattern to free the blades.

Once movement has been restored to the blades, push the reset button on the disposal unit.  Then follow normal operating procedure.

Of course, if you ever run into an issue you cannot resolve yourself, our friendly maintenance team will be happy to help. Just call your leasing office and we will schedule a friendly maintenance technician to come to your apartment home.