When You Need A Quickie (Cleaning)

When You Need A Quickie (Cleaning)

Spring is the traditional time of year when we think of deep cleaning to get rid of all the dirt we simply could not see during the dark and dreary winter. (My tried and true excuse. LOL.) Last year, we talked about spring cleaning. A lot. From cleaning windows and blinds, to dusting, to cleaning bedrooms, bathrooms, and kitchens — we covered it all. Deep cleaning your home ensures your space stays free of bacteria, allergens, crumbs, and other debris. But sometimes, “Ain’t nobody got time for that!”  Today we’ll chat about what to do when you need a quickie.

Finding time to give your home a thorough spring cleaning can be challenging even in the best of times. When you unexpectedly learn you’re about to have company and your home needs tidying up, don’t panic!  When you are in a time crunch, this 30-minute cleaning routine will save the day. This simple checklist will sanitize some of the highest-touch areas of your home, help you to stay focused to actually complete the spruce-up in 30 minutes, and make your space look and feel cleaner, so you can enjoy your guests worry-free.

Do the Dishes

Give your kitchen a sparkling look by cleaning dirty dishes and putting away clean ones. Including dish cleaning in your routine encourages consistency in maintaining a clean home. Consistent small efforts can prevent the accumulation of a larger mess, making it easier to manage cleaning tasks over time. But for now, just wash ’em up and put ’em away for an immediate positive impact on your kitchen.

Wipe Down Counters

Kitchen and bathroom countertops are like magnets attracting dust, crumbs, spills, and splatters. A quick wipe-down will give your space a tidier look almost instantly. Plus, you’ll eliminate bacteria and germs, and eliminate odors. Tuck any items creating clutter in a drawer or below-sink cabinet.

Shine Faucet Fixtures

Water stains can give your faucet fixtures a dingy, uncared-for look. Return your faucets to their former glory by giving them a quick polish. Bar Keeper’s friend applied with a wet sponge followed by a buff with a microfiber cloth will work wonders. Regular shining helps minimize water stains, keeping your faucets looking new and well-maintained.

Polish Stainless Steel Appliances

From your microwave to your refrigerator, stainless steel surfaces easily show fingerprints, smudges, and water spots. Apply a stainless steel cleaner then buff with a clean, dry microfiber cloth. Polishing these surfaces regularly ensures they remain free from these marks (but also stains and corrosion), creating a visibly clean and well-maintained appearance. Polishing stainless steel appliances is a relatively quick chore that can have a big impact on the overall appearance of your kitchen, and who doesn’t appreciate a little gleaming in the kitchen?

Pick Up Clothes

Pick up your clothes, you animal! LOL. Clothes piled up on your bedroom floor, bed, or chair; left on the bathroom floor; or heaped in the laundry room can make your place look a hot mess. Put clothes back where they belong, whether in your closet or the hamper, for a quick tidying up. Not only will your space look instantly cleaner, but regularly washing and maintaining your wardrobe minimizes the presence of allergens, dust, and other particles that can affect indoor air quality and cleanliness. And it will make your mother happy.

Dust

Use a duster to clean furniture around your apartment that has accumulated a layer of dust, like your nightstands, dining room table and chairs, living room coffee and end tables, and any shelving. Don’t forget the TV! A clean and well-maintained living room creates a much more welcoming atmosphere for guests than a messy, dusty space. Plus, it will reflect your commitment to a comfortable, inviting living environment while promoting a more organized and orderly living space for you.

Empty the Trash

If your trash cans are full, use this as your opportunity to empty and clean them. Remove the bag and sprinkle baking soda in the bottom of the can. Add about two inches of warm water. Allow the mixture to sit for a few minutes, then swish it around and wipe. Rinse with clean water and let it air dry upside down. If the can itself is not dirty, just empty the trash, especially in the bathroom. No one wants to see your bathroom trash. If you, like me, are not a fan of seeing a trashcan liner around the top edge of your bathroom wastebasket, here’s a quick tip to keep the can from getting mucky: place a paper towel in the bottom and let the corners rise up the sides. This will keep any wet or damp waste from discoloring the can or trash from sticking to the bottom. You’re welcome.

Tidy Your Entryway

The entryway sets the tone for the rest of your place, so cleaning it is a quick way to make your space feel fresh and well-tended. Take a moment to organize shoes, jackets, shopping bags, and/or the dog leash.  All manner f stuff can quickly accumulate in the entryway. Put it all way (or tidy it up) now, then keep it clean and organized. Regular tidying and freshening helps reduce mess and creates the appearance of a more open and spacious entryway.

Vacuum & Swiffer

A quick once-over with a Swiffer on your hard surface flooring and vacuum on your rugs and carpets is a quick and easy way to make your space look and feel cleaner. Floors, like countertops, are magnets for tracked-in dirt, dust, and debris, especially in high-traffic areas like your foyer, hallway, and entrance to your kitchen. Swiffering and/or vacuuming helps remove the dirt and dust, and prevents the grime from spreading throughout your home and settling on other surfaces. It also improves indoor air quality. Best of all, carpet vacuum tracks lend an air of tidiness to a room.

Floof

The easiest and funniest way to make your home look company-ready is floofing. You know, fluffing up all the soft surfaces. Punch the pillows, then give the sides and top a good wack to fluff up all the stuffing. I like to finish with a nice karate chop to the top. This tiny bit of effort will make them look thick, cozy, and inviting. Fluff up and straighten the sofa and chair cushions, too. Bonus: all this floofing is a great stress reliever!

Look at you! 30 minutes in and your place looks great, but don’t forget to make time for spring cleaning later. Cleaning is always a bit of a pain, but a clean and organized home turns your home into a calm retreat for you and your guests.


New Year New You

Globally and nationally 2023 brought us wars, earthquakes, fires, the Hollywood writer’s strike, AI, a former president indicted, Twitter morphing into X, the George Santos bevy of lies, Damar Hamlin’s collapse, Alec Baldwin’s manslaughter charge, Barbenheimer, and Swelce. Then the year rushed to a close – as per usual – with a mashup of Halloween, Thanksgiving, Christmas, Hanukkah, Kwanza, and New Year’s. I, for one, am exhausted and ready to start 2024 fresh. On the right foot. Clear headed, and with a light heart. Here is a collection of ways you too can start the New Year on the right foot.

Say No to New Year’s Resolutions. Ahhhh, big sigh of relief. It’s like a get out of jail free card. Resolutions are too easy to break and can be overwhelming when you try to do too much too fast, so just say no.

Walk Every Day. Whether it’s 10 minutes or an hour, walking will give you more energy, lower anxiety levels, and lift your spirits. Walking in nature can be spiritual; a time to clear your mind. Walking on a treadmill at home or at the gym can provide you with the opportunity to connect with great music, a best-selling book, self-help guidance, or a trending podcast.

Commit to Eating Healthy. Cut back on ice cream, sweets, carbs, processed foods, and fast foods and your body will thank you. In today’s world we have plenty of healthy food options from the grocery, delivery services, and many places deliver right to your door. A better diet means you can say goodbye to heartburn, fatigue, and tight clothes.

Purge Your Closet. Here’s our post on how to do just that. If you haven’t worn something in over a year, chances are you are done with it. Treat yourself to a new look in the new year with a couple of new pieces that make you feel great when you put them on. Clothing can lift your mood when you put thought and energy into your style. As in, “Giiirl, you look good!”

Clean Out Your Pantry. Here’s some help cleaning your entire kitchen, and reorganizing it too. You may find something hidden in there with a use-by date of 2008 – YIKES! – so a purge will get you not only a clean pantry, but also prevent accidental food poisoning.  It’s a win-win! The general rule of thumb is: if you don’t remember when you bought something, and there’s no date on it, it’s best to toss.

Apologize. Review 2023. Do you owe anyone a heartfelt “I’m sorry”? If not, good for you. But if there is, do it. Don’t start the year with a heavy heart about something you said or did. Having negative things fill your mind makes life uncomfortable, and you may not even know where the discomfort is coming from. Make it right or let it go.

Finish It. Partially completed projects can weigh you down. Make a commitment to finish projects before starting new ones. You can only keep a few big things going on at the same time, and sometimes dealing with just one life-changing project can keep you occupied and overthinking for weeks. So finish at least one project before you start something new.

Plan Your Year. Get out your calendar, block out your vacation, you’re your reservations, book your family gatherings, give some thought to hosting parties, and be sure to put any big events on the calendar, so everyone in the house can see what’s coming up. Having something to look forward to helps make you happier. Not flying by the seat of your pants throughout the year can be so liberating!

Set Goals. I know what you’re thinking, but goals are not necessarily resolutions. Make ‘em simple ones or complex, but give yourself direction and then make a plan. Embrace the power of written goals. Having your goals in writing is so much more effective than those mental notes. You may not follow this road map exactly, but having something to guide you is better than wandering aimlessly. Even if you don’t achieve everything this year (and knowing that just makes you human), the simple knowledge that you are moving your life forward will be empowering.

Discover Your Sweet Spot. Find the place where your talents and passion intersect, and visit and engage in this place frequently. Promise yourself you will do what you love and not put if off because you’re busy working or are involved in the mundane tasks of life.

Be Satisfied. Choose to be content with what you have. Just because some influencer on Instagram suggests you NEED this or that, remember the cycle of “more is never enough” is destructive. Stuff won’t bring you happiness; connections with family and friends, communing with nature, fulfilling your heart by doing the things you love will bring you peace and joy.

In the new year, start off on the right foot with a new you of good habits. We wish each of you absolute success in making 2024 the best year yet with clear heads, loving hearts, and days filled with good health and happiness. Gushy, but we mean it!


How To Host Thanksgiving In Your Apartment

how to host thanksgiving dinner in your apartment

How To Host Thanksgiving In Your Apartment


The season of turkey, pumpkin pie, football, friends, family, and food baby is just around the corner. If you have more than a couple folks to celebrate with, but not a lot of space to celebrate in, we’re here to help. Hosting Thanksgiving in your apartment will take a bit of ingenuity and careful planning, but it’s certainly doable. Whether it’s Thanksgiving or Friendsgiving, you can keep your event from becoming a stress fest or a hot mess with good advance planning. Preparing a strategy ahead of time will allow you to relax when the big day arrives. Our recent How To Host A Potluck focused mainly on the eats, this How-To host Thanksgiving in your apartment guide will help you optimize seating, refrigerator storage, and more.

Be creative about counter space and storage

In an apartment typically without an abundance of counter space, you’ll have to make every square foot of empty surface space count. One trick is to “recruit” some of your furniture for meal prep. Seriously! You can use your dining table and chairs, coffee table, and the like as surfaces for cooling pots, pies,  and other desserts.

In our Create More Kitchen Storage Space post, we explored many ways to add space-saving solutions for apartment kitchens, such as installing wall hooks to hang pans and cooking utensils. When it’s time to eat, you can set up the food buffet-style in the kitchen or on a piece of furniture away from where you’ll be dining to save space on the table. If that’s not possible, try  using cake stands to elevate some dishes on a crowded table, which will make room for other serve ware underneath.

Ready your fridge

Thoroughly clean your refrigerator before you begin cooking and storing. Throw out any expired food and anything you know you’ll never eat, drink, or use again. Here’s our guide on how to do just that. Ideally, your fridge will be almost empty as you begin to prep your food. This allows for plenty of room to store everything ahead of time. Plus, one of the perks of hosting is that you’ll have leftovers to keep. When it comes to packing your fridge and freezer, don’t forget that you can probably adjust the shelves to make them more efficient. Shift them around to free up space to stack storage containers. Another creative storage solution is to store items in plastic zipper bags. They’re malleable and easy to stack up in a fridge while taking up little space, making them a great way to store things like cranberry sauce, make-ahead gravy, dinner rolls, and pre-prepped veggies.

Prepare food in advance

Allowing yourself plenty of time to prepare is essential when storage and counter space are tight, not to mention when you’re working with only a few kitchen appliances. Start prepping your Thanksgiving menus a full week in advance. A practical solution for making a Thanksgiving meal is to make as much as you can ahead. Figure out what can be put together the day before, and what needs to be made the day of. You can make the pies, gravy, stuffing, and mashed potatoes ahead. Sauces and baked goods can be made the furthest in advance, with most pies and cakes having a shelf life of three to four days. Some sides can be made up to two days out, such as mashed potatoes and make-ahead stuffing.

Then, on Thanksgiving Day, all you need to do is roast the turkey and make the veggies. More prep work in advance means less work and less stress on Thanksgiving Day. This will also minimize bodies in the kitchen, which helps keep your kitchen from feeling cramped and hectic.

Expand your dining table 

Fitting all your guests at a table in your apartment can be tricky as most apartment dining rooms are sized for four people. And maybe this time you’ll decide to invite neighbors to your fete! Try putting several small tables together to create one long one. If possible, make sure they are all the same height and width. Then toss a tablecloth over all of them, and nobody will know the difference! If you don’t have smaller tables on hand, take this opportunity to invest in a few folding tables and chairs that can be easily stored once the holiday is over. If your space is so limited that it doesn’t allow for even a makeshift dining table, no worries. My sister-in-law rents a couple of bar-height tables and puts them in the middle of her living room. No one ever minds standing up to eat, and this dining format really encourages guests to mingle.  Or maybe some people can eat at the table, some on the sofa, maybe even some on the floor. Believe me, where your guests eat is much less important than what they eat and with whom they share the holiday.

Have guests their own (folding) chairs

When I got my first apartment, I moved in with just bedroom furniture. But that didn’t stop me from throwing a Cinco Di Mayo party. The invitation noted that guests should BYOC (bring your own chair.) My friends thought that was a hoot! They each brought a folding chair, lawn chair, or stadium chair, and everyone ate with their plates on their laps. Everyone has a great time despite (or because of?) the untraditional seating.

Rearrange furniture

The dining room isn’t the only space to consider. Even if everyone fits around the table, think about after-dinner relaxation, game-watching, and mingling. Try to balance space for your guests to move with seating to accommodate everyone. This can be accomplished by temporarily removing furniture that won’t be used and shifting couches and chairs to the perimeter of the room. If the day is mild, you can also utilize your patio, deck, or balcony.

 Create a place for coats and bags

Once you have finalized the guest list, decide where your guests’ coats, bags, and boots (if the weather is inclement) will go. Depending on where you live, most people will arrive in coats, and many will have bags. You don’t want these items to take up valuable space in the eating area, and if you’re lucky enough to have an entry closet, it’s probably already pretty full. Your bed can make the perfect place for everyone to lay their coats and bags. Or consider purchasing a coat tree to place by your front door. Spread out an old towel or some brown paper bags to collect any we footwear.

Buffet it

Set food up on one table, buffet style, and let everyone serve themselves. Your buffet can be on the kitchen counter, side table, dining table (if people will be sitting elsewhere), or on a rented folding table. This works especially well if you have a non-traditional seating situation.

Cold beverage storage

Since your fridge will probably be very full, fill your [very clean] bathtub with ice for cold wine, soft drinks, mixers, and beer. Consider adding a big bowl for clean ice service.

 Use disposables

I’m seldom one for recommending single-use anything, but Thanksgiving dinner is an exception – especially if the number of guests exceeds your plate and flatware counts. Using attractive seasonal paper dinnerware, nice paper napkins, and plastic silverware is a very smart option. There will be plenty, even if some guests toss the first plate before going back for seconds, and the cleanup will be significantly easier.  And we do want to make hosting Thanksgiving in your apartment as easy as possible.

Right after COVID, and SO READY to entertain again, I had an usually large crowd (for me) of eight for Thanksgiving. I decided to get some pretty paper and plastic products instead of using my “real” plates and cloth napkins. Everyone loved how coordinated and festive the table looked. I chose dinner, salad, and dessert plates, plus cocktail and dinner napkins. Other than the pots and pans, cleanup was a breeze.

If you prefer to use your own dishes, you can add fall- or Thanksgiving-themed appetizer, salad, and dessert plates with coordinating napkins. If that sounds like overkill, choose pretty Thanksgiving-themed dinner napkins.

Pre-clean

When you host Thanksgiving in your apartment, you will need to clean your place and clean it well. A clean apartment always feels more spacious and inviting than a dirty one. Clea out the fridge, wipe counters and floors, wipe down bathrooms, vacuum, and dust to prepare your home for your Thanksgiving Day guests. You should also guest-proof your home. This may sound paranoid, but even if you know everyone who’s coming well, advance preparations will make you more comfortable in the long run.

  • Help prevent breakage. There’s always the chance some of your things can get broken, especially if children are joining you for dinner. Remove anything valuable or personally important, or that’s low to the ground. Store these things somewhere out of the way to keep them safe.
  • Protect yourself from The Snoop. Some guests like to snoop. Anything you’d like to keep private like medications, mail, or personal items, consider hiding away.

Stock your bathrooms

Keep your bathrooms well-stocked with tissues, toilet paper, personal products, and soap, making sure that extra items are easy to find. Disposable hand towels will prevent one cloth towel from getting overly wet and gross. Be sure your bathroom trash can is in sight. On Thanksgiving Day, set a timer on your phone to remind you to do periodic bathroom checks. Then a quick wipe and swipe will keep your bathroom fresh (because people, as a general rule, are pigs). A thoughtful touch is placing a small bowl of mints on the bathroom counter so your guests can freshen their mouths.

Declutter

Not only is clutter unappealing to the eye, but it takes up precious real estate that could be used for a serving platter, or a few bottles of wine, or an extra chair. One of the simplest Thanksgiving solutions for small spaces is to clear your surfaces of unnecessary items. Leave out just enough décor to keep your apartment feeling cozy and festive and store the rest. You can bring it all back out the next day as you begin to decorate before Christmas. LOL.


The most important thing about hosting Thanksgiving is making your guests feel welcome, cared for, and satisfied with the food and the camaraderie.  Any successful party is as much about lively conversation and laughter as it is good food. People gather during the holidays to celebrate family and friends and to enjoy the company of people they love and enjoy.  No matter what size apartment you have, you can make this Thanksgiving one to remember. Just focus on what you do have to work with, and you’ll do an amazing job hosting Thanksgiving in your apartment.

Garbage Disposal Operation

When I was a kid, and I will be dating myself here, we had a big old white porcelain sink with two basins. I was the dishwasher and my dad was the disposer of garbage. I washed the dishes because whenever my mom did the dishes, she broke at least one thing. My siblings and I used to joke that she filled the sink with hot, soapy water, added everything that was dirty (dishes, glasses, pots and pans), and stirred the lot with a big stick. A strainer in the sink caught any bits of food (or broken glass LOL). Once everything was washed and rinsed, I emptied the strainer into the trash for my father to take out. Good times. Today we have garbage disposals which are, when used properly (and in my humble opinion), a wonder of the world and saviors of dads everywhere. Because garbage disposals operate virtually trouble-free when used properly.

How many things operate virtually trouble-free when used properly? Best of all, they get rid of the muck when you wash dishes by hand, and the food scraps generated during food prep. But these scraps can get tricky if you try and dispose of the wrong thing. And a meal prep with a broken garbage disposal is no one’s idea of a good time in the kitchen.

Here are some helpful procedures and tips that will lead to a long life for your disposal and easy operation for you.

How To Operate Your Garbage Disposal

  1. Run a steady stream of cool water into the sink before turning on the garbage disposal.
  2. Flip the disposal switch to the “on” position before placing any food waste into the disposal.
  3. Gradually feed food waste into the disposal. Avoid putting large amounts of food waste all at once as this may slow the grinding process. Keep hands away from the inside chamber.
  4. Once the food waste has been broken down, turn the disposal off. It usually takes only a few seconds to grind food waste, although it depends on the quantity and type of food waste. The sound of the disposal will change when there is no more food waste in the grind chamber.
  5. Let water run for one or two minutes to flush the drainpipe.

Sounds easy enough, right? But my mother thought her method of washing dishes was easy, and we all know how that turned out. Although the device is easy to use, please take note of the following:

PRECAUTIONS

  • Never put your hand down a disposal when it is running.
  • Do not use hot water when operating a disposal.
  • Never try to put too much through a disposal at once. Slow and steady wins the race.

IN OR OUT?

Garbage disposals are designed to handle just about any type of everyday food waste.  But the topic of what not to put in a garbage disposal is alive and well, usually based on myths and old family stories rather than facts.

A good rule of thumb is: if you can’t eat it, neither can your disposal. Everything you put in your disposal should be biodegradable. But here is a more comprehensive list from the makers of InSinkErator Disposals which contains a few caveats.

Disposals can quickly and efficiently grind most everyday food wastes, including leftover meats, vegetables and fruits, as well as food preparation waste.  The key to keeping a disposal working properly is to follow the proper operation steps and avoid filling the disposal with too much food waste at one time. But do not put these foods in the disposal:

THE LIST OF NEVERS

  • Grease, fats, or oils
  • Fibrous materials (cornhusks, artichokes, potato skins, celery, onion skins, carrot tops, banana peels, tea bags, etc.)
  • Shellfish shells (clams, oyster) or nutshells
  • Expandable foods (rice, pasta, bread)
  • Eggshells, coffee grounds (see below)
  • Hard materials (bones, fruit pits, cigarette butts, wood, glass, plastic, anything metallic)
  • Drain cleaners or bleach
  • Dishcloths

ABOUT FAT, GREASE, AND OILS

These items should never go in your disposal. Instead, put used grease, fat, and oil into a small container like a small bowl or rinsed tin can and refrigerate. Once the fats solidify, toss in the trash.

 ABOUT COFFEE GROUNDS AND EGGSHELLS

Neither of these materials is harmful to a disposal, and will pass through without a problem.  However, problems can arise with household plumbing – especially if it is older, or has not been cleared in some time.

Both coffee grounds and eggshells are sedimentary in nature, if too much is placed in at one time, or if the plumbing is restricted, it can create a clog or a ‘slow drain’ situation.  Too help avoid any problems, feed these materials into the disposer gradually, and utilize a strong flow of cold water to help flush it through the pipes. Or, toss these items in the trash or compost them.

ONGOING

  • Grind a citrus peel or put baking soda down the drain to keep the disposal odor free.
  • Grind ice cubes to clean the unit walls and blades.
  • Place  the disposal cover or sink strainer over the drain opening when the disposal is not in use, and leave in this position to prevent foreign material from accidentally dropping into disposal.

 TROUBLESHOOTING

If the motor has stopped due to overloading, turn the disposal off.  Wait three to five minutes, and then push the red reset button (located under the sink on the unit itself).  Then follow normal operating procedure.

If the disposal has jammed, turn the power switch to the “off” position before attempting to remove an object.  With tongs, remove any objects that might be obstructing the free movement of the blades.  In many cases, you can insert a broom handle into the mouth of the disposal and turn it in a circular pattern to free the blades.

When movement is restored to the blades, push the reset button on the disposal unit.  Then follow normal operating procedure.

Of course, if you are a resident in a Fath Properties community, and ever run into an issue you cannot resolve yourself, a member of our professional, efficient maintenance team will be happy to help! Just call your leasing office and we will schedule a friendly service tech to come to your apartment home to make everything right.


Your Local Hero

Distilled White Vinegar. Your New Local Hero.

Trending: ecofriendly everything.

Are your social media feeds brimming with ads for new products designed to do a better job of cleaning all kinds of specific items with minimal packaging waste? I know mine are. We could all spend a fortune and clutter up our storage spaces with products galore. Seems counterintuitive, doesn’t it?

How about an alternative? It’s nothing new, newfangled, expensive, or “only available on line”. In fact, I’d be willing to bet you have a bottle in your cupboard. Let me reintroduce you to your new local hero: distilled white vinegar.

My admittedly dusty bottle of white vinegar sat in the back of my cabinet unused for ages. Not quite sure why I bought it; it just seemed like one of those must-have pantry staples.  But then when I moved into an old (circa 1896) apartment in the historic district of Newport, KY and my bathtub drain ran super slow, Google taught me that white vinegar would keep my drain running clear. More on that later.  That Google search opened my eyes to the almost magic trickery of distilled white vinegar which, as it turns out, is a workhorse in the kitchen, bathroom, garden, and more! Bonus: it’s cheap.

Here are just a few of the tricks white vinegar has up its sleeves:

All-Purpose Cleaning Solution. In a spray bottle, combine 1 cup of distilled white vinegar with 3 cups of water and use on just about everything. Don’t love the smell of vinegar? Let vinegar sit in a jar with strips of lemon zest and a spring of fresh thyme for a week or two in a sunny spot, then strain. Mix with water as described above. This can be done with any herb or fragrant plant like lavender or eucalyptus, just avoid anything that colors the vinegar if you plan on using it on a white carpet.

IN THE KITCHEN

Stinky Sink Drain. To keep kitchen drains fresh, pour 1 cup of distilled white vinegar down the drain once a week. Let it sit for 30 minutes and then rinse with cold water. Ahhh, fresh!

Dishwasher. Pour a small amount of white vinegar into the rinse-aid dispenser of your dishwasher. This will help prevent a cloudy residue on your glasses and keep cutlery-free of smears and streaks. And, once a year or so, more often if you have hard water, pour a cup of vinegar into an empty dishwasher and run it on a short cycle to remove lime and soap build-up.

Stainless Steel Cookware. Scrub with a mixture of white vinegar and salt.

Cutting Boards. Undiluted white vinegar cleans and disinfects cutting boards, especially those made of wood.

Microwave. To remove smells or cooked on food, combine ¼ cup of distilled white vinegar and 1 cup of water in a microwave-safe container. A slice of lemon will add a fresh, clean scent. Microwave on high until the mixture comes to a boil and steam forms on the window. Let cool slightly, then wipe away any food residue.

IN THE LAUNDRY

Stain Treatment.  For removing stains like mustard, ketchup, tomato sauce, grass, and underarm deodorants, spray a little white vinegar onto the stain before laundering. Soaking whites in vinegar will help bring back their whiteness.

And just like in your dishwasher, vinegar helps to break down detergent when added to the rinse cycle, making clothes fresher, more colorful—and it gets rid of funky towel mildew. One cup should be plenty; add less when using a front-loading washing machine.

WARNING: Never add vinegar when using chlorine bleach; it will create noxious chlorine gas, a potentially deadly compound.

Laundry Softener. If you’ve run out of fabric softener, simply add about three tablespoons (or a scant ¼ cup) to your washing machine dispenser. Your clothing will be softer, but won’t smell like vinegar because of the limited measurement.

IN THE BATHROOM

Window/Mirror/Shower Door Wash.  Spray the all-purpose solution on the glass surface and wipe it off with a clean, lint-free cloth or a balled-up piece of newspaper (does anyone still read the newspaper?).

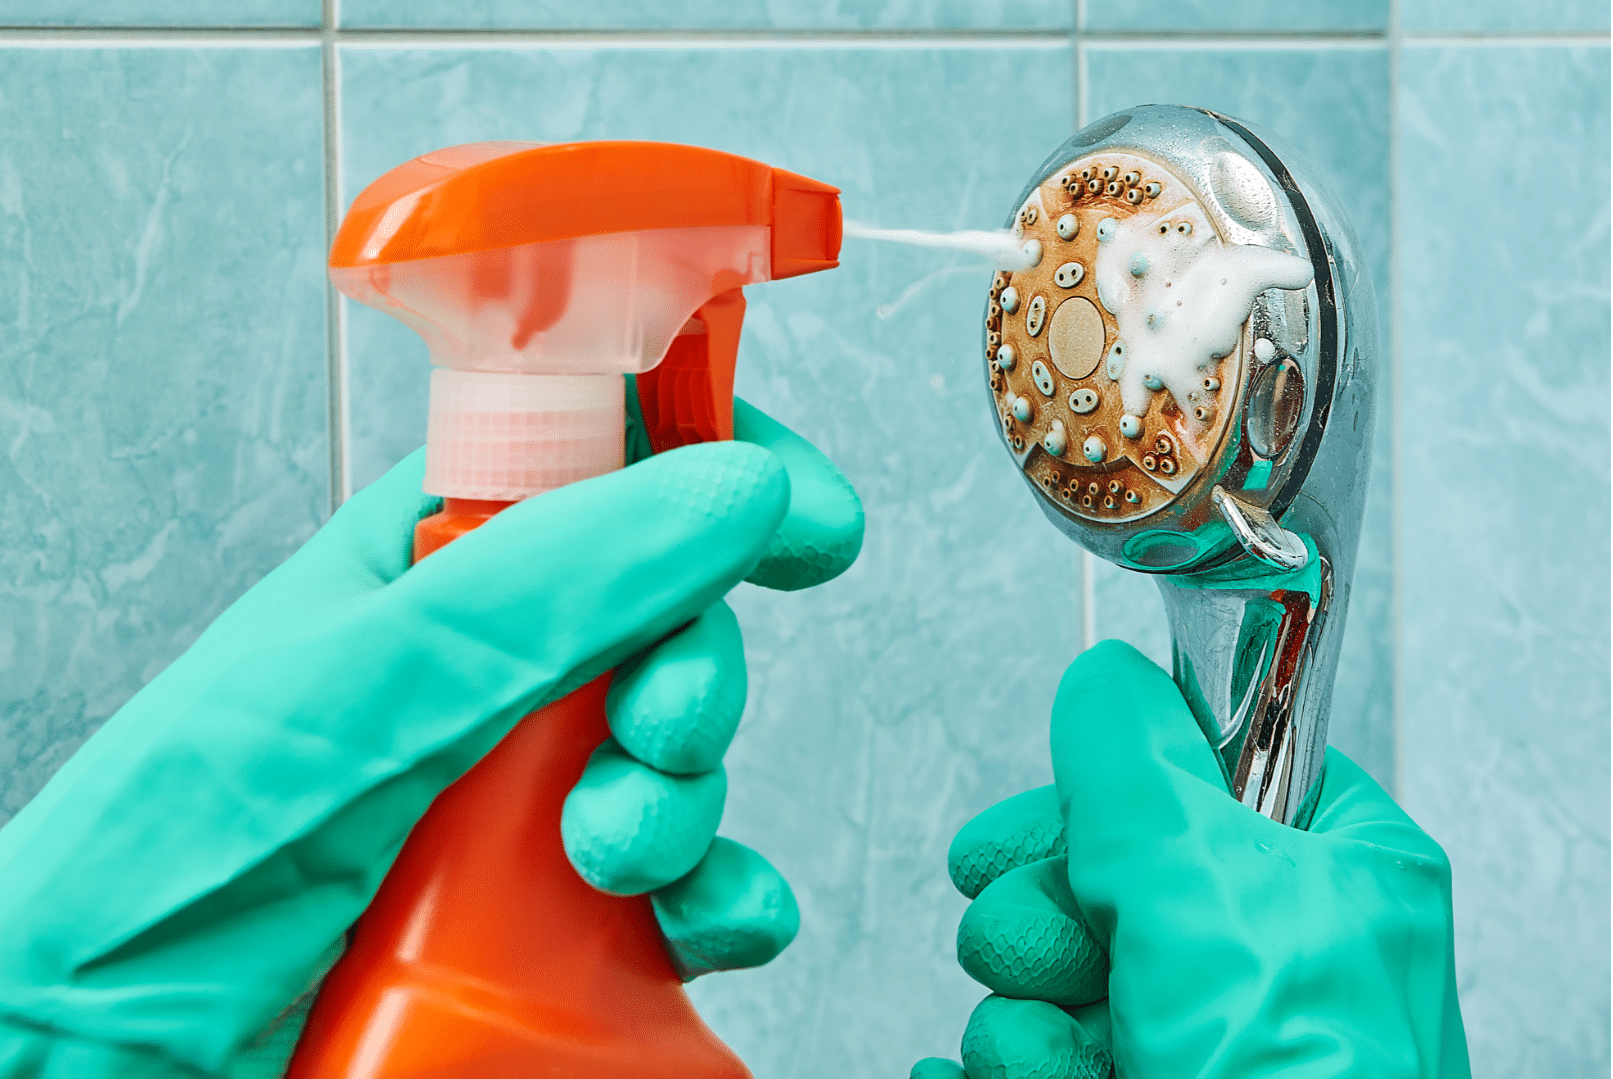
Clean Faucets & Showerheads. White vinegar is effective in removing lime scale especially when mixed with hot water. Wrap your showerhead in a plastic bag of warm, white vinegar and secure it with a rubber band. Let it soak for an hour before rinsing it clean. Spray faucets, let sit for a bit, then wipe clean. If your toilet bowl, bathtub, or sink has lime deposits from hard water, soak or spray vinegar onto the grit. It should loosen the deposits enough to remove them easily.

Tile & Grout. Spray full strength white vinegar on mildewed or scummy grout and tile. Wait for about an hour, and scrub with a soft bathroom scrub brush.

Keep Drains Clear. To keep your sink or bathtub drain running clear, use a funnel to pour a half cup of baking soda down the drain followed by one cup of white vinegar. The concoction will foam up like crazy, so this can be a fun “science experiment” with the kids. Let sit until the foaming action stops, then rinse with hot water (this step should be kid-free). Not only will it clear your slow running drain, but it will also destroy any odor-causing bacteria.

IN OTHER PLACES

Pet Potty Accidents. Clean and refresh the soiled area by spraying vinegar. This may also deter your pet from soiling the same area. Read more in our blog post about cleaning carpet stains here.

Remove Stickers. Who hates price tag stickers??  They are a pet peeve of mine. I especially hate it when a price sticker is placed on the glass of a picture frame or in a very conspicuous place on a pretty vase. Dab white vinegar on the spot and let it sit for a minute or two. Afterward, it will be easy for you to scrape away the excess paper and gunk. And much less expensive than Goo Gone.

Relieve Sunburn Pain. No one ever plans a sun burn, so aloe is usually not close at hand. Instead, soak a washcloth in a 50/50 solution of distilled white vinegar and water and dab on your sunburn. Reapply as the washcloth warms. Or, add 2 cups to your bathwater.

Fresh Flowers. Add a few tablespoons of vinegar to your flower water to make your flowers last longer. When the water gets cloudy, dump it out and repeat.

So there you have it. Well not all of it, because the uses for white vinegar go on and on!

In closing, I’ll mention that vinegar is an acidic liquid originally created from wine gone bad. Wine gone bad is a very, very sad thought until you think of all the easy, effective, and inexpensive things that can be done with it.

Now go buy a gallon. Who doesn’t need a hero right now?

Resources: https://facty.com, www.foodandwine.com, www.thespruce.com


Spring Cleaning Extravaganza – Kitchens

Spring Cleaning Extravaganza – Kitchen

We’ve sped through the backstretch and are rounding the corner to the finish line in this final edition of our Spring Cleaning Extravaganza! We’re oh-so-close to a tidy, spotless, well-organized home that will allow us to embrace the spring season and be well-prepared for summer fun. Thus far our journey has made our windows and blinds sparkling and dust free, dust has been removed from every nook and cranny in our home, and our bedrooms have become beautiful, calm, clean, and relaxing havens, and our bathrooms are gleaming. Next, we’ll tackle what is arguably the most time consuming room in the house to clean – the kitchen – with our spring cleaning extravaganza – kitchen edition.

As always we’ll begin by assuming the usual suspects aka cleaning supplies.

SUPPLIES

THE CABINETS

  • Empty cabinets and drawers. Do one section at a time.
  • Vacuum accumulated dust, and dirt from the shelves and drawers.
  • Dab a microfiber cloth with a mild cleanser. Wipe down the shelves and the inside and outside of the door. Use a clean toothbrush to treat the corners and other small crevices. Let dry completely before restocking.
  • Wipe down cabinet hardware or remove knobs/handles and wash in hot, soapy water.
  • Wash any storage bins, silverware trays, and drawer dividers and thoroughly dry.
  • As you restock shelves and drawers, consider tossing any chipped or cracked items. Organize everything neatly. Toss any pantry goods, spices, and other foodstuffs that have expired or exceeded their shelf life.

THE BACKSPLASH

Some of us have some kind of tile between the counter and upper shelves; others have wall surface. Whatever you have, this space can get grimy and greasy from cooking and splattered during food preparations. Cooking is messy!

  • Remove outlet- and switch-plate covers and place in hot soapy water. Wash, rinse, set aside to dry. If the covers aren’t too dirty/greasy, use an all-purpose cleaner and paper towel.
  • Soften grease and grime with warm water, then clean with a sponge soaked in warm, soapy water, and finally dry with a dishtowel to avoid any leftover residue that would attract dirt and grime. For stubborn stains, use a baking soda spot treatment or a spritz of distilled white vinegar.

THE STOVE AND OVEN

Stovetop

  1. Remove control knobs and drip pans and soak in hot sudsy water.
  2. Use hot, soapy water to clean the stovetop and control panel. If your stove has a glass top, apply glass top cleaner with a soft cloth or sponge. Buff with a clean, dry, microfiber cloth.
  3. Shine all surfaces with Windex and a clean paper towel.
  4. Rinse and dry knobs and replace them on the control panel.

Oven

  1. Mix about 3 tablespoons of baking soda, a bit of water, and some white vinegar in an oven-safe dish until it forms a paste.
  2. Dab the dirtiest areas with the mixture.
  3. Place the remaining mixture in the center of your center oven rack.
  4. Turn the oven to around 212 degrees Fahrenheit.
  5. Leave the mix in for around 45 minutes.
  6. Turn the oven off and allow it to cool for a bit.
  7. Wipe down the oven with a wet sponge to easily remove build up. Rinse the sponge frequently.
  8. With a freshly rinsed sponge, use clean water to give the oven interior a final rinse.

Oven door glass

  1. Mix a paste of baking soda and water and apply a thick layer to the glass.
  2. Allow to sit for 20 minutes.
  3. Use a scraper to remove the crud.
  4. Wipe the glass with white vinegar to neutralize any remaining baking soda.
  5. With a freshly rinsed sponge, use clean water to give the oven interior a final rinse.

Oven drawer

  1. Empty the drawer and vacuum away all loose dirt and crumbs.
  2. Wipe clean with all-purpose cleaner and a paper towel.

Vent hood

  1. Wipe it down with an all-purpose cleaner or hot soapy water.
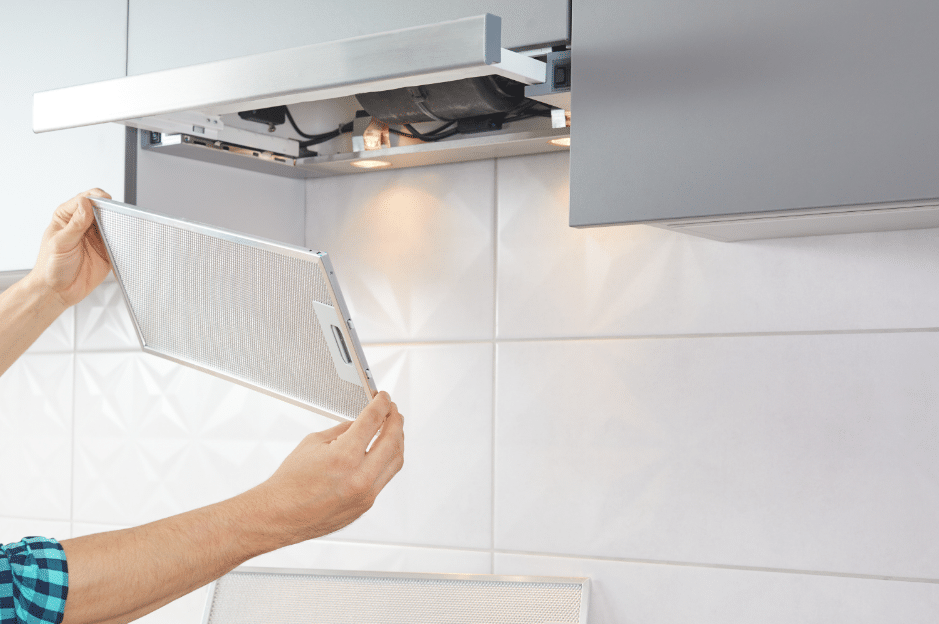
  2. Remove vent filters and wash in hot soapy water. Rinse well. Allow to air dry before reinstalling.

Microwave

  • Fill a microwave-safe bowl with two cups of water and two tablespoons of vinegar or freshly squeezed lemon juice.

Tip: Add a small wooden spoon to the bowl or place a toothpick in the mixture. This will allow bubbles to form against the wood as the water heats up, preventing the water from becoming superheated and “exploding” into a boil.

  • Place the mixture in the microwave, close the door, and microwave on high for three minutes. Wait an additional 15 minutes without opening the door.
  • Using potholders carefully remove the bowl from the microwave and set it aside—don’t pour it out just yet.
  • Remove the turntable tray to wash it in hot soapy water in the sink.
  • Dampen a clean microfiber cloth with the vinegar mixture and wipe down the interior of your microwave. Use a non-scratch scrubbing pad for any stubborn spots or hard-to-reach crevices.
  • Spray an all-purpose cleaner onto a clean cloth and wipe down the control panel, sides, top, and bottom. (Never spray directly onto the control panel.)

THE FRIDGE

For a complete, in-depth how-to for cleaning your fridge, please visit to our blog post dedicated to that subject here.  In a nutshell:

  • Start at the top.
  • Remove everything from a shelf and see just how messy you (blame the kids! Blame your S.O. Blame the dog!) have been.
  • If there are spills, carefully remove the glass from the frame (or brackets, depending on your fridge) and clean both sides, as well as the edges, with the vinegar solution.
  • Dry with paper or microfiber towels.
  • Wash the frame that holds the glass before replacing the entire shelf. For that, I usually head to the sink and use dish soap and hot water.
  • If there aren’t any caked-on spills that require shelf removal, simply run a scrubby sponge under hot water. Give the shelf and fridge walls an initial scrub to loosen any gunk. Then, spray it all down with cleaner and give it another scrub, before wiping everything clean with a microfiber cloth.

NOTE: When you’re not actively working in the fridge, close the door to keep everything as cool as you can.

  • Remove the drawers and wash them in the kitchen sink with soap and water. If they won’t fit in your sink, spray them down, wipe them clean, and dry them before putting them back. While the drawers are removed, wipe down the walls and “floor” of the fridge with the vinegar cleaner. Use the same method for the shelves inside the doors.
  • Wash down all items you removed from the fridge to clean it. Check all expiration dates and toss anything that’s expired.
  • Use a clean microfiber cloth and vinegar spray to wipe down the outside of the doors, including the edges and seals, and don’t forget the handles! The worst area will undoubtedly be to top of the fridge as it tends to collect greasy residue from cooking and dust. I like keeping a kitchen towel on top that can just be thrown in the wash.
  • Clean under the fridge.
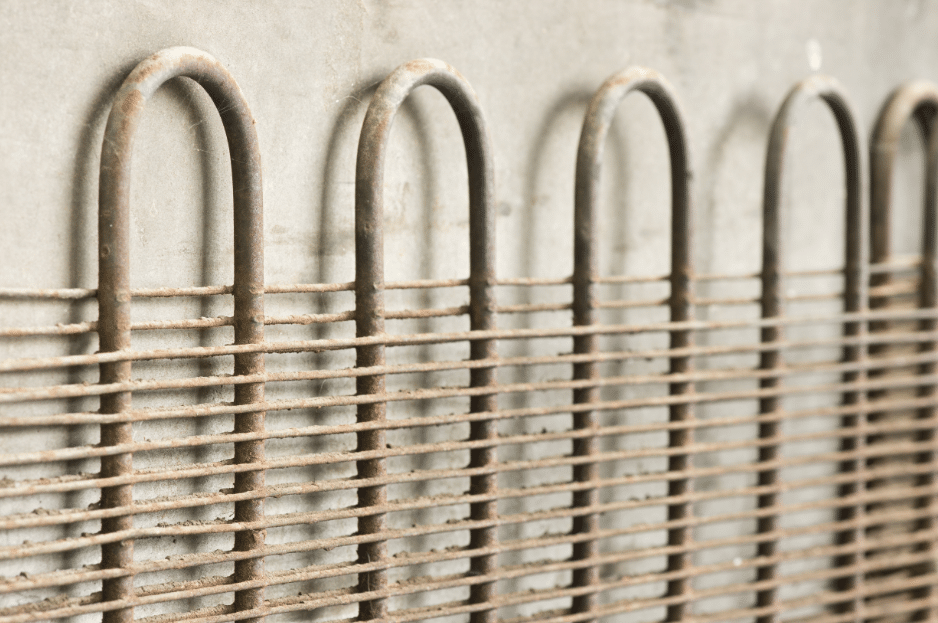
  • Vacuum the coils on the back of the fridge.


THE DISHWASHER

Filters

  • If you have a removable filter, make a habit of regularly checking the cover at the bottom, underneath the twirling spray arm. Although the holes let food through, the filter is designed to block larger, harder debris. Cleaning is easy: just pick the pieces out by hand.
  • If you have a removable filter, there is generally a circular piece at the bottom that can be turned when you want to clean the fine-mesh basket strainer underneath. The circular piece often fits into a flat piece of metal mesh with coarser holes that lifts out for cleaning.
  • Clean each part by rinsing it out in the opposite direction from the way the water flows when the dishwasher is running. An old toothbrush or sponge can loosen debris, along with soaking in soapy water or vinegar. Once you’ve removed the mesh, clean the area underneath.

Air Gap

  • The air gap is next to the sink, higher than the dishwasher, and has a liftoff cover. Below that is a part that’s plumbed to both the drain line from the dishwasher and a drain line that connects to the sink.
  • Remove the cover and clean debris from the plastic part underneath.

Nozzles

  • Clean nozzles on the spray arms by removing each arm (most dishwashers have upper and lower ones). Use a narrow wire, a pick, or sturdy needle to clean out the holes while running water thought the central opening on the arm.

Exterior

  • A dishwasher usually cleans the interior on its own, but the exterior is up to you. You can never go wrong by simply wiping away food spatters with a soft, slightly damp cloth, then drying the surface with a second soft cloth.

GARBAGE DISPOSAL

The easiest job you’ll do all day!

  • Sprinkle a half-cup of baking soda into the opening of the garbage disposal.
  • Pour in a cup of white vinegar and allow it to sit for 10 minutes.
  • Turn on the garbage disposal and allow hot water to rinse away the baking soda mixture.
  • As an alternative to baking soda and vinegar, use chopped citrus peels.
  • Pour in two cups of ice and a cup of salt, and then run the disposal to clean the blades.
  • Using a soapy sponge, wash the disposal’s rubber splashguard (also known as a gasket or baffle).

THE SINK

I always do the sink last as you’ll need it for every other step of the kitchen spring cleaning.  There’s a clean sink and then there’s a sparkling clean sink. To me, the kitchen is not really clean unless the sink is gleaming. Follow these steps once a month to keep your sink looking like you have a maid. Before you get started, clean your dish drying rack. Place it in a sink full of hot, soapy water and give it a good scrub with your scrub brush.

  • Generously sprinkle Bar Keepers Friend across the bottom of the sink(s).
  • Use a sponge to scrub the walls and bottom of the sink, and the faucet. Get in the tiny space between the sink and the counter and in the openings to the drain and garbage disposal. Don’t forget to wash the sink drainer and disposal cover.
  • Rinse with clear water.
  • Use your sponge to blot up the water until the sink and faucet are just about dry.
  • Spray with stainless steel cleaner.
  • Polish with a dry paper towel or microfiber cloth.

process for cleaning a stainless steel sink

COUNTERS

  • Wash counters with hot soapy water or all-purpose cleaner. Then dry with a paper or cloth towel.

FLOORS

  • If you have a washable rug, now is the time to wash and dry according to manufacturer’s instructions.
  • Vacuum or sweep floors.
  • Clean baseboards and any quarter round trim. A used dryer sheet works great in removing dust. Use soapy water and a sponge to remove any built-up dirt.
  • Damp mop with Swiffer Wet or your mop and cleaning solution of choice.


And that, ladies and gents is that. We’ve crossed the finish line of our spring cleaning extravaganza with this kitchens edition. At least until the next person comes home with dirty shoes, leaves toothpaste residue in the bathroom sink, or is less than neat while making dinner. But that’s our wonderful, messy lives with the people we care about. At least deep down our home is clean – and with that – our minds clear of “must-clean clutter”.

Thanks for sharing this spring cleaning journey with me!