Spring Cleaning Extravaganza – Bathrooms


In the wee hours last Monday morning, most folks in the USA grumbled as we lost an hour of sleep during the annual “spring forward” time change reminding me that we’re ever closer to the Spring Equinox on March 20. This Spring Cleaning Extravaganza’s intention was that we would welcome spring with a tidy, spotless, well-organized home and a light heart ready to embrace the season. Thus far our journey has made our windows and blinds sparkling and dust free, dust has been removed from every nook and cranny in our home, and our bedrooms have become beautiful, calm, clean, and relaxing havens. Next, we’ll tackle what is arguably the worst room in the house to clean – the bathroom. Our spring cleaning extravaganza continues with tips, tricks, and a checklist to help you make your bathroom sparkling clean.

Think happy thoughts trying to undermine the gag factor of bathroom cleaning, and assemble the usual suspects – aka cleaning supplies and products.

SUPPLIES 

Click the links to find the best product in each category. You’re welcome.

PROCESS

Clean The Slate

  • Remove everything from the bathroom counter, shelves, ledges, back of the toilet and place in a basket. Place the basket outside the bathroom.
  • Remove any bath mats and/or bath rugs, the shower curtain and its liner, and all towels. Launder as per manufacturer’s instructions.
  • Move the trashcan, scale, and anything else that sits on the floor.

Dust Top to Bottom

  • Dust vents with a dry rag, or vacuum cleaner detachment (a compressed air cleaner really gets in there).
  • Wipe off all ledges, windowsills, and shelves with a dry rag.
  • Dust light fixture covers and the shower curtain rod.

Wipe It Down

  • Wipe all bathroom surfaces with a wet, soapy sponge or spray multi-purpose cleaner on the below items, let sit for a minute, and then wipe residue with a clean, wet sponge or paper towel:
    • Vents (careful not to get vent interior wet)
    • Sink bowl and faucets
    • Walls
    • Light switches
    • Countertops (don’t forget the underside of ledges)
    • Showerhead, faucets (don’t forget the aerator – where the water comes out), and handles
    • Shelves
    • Toilet base, back, seat. handle (now is a good time to tighten base and seat bolts if loose)

Scrub The Gunk

  • Use a bleach/water combo (¾ cup bleach to a gallon of water), disinfectant spray, or DIY baking soda solution on your tile and grout shower walls and/or shower floor to scrub away any visible mildew, mold, or discoloration. TIP: remove water from the wall tile and tub with a squeegee after every shower and leave your shower curtain open until the tub area is dry. This will help to prevent the grown of mold and mildew. Move tips for cleaning your shower are here! Detailed tips for keeping grout and tile clean are here.
  • Wipe your porcelain tub with a Mr. Clean Magic Eraser Bath. It works great on hard soap scum.
  • Use a wet soapy sponge to wipe down shower curtain rod and rings.
  • Using multi-purpose cleaner or DIY baking soda scrub, thoroughly scrub sink bowl, drain, and faucet.
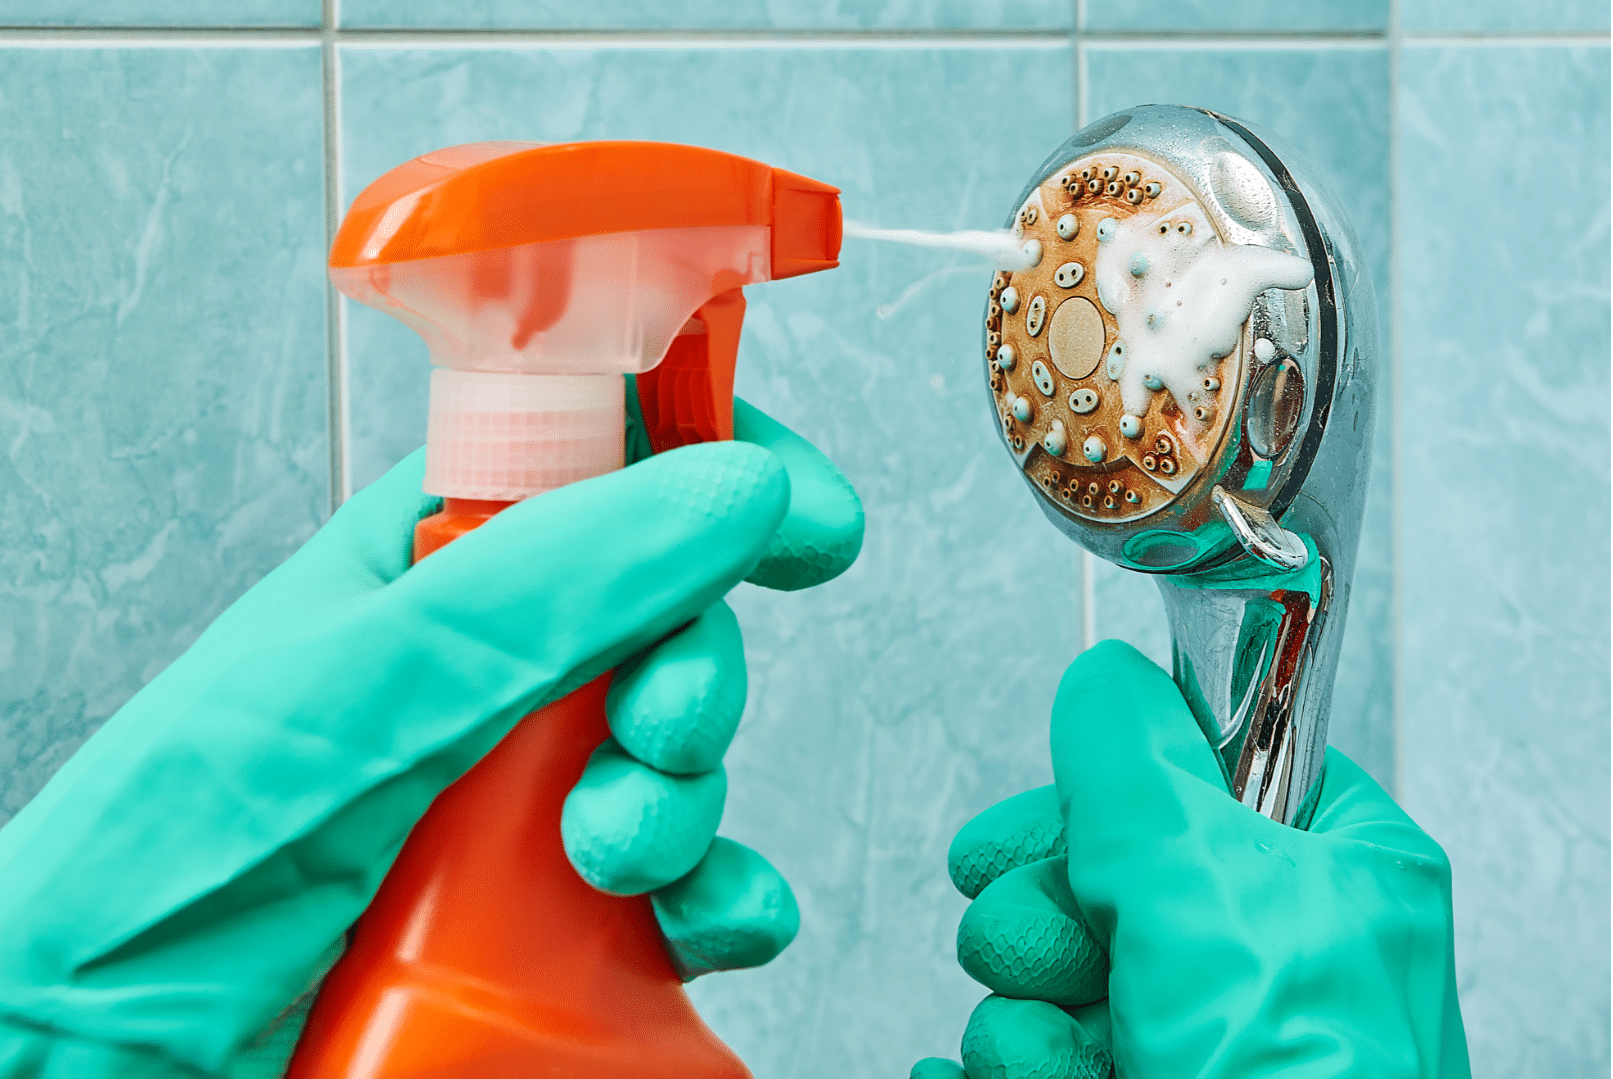
  • Use your bristle brush with bathroom cleaner to scrub the shower head. Be sure to scrub the aerator where the water sprays out. See tips for descaling below in the Miscellaneous section.
  • Scrub toilet bowl, seat, and area around the bolts with bowl. TIP: to prevent an accumulation of liquid in your brush holder, let the brush hang over the bowl with the seat closed until dry.

Shine

  • Using glass cleaner and paper towels to clean and shine all windows, mirrors, glass surfaces, light fixture covers, cabinet handles, doorknobs, and hinges.
  • Spray inside and outside of shower doors with glass cleaner and wipe clean with a squeegee.

Floor & Baseboards

  • Use a Swiffer dry or a vacuum to collect all loose hair and dust from the floor.
  • Wipe down baseboards (a used dryer sheet works great on this job!)
  • Remove the floor vent and vacuum both sides of the vent along with the airway below.
  • Wipe the doorstop.
  • Wet mop the floor with a Swiffer Wet or mop, then let dry.

Sanitize

  • Spray disinfectant such as Microban 24 Bathroom Cleaner on hard, non-porous surfaces like you countertop, shower stall, bathtub, toilet exterior, sink basin, faucets, handles, and doorknobs.

Miscellaneous

  • Unclog the drains, if necessary. A monthly treatment with white vinegar and baking soda keeps drains clear. Simply sprinkle about 1/2 cup of baking soda in your tub and/or sink drain, then pour a cup or two of white vinegar on the baking soda. This will cause a bubbling reaction (which your kids will love) and will clear a slow drain. Rinse with hot water.
  • Wash the toilet brush and its holder in hot, soapy water.
  • Empty the medicine cabinet (if you’re lucky enough to have one) and discard expired medications and cosmetics.
  • Restock the hand soap.
  • Throw your toothbrush caddy and soap dish in the dishwasher.
  • Clean makeup brushes.
  • Descale the showerhead
    • If your metal showerhead is clogged with scaly mineral deposits, place it in a pot with a solution of one part vinegar to eight parts water, bring it to a boil, and simmer for 15 minutes. If you don’t want to take the shower head down, or if the shower head is plastic, fill a zipper bag with a solution of equal parts vinegar and hot water, tie it around the showerhead and soak.
  • Clean and organize drawers and cabinet under the sink.
    • Toss out expired sunscreen and old cosmetics
    • Vacuum wipe it clean with a damp cloth
    • Treat yourself to inexpensive trays or bins to help keep these spaces tidy.
  • Clean the filter on your hair dryer
  • Apply Rain-X to shower doors
  • Clean your toothbrush holder
    • If dishwasher-safe, just pop it in with a load of your dishes, or hand-wash it with hot soapy water, rinse, and wipe it with a disinfecting wipe.

Whew! We did it!! Now comes the easy part. Put out fresh soap, towels, and rugs; rehang the shower curtain and its liner. Place all your personal grooming tools back in their designated spots, and redecorate the room with the pretty things you love on shelves and counters. Don your sunglasses because the glare of your sparkling clean bathroom will be blinding.  LOL.


Stink Bugs, Well, Stink


We interrupt our Spring Cleaning Extravaganza series to bring you an important announcement: Stink Bug Season has arrived and those pesky critters will be around to annoy us and gross us out through September. And stink bugs? Well, they stink.  In more ways than one. I don’t know about you, but I am seriously weirded out by the brown marmorated stink bugs. They look so…prehistoric, are so…ugly, and they can be so…stinky. Removal of these unwanted visitors is assigned to another person in my household who does not have the same aversion as me. But what to do if you live alone or everyone at your place is equally reluctant to deal with these creatures? We’ve done a bit of homework to help you sort it all out. You’re welcome.

SEARCH AND DESTROY

Indoors the creatures tend to congregate on upper floors and in tight spaces. That’s why they often tuck into drapery folds and walk along the tops of walls. Typically they will gather on warm, west-facing walls and enter buildings via cracks and crevices. Once they find an ideal spot, they release pheromones, chemical signals that beckon more stink bugs to join the party.

So what do you do when you’re just trying to have a nice evening binge-watching Netflix when you spot a stink bug (besides, if you’re like me, scream your fool head off??)? Sadly, chemical pesticides and insecticides are not the answer. Horrifyingly, few actually work to kill these bugs and they often raise from the dead a few days later. And if you do manage to kill them, their bodies may attract other insects to feed on them. So put down your phone, Virginia. Your landlord or local pest control company is not going to be the best solution. Especially since most apartment communities offer visits from pest control companies on a periodic basis, and scheduling pest control is seldom immediate, you’ll want to get rid of these pests now.

Instead, try one of these techniques for fast and easy results. I don’t know about you, but when it comes to insects, I’m all about fast removal.

Natural Pesticide

Fill a spray bottle with a 50-50 concentration of white vinegar and water. Then, add a small squirt of dishwashing liquid and get to work! This mixture is highly effective and safe, though it takes more time to kill the bugs than typical insecticides (requiring 30-45 minutes.)

Essential Oils

Here’s a great method that allows you to kill two birds with one stone. Make your home smell great and banish stink bugs at the same time. If you are following along with our Spring Cleaning Extravaganza, you may already have essential oils on hand. Simply mix 10 drops of mint essential oil with 16 ounces of water and spray at interior entry zones like windows and doors.

Garlic Spray

How about another way to kill two birds with one stone? Get rid of vampires (LOL) and stink bugs in one swell foop! [Good grief, it’s fell swoop. My father used to say swell foop (along with a myriad of other malapropisms we referred to lovingly as “Scoopisms”.] Combine two cups water and four teaspoons of garlic powder or a handful of garlic cloves and spray on indoor windowsills where these creepy crawlies are likely to enter your home.

Paper Towel

Grab a paper towel along with your designated stink bug killer (DSBK). If you don’t have a DSBK, you’ll have to brave this on your own thus becoming my personal hero. Ever so gently pluck the bug (do not squish) from wherever it has landed and flush the bug down the toilet. Do not flush the paper towel or you will have a toilet back up to deal with as well as stink bugs and a human can only take so much. See below section on the importance of not squishing.

Vacuum

You can also use your vacuum if you have a wand attachment, but proceed with caution. This method only works for vacuum cleaners with bags. And you’ll need to throw the bag away immediately to prevent a stink bomb from developing. Maybe use this one only in a dire emergency. (But isn’t any visible insect a dire emergency?!?)

Soapy Water

A stink bug’s natural reaction to any perceived threat is to drop straight down. Clearly, they are not too bright. Fill a wide mouth jar with soapy water (add some vinegar for extra killing power), place it underneath the pest, and most often it will drop right into the suds and drown.

Lint Roller Sheet

Cover a dry sweep mop head with a lint remover sheet (which again you may already have if you’re following along with the Dusting Edition of our Spring Cleaning Extravaganza). Use it as a long-handled stink bug catcher. It’s perfect for grabbing any high-climbing bugs. But be careful not to squish. See below.

Should I Squish A Stink Bug?

Squishing them is not an ideal solution. In fact, it’s the worst. Whether threatened or not, stepping on or swatting a stink bug is likely to release their stinky spray, resulting in a pungent odor that will fill the area where they were killed. Eww.

What Happens if a Stink Bug Releases Its Scent?

While seemingly innocuous, killing a stink bug can have lingering effects. Not only does the chemical produced by stink bugs smell, but it also releases pheromones that attract other stink bugs. With numerous stink bugs roaming through your home, it’s only a matter of time until you’re stuck with a smelly infestation!

PREVENTION

Soapy Water

Combine equal parts hot water and dish soap in a spray bottle and spray on windowsill entry points. Not advisable, however if your windowsills and window frames are wood.

Dryer Sheets

Stink bugs dislike dryer sheet odor, so rub dryer sheets on window screens and windowsills as a preventative measure. If you see holes in your screens and you are a renter, alert your management office for assistance patching or replacing the screen.

Drown By Night

Before bed, fill a wide pan with soapy water and place it in the room with the most stink bugs. Place a small light so it hangs over the dish. Obviously, you do not want the light/lamp to touch the water. Overnight the stink bugs will flock to the light, fall into the suds and drown.

Block Points of Entry

If you see cracked seals around utility entry points, doors and windows, joints where two different materials meet, like wood and concrete block or wood siding and brick, caulk the cracks as needed. Check weather stripping and sweeps on doors and look for gaps. If you are a renter, alert your management office and request assistance. Homeowners, don your tool belts or call your local handyman.

Wishing you days and months of stink-free and bug-free enjoyment of your home – unless of course, you wish to train them so you can make a million dollars on American’s Got Talent, or keep them as pets (pet fees may apply LOL).


RESOURCES: The Pest Rangers, Terminix, Orkin


Beautiful Bedrooms – Spring Cleaning Extravganza


Our Spring Cleaning Extravaganza Continues With Bedrooms

So far on our spring cleaning journey we’ve made our windows and blinds sparkling and dust free, and dust has been removed from every nook and cranny in our home. Next, we’ll tackle each room one at a time starting with a deep cleaning of the place where we spend a third of our life – the bedroom. Today we’ll make our bedroom beautiful.

Just as with our dusting segment, we’ll be cleaning top to bottom in our bedroom/s. Let’s get started!

Step 1. GATHER SUPPLIES

Combine these ingredients and pour them in a spray bottle:

    • 2 cups water.
    • 1/2 cup white or cider vinegar.
    • 1/4 cup rubbing alcohol 70% concentration.
    • 1 to 2 drops of orange essential oil for smell (optional)
  • Glass Cleaner
  • Baking Soda
  • Essential Oils Did you know? Lavender oil is a sleep aid. Read more here.
  • Furniture polish Be sure to read labels and use one appropriate for your furniture.
  • Depending on the type of floors you have, a vacuum or Swiffer wet and dry.
  • Clothing donation bags or storage boxes

Step 2. CLEAR ANY CLUTTER

  • Gather and toss any trash into the trash bag/can.
  • Remove clutter on all visible surfaces, including shelves, dresser top, night stands, floor, bed, chair, desk. Put anything that’s just out of place away. If items belong in another room, place them in the basket to address later.
  • Organize drawers and closets removing any items ready to donate, store, sell, or toss. Place those items in donation bags, storage boxes, and/or your trash as appropriate. A good rule of thumb for most items: if you haven’t worn it in the last year, get rid of it.

Step 3. DUST

  • If you’ve already completed the Great Dusting segment of our Spring Cleaning Extravaganza, lightly dust any accumulation since then (and good for you!).
  • If you’re just now dusting, use your Swiffer to dust the ceiling, walls, and doors (both sides, top, and trim). Remember to start at the top an work your way down.

Step 3. WASH

  • Wash down walls with your Swiffer Wet.
  • Wash your doors, doorknobs, and light switches using a damp microfiber cloth.

Step 4. CLEAN LIGHT FIXTURES

  • Dust lampshades with the lint roller.
  • Clean lightbulbs, lamps, and any light fixture with the Swiffer duster or microfiber cloth. Be sure light bulbs are cool before cleaning. If bulbs are especially grimy, use a bit of your household cleaner and wipe with a paper towel or microfiber cloth.
  • Wash any glass globes in hot soapy water and hand dry to avoid spots.

Step 5. CLEAN WINDOWS AND WINDOW COVERINGS

  • If you’ve already completed the Windows and Blinds segment of our Spring Cleaning Extravaganza, you can skip this step. YAY!
  • If not, follow the above link for tips and tricks on achieving sparkling clean windows.

Step 6. THE BED

Of course, the point of our spring cleaning extravaganza is a beautiful bedroom! The bed is key. See inspiration for your beautiful bedroom at the end of this post.

  • Remove and wash all bed linens, including pillows, mattress toppers, blankets, comforters, and bed skirts. Be sure to check tags to make sure everything is washable. You may need to set some items aside for dry cleaning or to take to the laundry where there are jumbo washers and dryers. Did you know that some of these places will do the laundry for you for a per pound fee?
  • Sprinkle your mattress with baking soda and let it sit for 10 minutes, then vacuum it up.
  • Rotate and flip your mattress. Note that you may not be able to flip a pillow-top mattress. It’s a real rip as being able to flip gives the mattress a longer life (but the luxury of the pillow-top may be worth it).
  • Dust the bedframe and headboard, including the backside. Use the vacuum and upholstery brush if it’s super dusty or if your headboard is upholstered.

Step 7. SHINY THINGS

  • Polish any mirrors or glass, including glass on picture frames. Polish any glass decorative items.

Step 8. GO LOW

  • Dust baseboards using the used dryer sheets, and wash if needed.
  • Vacuum underneath/behind your furniture.

Step 9. POLISH

  • Polish all furniture pieces as appropriate. Follow the instructions for the type of furniture polish/ furniture you have. You can ruin  the furniture’s finish by using the wrong cleaning product on it. When in doubt, consult the furniture manufacturer or Google it.

Step 10. FLOORS

  • Sweep, vacuum, shampoo, or mop your floors depending on the type of floor you have. If you have carpet that has wine stains, read our Out, Damned Spot post for removal tips.
  • Don’t forget to get underneath the bed and any other furniture with legs.

Step 11. RELOCATION

  • Take trash to the bin.

  • Relocate basket of runaway clutter to the room/s where the items belong.

Step 12. THE FROSTING ON THE CAKE

  • Make the bed with your fresh, clean linens. I love to iron the sheets (or maybe just the pillowcases) because it makes the bed look so pretty and makes the pillowcases feel softer next to my face.
  • Consider a wee splurge to add a sweet finishing touch to your now spotless bedroom – a candle, scented diffuser, a pretty toss pillow (Because you can never have too many pillows. I gently remind my partner of this fact whenever he says, “We’re birthin’ pillows in here!!”)

Spring Cleaning Extravaganza Beautiful Bedroom Complete! Now look! We’ve a fresh clean bedroom just waiting for a night of sweet dreams (or other fun things.)

Looking for a bit of beautiful bedroom inspiration? We got you covered.


Leave No Surface Undusted. Spring Cleaning Extravaganza II

Spring Cleaning Extravaganza II. Leave No Surface Undusted.


In our Spring Cleaning Extravaganza I, the bold announcement was made that over the next couple of months, I will be sharing my spring-cleaning and tidying journey with you. I am ever hopeful that this commitment will keep me on track to achieve my goals before the days are too beautiful to spend inside fussing about with the Swiffer duster and the Vietnam Vets donation bags. I am also hopeful that you will share this journey with me so that you, too, can welcome spring with a tidy, spotless, well-organized home and a light heart ready to embrace the season. Whole house dusting is phase two of our spring cleaning extravaganza! Learn tips and tricks to leave no surface undusted.
Last time, we worked on letting the sunshine in by cleaning windows and blinds. I am  so glad those awful tasks have been marked as completed on my To Do List. And, admittedly, I am feeling quite proud of this accomplishment. #patontheback.

While dusting, buffing, and polishing the windows, I considered how the rest of this ordeal should proceed. Room by room or job by job? I think the way to go is job by job, then once everything is clean and organized, we can spend one day putting a spit shine on the whole place. So this time?

Dusting. It’s phase two of our spring cleaning extravaganza.

Can you really clean and organize anything in your home if there’s a thin (ok, maybe in some places thick, layer of dust. It’s so easy when doing routine dusting to just focus on the flat surfaces – coffee table, night stands, shelves – and overlook the more challenging spots like cold air returns, the leaves on plants (real and/or artificial), baseboards behind large pieces of furniture – you get the idea.

As I mentioned in my last post, I consider myself a fairly tidy person. But working my way through this spring cleaning proved that it’s so easy to overlook so many things! Here are my tips and tricks to leave no surface undusted.

First, let’s get organized.

SUPPLIES

PROCESS

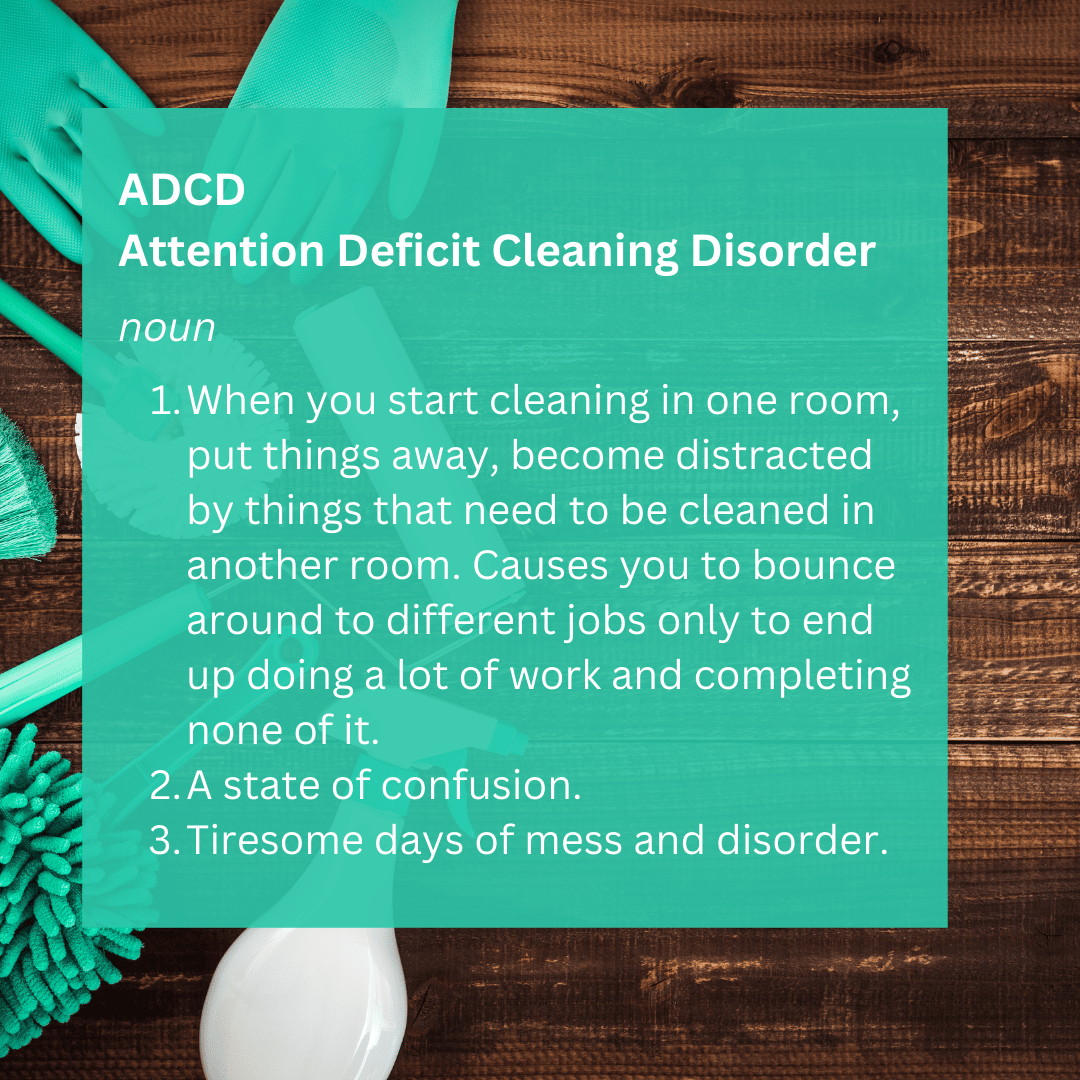
First, and most importantly, do not allow yourself to become distracted by ADCD – Attention Deficit Cleaning Disorder.

I, for one, suffer significantly from this “disorder”, so have first-hand knowledge of this disruption. How many times have I started dusting in the living room, decided to go ahead and put a morning coffee mug left on the coffee table in the dishwasher, and the next thing I know I am mopping the kitchen floor. Geesh.

Okay, back to business. We will leave no surface undusted!

  1. Plan your route. Perhaps start in the bedroom/s, move to the bathroom/s, then hallway, dining room, living room, kitchen.
  2. In each room, start at the top.
    1. With a long handled duster, clean all the dust webs from the space where wall meets ceiling.
    2. Dust cold air returns.
    3. Remove any artwork from the walls and clean not only the art, but also the wall behind it.
    4. Remove all items from flat surfaces. Dust the surface. Polish with wood cleaner or glass cleaner as appropriate.
    5. Dust all items removed from flat surfaces. Polish any glass or shiny surfaces with glass cleaner and paper towels or microfiber cloths.
    6. Pay special attention to lamps. Dust the bulb, the base, and the cord. Use the lint roller to remove dust from the inside and outside of the shade.
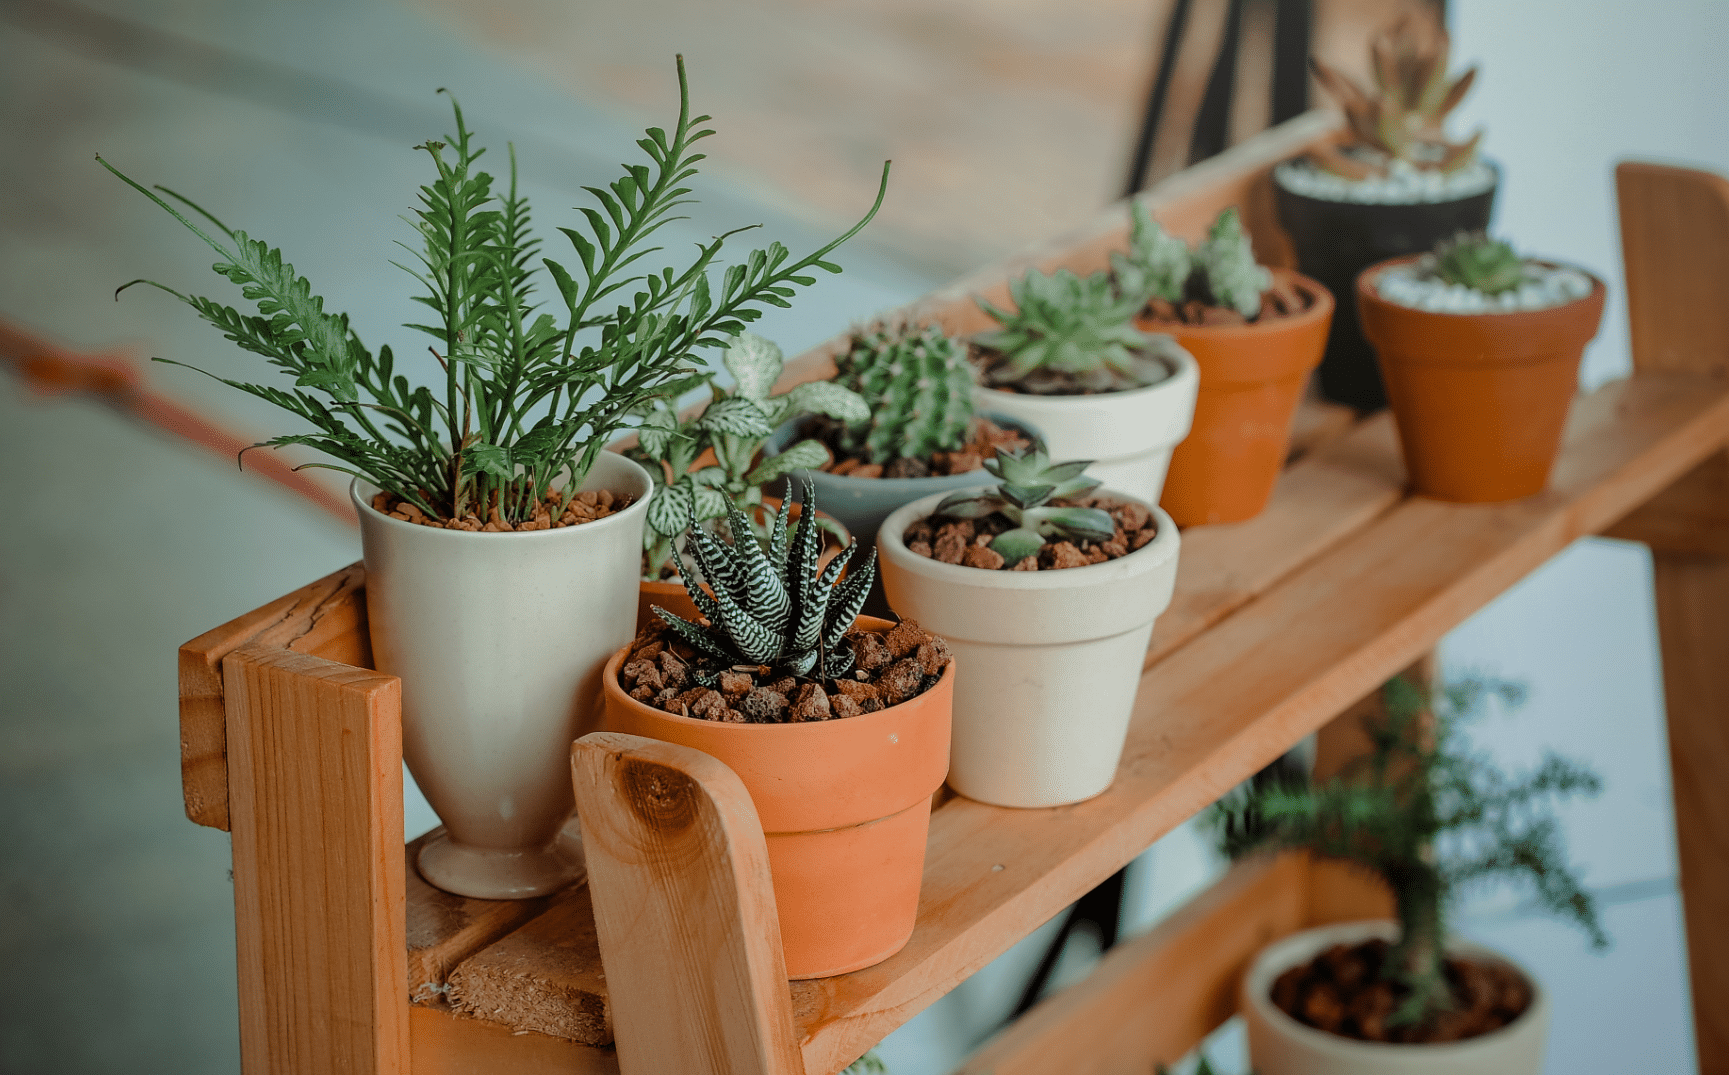
    7. Clean live plants. Use warm water and a soft cloth to remove dust from live plants. Alternatively, place your plants in the shower and wash them down being careful not to wash soil down the drain. Dry leaves with a soft cloth to prevent water spots. Use damp paper towels to wipe down plant pots.
    8. Clean artificial plants and floral arrangements. This is where those dryer sheets come in handy! Dryer sheets will do a great job removing dust even from those leaves in the back that haven’t been dusted for a while. It’s so quick and easy!

  1. Use glass cleaner on all mirrors and picture frame glass.
  2. Dust all light fixtures and use class cleaner to polish the globes. Don’t forget to dust the light bulbs.
  3. Run the duster over the front and back of all doors, the top of the door, and the door frame.
  4. Be sure to dust the back of any picture frames. The lint roller will come in handy if they have a velvety surface.
  5. If you have candles – real or battery operated – dust the indentation around the wick and the entire candleholder. If your candle is in a lantern, use glass cleaner and paper towels to clean the glass and all surfaces.
  6. Dust bed frames, and legs of all furniture. If your headboard is fabric, clean with the lint roller or hand held vacuum.
  7. Pull furniture away from the walls and using your long handled duster, clean the back of the furniture and the wall and baseboard behind the furniture.
  8. Dust curtain rods.
  9. Use the lint roller to remove dust from curtains. Don’t forget to clean the back of the curtain!
  10. In the bathroom, dust the top of the shower curtain rod, the towel rods, the toilet paper holder, the water lines to the toilet, the sides and front of the cabinets, and the light fixtures.
  11. Be sure to dust all books, CDs, and DVD cases.
  12. Dust the back of all electronics including the TV/s.
  13. Dust all light fixtures and use class cleaner to polish the globes. Don’t forget to dust the light bulbs.
  14. Run the duster over the front and back of all doors, the top of the door, and the door frame.
  15. Dust all baseboards.

Mission accomplished: we leave no surface undusted. End your dusting session by cleaning up and tossing any used paper towels, disposable dusters, lint roller sheets, dryer sheets, and wash any dusting and microfiber cloths.

Take a deep breath and pat yourself on the back for a great day’s work! I did.

Next up: bathrooms.


Spring Cleaning Extravaganza!

Why a Spring Cleaning Extravaganza? Well, despite the prediction of Punxsutawney Phil last Tuesday that we’re in for another six weeks of winter, seemingly a predilection of his, this writer is itching for spring. So many wonderful things come with that glorious season: longer days, the return of robins (for those that still fly south for the winter), bulbs bursting forth from the once frozen soil, skies forming a brilliant blue dome overhead, ditching our dark, cold weather gear in favor of clothing that floats on the body, comfort in spending time out of doors, and so much more! Like a spotless home that will allow me to really enjoy spring guilt free!

I, for one, am so ready to get ready for spring. As the daylight gradually lasts longer, and there are more sunny days than cloudy ones, evidence of winter doldrums punch me in the face almost daily. Short, gloomy winter days brought with them a perfect cover for the dust webs and grimy corners along with the uncanny ability to overlook overstuffed closets and untidy drawers and cabinets. Now don’t get me wrong – at first glance my place looks pretty good. Just don’t move any of the pictures on the dresser, swipe your finger on the slats of my blinds, or peek below the crisper drawer in my fridge.

Over the next two months, I will share my spring-cleaning and tidying journey with you in a Spring Cleaning Extravaganza! Hopefully this commitment will keep me on track to achieve my goals before the days are too beautiful to spend inside fussing about with the Swiffer duster and the Vietnam Vets donation bags. And perhaps you will share this journey with me so that you, too, can welcome spring with a tidy, spotless, well-organized home and a light heart ready to embrace the season.

Let’s get started!

Throwing back the curtains and opening up the blinds has to come first. With cleaning windows and blinds, the sun can come streaming in exposing all those tasks we’ll need to tackle next.

Windows first.

How I hate washing windows! For me, it’s the worst cleaning job in the house. Except maybe for mini blinds. A true glutton for punishment, I’m doing both. Today. It’s the launch of oour spring cleaning extravaganza!

The thing that makes washing windows so awful is that so often they almost look worse after you’ve washed them because of streaking. So what is the best way to clean windows without streaking?

According to Pella, the folks who are known for their windows, a microfiber cloth is ideal but a gentle and clean paper towel can work as well. Rub from multiple directions to help avoid streaking. If you find that you still have streaks after you’ve cleaned your window, simply rinse with clear water to help remove any of the remaining cleaning solution. Check out their YouTube video!

Hmm. I think we need more details.

SUPPLIES

PROCESS

Indoors

  1. When cleaning windows from inside your apartment, place a drop cloth on the floor to catch any water drips.
  2. Pour cleaning solution (water mixed with liquid dishwashing detergent) into a plastic spray bottle, then spray the interior surfaces of the window.
  3. Immediately after spraying, clean the glass with a terrycloth rag, followed by a quick wipe down with the micro-fiber towel.

Outside (if you can safely reach)

  1. Fill bucket with clean water and add a small amount of liquid dishwashing detergent.
  2. Wipe down the window frame using a wet (not dripping) terrycloth rag.
  3. Dip your window scrubber into the water bucket, then wring out the excess water.
  4. Clean the glass with the scrubber to remove all dust and dirt.
  5. Wipe the window glass dry with a rubber squeegee. Hold the edge of the squeegee at about a 30 degree-angle to the glass, then make a horizontal pass across the window.
  6. Use a terrycloth rag to wipe the squeegee dry after every pass. If you’d prefer to wipe down vertically, start by using a dry cloth or end of the squeegee to create a dry edge along the top of the window glass.
  7. Place the squeegee on the dry edge and pull straight down, cleaning the glass.
  8. Use a micro-fiber towel to wipe down the glass one last time.
  9. To clean windows with divided lites (panes), use the scrubber to first wash the glass, and then squeegee the glass clean. Only this time, hold a terrycloth rag against the bottom end of the squeegee to catch water and protect the muntins.

Read more about attaining streak free glass here!

Blinds next.

It’s so easy to forget about (IGNORE?) the need to clean your blinds. It’s pretty easy to not really see the dirt adorning the slats. I mean, when you open your blinds, do you actually look at the slats or are you looking out the window to check the weather? Then one day when you’re opening or closing them, you see – really see – the dust bunnies and the grime. Thankfully, this oft-forgotten task really isn’t so bad if you’re strategic. Here’s how to clean blinds the quick and easy way as part two of phase one of our spring cleaning journey.

SUPPLIES

Ohhh, look! You already have some of these supplies organized from your window-cleaning project!

  • Microfiber cloth – read all about microfiber cloths here.
  • Vacuum and upholstery attachment
  • Clean sock
  • White vinegar
  • Optional: Mini blind duster* link this one, just $9 from The Container Store, or this one, just $7.80 from Walmart.

* Note:  The special blinds duster isn’t necessary, but makes quick work of dusting blinds especially if you incorporate this task into your regular cleaning schedule. You’ll find it will save time in the long run by allowing you to clean multiple blades at once quickly and easily.

PROCESS

  1. Close the blinds and gently wipe them down with a microfiber cloth starting at the top and wiping side-to-side. Hold the bottom of the blind in your other hand so it’s pulled out from the window. Adjust the blinds to open them, and run the microfiber cloth over them again. Then close them the opposite way and repeat.
  2. Vacuum up any dust and debris with your vacuum attachment.
  3. For stuck-on dirt or stains, mix a solution of equal parts white vinegar and water. Dip a clean sock (finally a use for that old sock with the hole in the toe!) into your cleaning solution. Wring it out until the sock isn’t dripping wet, then slip onto your hand. Use your fingers to run over each blind blade tightly. Leave the blinds open to dry thoroughly.
  4. For deep cleaning, remove them from the window and place them in a bathtub filled with warm water and a squeeze of dish soap. Let them soak for an hour. Rinse and hang them outside until they’re completely dry.

Read more, including the “Do’s and Don’ts” of blind cleaning, and how to incorporate cleaning those blinds in your cleaning routine here.

Now that we’ve let the sun shine in, we’ll tackle the rest of the place! Stay tuned for phase two of our spring cleaning extravaganza.


Is Your Toaster Toasted?

According to Kitchen Infinity, no matter how much you shelled out for your toaster, it will survive an average of six to eight years. You can extend the life of your toaster by cleaning it regularly to remove excess breadcrumbs and additional food particles.

The factors that affect the lifespan of a toaster include:

  • Frequency of use: How often you use your toaster affects how long it lasts. Frequent use of a toaster can wear out the lever or door hinges over time.
  • Maintenance and upkeep: If you maintain your toaster, it will last longer. This includes cleaning the toaster out between uses.
  • Initial quality: The initial quality of the toaster affects how long it lasts. Stainless steel toasters tend to last longer than plastic toasters.
  • Type of use: The type of foods you cook in your toaster can also affect its longevity. If you frequently use your toaster to defrost foods or make cookies, it may wear out faster.

Whether you’re using it to warm up a quick breakfast pastry or perfect a slice of wheat toast, you count on your toaster to deliver the goods. The cost of a toaster ranges from $20-$400. Smaller, two-slice toasters are on the lower end of the range, whereas larger toasters with more cooking functions may cost even more.

How do you know when it’s time to clean your toaster? Well, if you peer into the slots and see enough crumbs to bread a chicken cutlet, it’s long overdue. We recommend cleaning the crumb tray once a week or whenever you see a buildup of crumbs. Otherwise, you’re looking at a potential fire hazard, so it’s important to take a moment every now and then to clean them out.

Wirecutter’s Michael Sullivan has been testing toasters since 2016 (think of all the delicious buttery toast!).  In 2021, he partnered with Elvin Beach, associate professor of practice, and his students in the Department of Materials Science and Engineering at Ohio State University to figure out why newer toasters seem to fail so quickly. Through their research and testing, he learned even more about how to clean toasters and help prolong their lifespan.

‌If you follow this blog and try our cleaning tips, chances are good that you already have everything you need on hand to get the job done (YAY!) and here’s how to do it.

SUPPLIES

  • A clean pastry brush: A soft-bristle pastry brush is best for gently removing the crumbs that cling to the sides of a toaster’s heating elements (don’t use a silicone pastry brush).
  • A long-handled, clean, paintbrush: Any thin brush with a long handle (like those used for watercolors) will help you sweep away crumbs in hard-to-reach crevices.
  • Paper towels or a clean cloth: For wiping down and polishing your toaster.
  • Dish soap: A drop is all you need to remove grease buildup or grime on the sides of your toaster and crumb tray. Try Seventh Generation Natural Dish Liquid or Dawn Liquid Dish Soap.
  • A sponge: Any sponge, such as our faves Scotch-Brite Heavy Duty Scrub Sponge or a Scotch-Brite Dobie pad (which is gentler and doesn’t scratch stainless steel), can be used to wipe down the sides of your toaster and crumb tray.
  • Bar Keepers Friend (for stainless steel toasters): A mixture of Bar Keepers Friend and a bit of water will polish the exterior and keep it looking like new.
  • Micro-fiber cloth: for a perfect polish and shiny finish.

TIME

You’ve got the time. Promise. It will only take a couple of minutes to clean your toaster. Brushing away crumbs inside the slots or wiping down the exterior of your toaster will take a few minutes more.

PROCESS

Unplug
Before you attempt to clean the toaster, always unplug it first. Inserting anything except food into a toaster while it is plugged in can cause an electrical shock or a fire. Once the toaster is unplugged, allow it to cool completely before beginning to clean.

Shake
Move the toaster to a trash can or hold over a sink with a garbage disposal. If the appliance has a removable tray in the bottom or a bottom that opens, open it and use a pastry brush to remove crumbs from the toaster and into the trash can. Don’t be tempted to flip your toaster upside down and bang on the sides to get crumbs out. According to research done by The Ohio State University, such treatment can easily break the delicate solder joints and cause an electronic component to give out.

Mix
In a sink or dishpan, mix a solution of warm water and dishwashing liquid. If the toaster has a removable crumb tray, submerge only the tray in the soapy water and wash it well with a sponge or dishcloth. Rinse the tray with clear water and dry with an absorbent cloth.

Degrease
Choose a dishwashing liquid that contains a degreaser for the best cleaning results. See our picks in the Supply List. The degreaser will cut through any build-up more quickly and with less elbow grease than regular dishwashing liquid.

Brush
With the crumb tray removed, use the pastry brush to reach any crumbs still clinging to the interior of the toaster. Do not put your fingers inside the slots or you risk damaging your fingers and the interior components. If possible, work from both the top and bottom of the appliance.

Exterior
Dip a sponge or dishcloth in the soapy water to wipe down the exterior of the toaster. Wring out most of the water so the sponge is just damp. Pay extra attention to dials or levers on the controls, as well as handles. Wash removable dials in the soapy solution.

When the exterior is clean, wipe down with a sponge dipped in clear water to remove any soapy residue. Dry the appliance well with a soft, microfiber cloth.

Shine
To make the exterior of a stainless steel toaster shine, use a commercial stainless steel cleaner or dampen a clean cloth with a bit of distilled white vinegar. Wipe down the exterior to remove smudges and leave a streak-free shine.

Reassemble
To finish the cleaning process, replace the crumb tray, reset the dials to your favorite setting, and plug-in the toaster.

FREQUENCY

If you use your pop-up toaster daily, weekly cleaning is best to remove crumbs and any food residue that could cause a burnt taste or a fire. Since toaster ovens are used for much more than making toast, they need cleaning more often. If you only use the oven to make toast, weekly cleaning is sufficient. However, if you heat foods or broil other foods, the oven—especially the food tray— should be cleaned after every use.

TIPS

Trim a reusable oven liner to fit a toaster oven’s crumb tray. This will make cleaning easier when spills happen.

  • Eliminate crumbs that can prevent bread from popping up. Clean toasters and toaster ovens regularly to prevent residue from interfering with internal mechanisms.
  • Do not place plastic bags of bread or bagels near the appliances. The heat from a toaster can quickly melt the plastic. If you forget and a plastic bag has accidentally melted onto the finish of a toaster, remove as much plastic as possible using a wooden or plastic scraper. Unplug the appliance and allow it to cool before removing the remaining plastic. Then sprinkle baking soda on a damp sponge and scrub the area. Wipe away with a clean damp sponge and repeat until no more plastic is coming off. To remove the final discoloration, dip a cotton ball in acetone-based nail polish remover. Rub the area with the cotton ball and use a fresh ball as the plastic is transferred. Lastly, wipe down the area with a water-dampened soft cloth to rinse the area.

Toasters can be used for so many things from making breakfast toast or waffles, to lunchtime BLTs and a plethora of other toasty sammies, to toasted crostini for your happy hour smacks. Slightly stale bread gets new life when toasted. So be good to your toaster and it will be good to you. A clean appliance will produce tastier (and safer) toast. Now let’s get toasty! Or toasted.

RESOURCES: Wirecutter, ahs.com, The Spruce, KitchenInfinity

Paw-some Pet Friendly Holiday Events Near You!


Get your furry friend/s in on the holiday festivities this year! We’ve rounded up a few paws-itively pet-friendly holiday events you and your fluffy friend can do together in and around our Cincinnati, Dayton, and Dallas locations. Please be sure your best buddy says “woof!” to Santa Paws for us!

Cincinnati, Ohio and Northern Kentucky

Red Dog’s Santa Paws at MadTree

  • Saturday, December 10th, Noon – 3:00 PM
  • Catch-a-Fire Pizza Oakley

Santa Paws is coming to town and his first stop will be MadTree to enjoy an ice-cold brew and to pet some pups! Party at this pet friendly event with Red Dog at MadTree Brewing, 3301 Madison Rd.

A $10 suggested donation gets you a digital photo of your dog with Santa. Donations will benefit the League for Animal Welfare and give you a lasting memory of the holiday! Professional Photos by: Alyssa Jeanine Photography. Get your dog’s photo taken with Santa and they will receive a FREE gift from the big guy! (While supplies last.)

Pet Nights with Santa

  • November 21st – December 5th, 4-7 PM
  • Kenwood Towne Center

A paws-itively good time! Get your furry friends together at this pet friendly event to strike a pose with St. Nick, capturing paw-fect holiday moments to share with family and friends!

Reindog Parade

Voted the “Best Family Event” in Cincinnati!

  • Saturday, December 10. Registration begins at 12:30; the parade starts at 2:00 p.m.
  • The Monastery, Mt. Adams. The parade will be led by Santa himself!
  • Costume categories have historically been Small Dogs (under 25 lbs), Large Dogs (25 lbs and over), Dog/Owner Look-A-Like, and Multiple Dogs (2 or more dogs). Be creative – they’re looking for fun, unique, and festive costumes for each category!

Food and vendors will be available before the parade, so you can join the party ahead of time! It’s the most fun pet friendly event in town!

Dallas, Texas

Paint Your Pet! Christmas Edition!

  • Thursday, December 8th, 6-9 PM
  • 513 E I-30 Rockwall

This is an advanced, custom class. Limited seating is available, and photos of your pet must be submitted prior to the event. Please send photographs of the pet you’re planning to paint back to the email address: Studio155@paintingwithatwist.com

Due to the difficult nature of this painting, the age is set at 15 & Up.
If you have an extraordinary young artist in their teens, they may do fine with this painting, and would be allowed to attend at your discretion.

Adults over 21 are welcome to BYOB.

Light Up Lake-woof!!!

  • Friday, December 2nd, 7-10 PM
  • Lakewood Shopping Center

It’s the 20th annual Light Up Lakewood celebration, which brings live music performances, tree lighting, meetings with Santa Claus, face paintings, balloon artists, and more! Meet our adoptable dogs and cats, leave us a donation or buy a Dogrrr t-shirt or sweatshirt!

The Boho Market Stocking Stroll

  • Saturday, December 17th, Noon – 3 PM CST
  • Main Street Garden Park

Adults, kids, and pets are invited this holiday season for the 4th Annual Downtown Stocking Stroll where you can visit your favorite Downtown merchants for fun holiday stuffers and treats. This event is free, but RSVPs are requested for this pet friendly holiday event.

Main Street Garden will also host a Boho Market with local shops, hot cocoa station, and FREE train rides at the park!

Bring your own stocking or pick one up from Main Street Garden for free (while supplies last), along with the map of all participating businesses.

Family Friendly | Pet Friendly


Dayton, Ohio

Pet Photos with Santa

  • Monday, December 5, 5-7 PM
  • Dayton Mall

Bring your pet (dogs and cats only, please) for a photo with Santa! Leave with a picture to cherish for years. Reservations are highly recommended.

Pawsitively Purrfect Holiday Bazaar & Christmas Pawty

  • Sunday, December 11 Noon – Monday, December 12, 5 PM
  • John’s United Church of Christ

Just in time for the holidays! We have vendors from local businesses and privately owned shops, raffles, adoptable cats and dogs, music, and our famous Gift Card Christmas Tree Raffles ready for you!

Friends of SICSA Holiday Bazaar

  • Saturday December 3, 9 AM – 4 PM
  • SICSA Washington Township

Come shop pet beds, blankets, and toys; handmade gifts for you and pet lovers, and much more! Make lasting memories by getting a picture with Santa (Saturday 9am to 3pm). Cost: $10 pictures – All proceeds help our animals.

Wishing you and your best furry friend a paw-some holiday season!

How to Clean Tile and Grout and Keep It Clean

woman cleaning shower

I dread doing many household chores. My least favorite has to be cleaning the tile and grout in the bathroom. It never ceases to amaze me that a place we use to get clean, and that’s filled with soap and water daily, can get so dirty. UGH. Because I loathe it so much, I have embraced a preventative measure – a cleaning routine.  An ounce of prevention – in this case less than two minutes a day – is worth a pound of cure – 30 minutes or more of scrubbing. Think of it as protecting your tile and grout instead of rescuing it.

My easy-peasy method utilizes a squeegee and a rinse-free daily shower cleaner. After each shower, before I even grab a towel, I do a quick dry with my squeegee. Then a quick spray of rinse free shower cleaner to keep everything sparking clean in between “big” cleans. When those faint pink blotches just start to appear, I dive in for a deeper clean usually once a week. Those pink stains are not mold; it a form of water-borne bacteria. ARGH!!

HOW TO DE-PINK

Make a Cleaning Solution

Mix one-half cup of baking soda with one tablespoon of dishwashing liquid or all-purpose cleaner. The resulting paste will be runny. Make a double or triple batch depending on how much tile you need to clean.

Protect Yourself

Do wear rubber gloves, protective eyewear, and a mask to protect yourself from exposure to the bacteria.

Prep the Area

Since the pink slime (it’s bacteria!) can grow on plastic and fabric surfaces, you should wash your shower curtain and liner. Toss washable curtains and liners in the washing machine and wash in warm to hot water with your regular laundry detergent. Dry fabric curtains following the care label instructions but air dry, or replace, plastic liners.

Scrub

Dip a nylon-bristle scrub brush in your baking soda solution and scrub away! Start at the top and work your way down.

Rinse

Rinsing is a pain if you don’t have a hand-held shower spray. You can rinse with a towel or by using a large water-filled pitcher or measuring cup.

Disinfect

In a spray bottle, mix a 50:50 solution of warm water and chlorine bleach. Use caution with the bleach mixture as it will remove color from any fabrics, towels, or rugs if you accidentally drip or overspray. Or, you can use a bathroom disinfecting spray.

Now we’re having fun, right?

Tips to Prevent Pink Goo Growth

  • Keep surfaces dry (use your squeegee after every shower!)
  • Close your shower curtain after bathing so it will dry quicker
  • Clean your tile with a bathroom cleaner weekly
  • Use your bathroom exhaust fan or crack a window (if you have either) every time you shower

CLEANING DIRTY TILE AND GROUT

“The best way to clean heavily stained or aged grout is to maintain a cleaning schedule. Do not allow stains and soils to build up over time,” said David Mowery, a business manager of Tile and Stone Installation Systems for the MAPEI Corporation. “The sooner you address grout stains, the better.”

What tools are needed?

How long will it take?

For a full-size shower, the entire process can take 15 minutes or longer depending on how much tile you’re trying to clean and the severity of the stains.

What kind of stain is that anyway?

Bathroom tile and grout stains caused by mold or mildew thrive in the damp corners of a bathroom shower and the porous, concrete-based grouts that are commonly found in between bathroom tiles.

These stains respond best to alkaline or high-pH cleaners like Tilex Mold & Mildew or StoneTech Mold & Mildew Stain Remover or Scrubbing Bubbles.

The other common source of staining in a shower is rust or lime buildup. Hard water deposits can stain the porous tile and grout in your bathroom. Rust has a reddish-brown tint, while lime scale usually has a chalky-white or pale green color.

To deal with these kinds stains, use a cleaner with a lower pH such as Bar Keepers Friend More Spray and FoamZep Grout Cleaner and Brightener, and CLR Brilliant Bath .

Cleaning the tile

Apply the cleaner by directly spraying it on the wall or onto a damp sponge, cloth, or brush. Let the solution sit for a short period, and then scrub with the brush, making sure to get the bristles into the grout itself. Rinse thoroughly and let the area dry.

No No’s

To avoid damaging your tile or grout, do not use the below items which can scratch tiles or chemically damage grout.

  • Wire brushes or steel wool
  • Abrasive cleaners like Borax or Comet

Okay, that wasn’t so bad. Now promise me you’ll keep your tile and grout clean because bathing in a dirty shower is gross and kinda counterintuitive.


Resources: Wirecutter.com, TheSpruce.com

Apartment Gardening


My daughter went to college in New York, and has lived there ever since, in a variety of teeny tiny apartments. Affordable apartments in New York (wait, is that an oxymoron?) are not only small, but often times are in older buildings or homes converted into rentals; floor plans can be … strange. One of the things she learned along the way has been that despite using half her income on rent, she can dress up her place and make it look warm and welcoming with houseplants. Plant shops (also miniscule) are in every neighborhood, so many city dwellers are on the same page as she and her roommate.

Besides the beauty of houseplants, there’s also distinct health benefits.

Health Benefits

  • Improving your mood.
  • Reducing fatigue and sharpen your attention.
  • Lowering stress and anxiety.
  • Improving office performance and focus.
  • Boosting healing and pain tolerance; recover from illness faster.
  • Minimizing the occurrence of headaches by improving air quality.
  • Easing dry skin and respiratory ailments due to dry air.
  • Working with plants can be therapeutic.

Wow! That’s a lot of benefits. So, how does one get started turning an apartment into a green oasis?

Start With Sunshine

First things first, learn the light in your home. Observe the light in each room and determine how it fits in these categories:

  • Full sun: six or more hours of direct sun a day.
  • Partial sun or partial shade: four to six hours of direct sun a day.
  • Full shade: less than four hours of direct sun a day.

Once you know the light in your space, you can shop for plants. Seek out sun-loving plants, and those that prefer partial or full shade. Houseplants are usually tropicals and can take some heat, although not always direct sun. While most herbs prefer a sunny window relief from late afternoon sun in the form of shade is usually welcome.

No sun, no problem! In my office building, there are plants thriving in an interior hallway who receive light just from overhead fluorescents.  If your apartment has small or few windows, choose plants that are happiest in low light areas such as:

* Toxic to kids and pets if consumed

Where to buy?

If you are fortunate enough to live near an IKEA, you can shop for live plants and containers there. The selections are not huge, but the plants are healthy and cheap. The Home Depot has houseplants, but there’s usually a better selection at Lowe’s. Check out your local garden center as well! All these will carry containers; most will also carry potting soil. Target also has some cute containers, and some of their newly redesigned store also carry live plants!

Containers

Make sure the containers you plan to use are compatible with the growth habits of your plants. Make sure they have adequate drainage as well. If you live on an upper level, be mindful of the weight of the materials you’re carrying to your garden space. Choose lightweight containers (look for self-watering planters if you travel or forget to water), potting mix in small bags and plant caddies to conveniently move planters when it’s time to rotate; a caddy will also help protect a carpeted floor.

Soil

Use a potting soil specifically designed for containers. Potting mix is light and fluffy, efficiently circulating air and water to keep roots healthy. It’s also fairly sterile, so you won’t have to worry about bringing diseases into your apartment.

All purpose potting soil will work for most houseplants, but use cactus potting soil for cacti and succulents which prefer a very quick draining soil. An added bonus of potting soil is that it will contain fertilizer. Make sure all planters have enough drainage provided by holes in the bottom. Add a single layer of rocks or chards from a terra cotta pot to the bottom of the planter to avoid blockage of drainage due to compacted soil.

Water

No matter the plants you choose to get started gardening indoors, it’s imperative you follow a watering schedule based on each plant’s needs. Many people water their plants on the same schedule, which can lead to overwatering. Each plant has unique needs and water requirements.

Soil in terra cotta pots will dry out more quickly than plastic or fiberglass containers. A water meter is an excellent inexpensive investment to prevent over-watering. Or test the soil by poking your finger an inch or two below the surface. If it feels dry, you need to water.

Humidity

If you are growing your plants on an indoor windowsill, you might need to provide some extra humidity, especially when the heat is on. Spritzing the plants with a fine mist can help, or you can place the plants near a tray of water.

Feeding

Feed your plants on regularly according to their individual growing requirements. Adding a water-soluble fertilizer when you water is usually the easiest method. Also, note whether your potting mix has fertilizer already in it, as this typically will delay the need for you to feed your plants.

Tools

Essential tools and supplies for apartment gardening include gardening gloves, pruners, soil, water, containers for your plants and a watering can. ​

Problems

Pests and diseases have a way of finding plants no matter where you grow them, and there are no natural predators for insects indoors. Inspect your plants for problems whenever you water them or harvest. If you spot signs of pests or diseases, such as discoloring or holes in the leaves, move that plant away from the other plants until the problem is resolved.

Here’s to a healthy and beautiful home! See you at the garden center; I’ll be the one with dirt under my fingernails.


Resources: ApartmentList.com, The Home Depot, SustainableJunglr.com, Chatelaine.com, SwansonNursery.com, Healthline.com

Staying Safe in Summertime Heat

Hot summer sun causing heat wave

Hot Sun in the Summertime

Unlike Sly and The Family Stone’s Hot Fun In The Summertimea heat wave is no fun. The extreme heat of this summer can take all the fun out of the season if we’re not careful. Let’s chat about staying safe in this summer’s heat.

But first, some background. I grew up in a small ranch-style house in northern New Jersey without air conditioning. On hot summer nights, my brother, sister, and I would sleep – or try to – on folding lounge chairs on the back patio; sometimes our friends from next door would join us in a make-shift pajama party. The huge oak tree next to the patio made us feel like we were under a leafy cathedral ceiling. We used pieces of cardboard to fan ourselves while trying to find the Big Dipper and the North Star until we finally dozed.

My folks had a box fan in one of their bedroom windows, and dad had it set to pull the hot air out of the room. To keep their room as cool as possible, their door was kept shut and the curtains were pulled. Drapes were drawn in rest of the house too, and the windows kept shut to keep out the heat and hot air. Hot summer days in the house were dark, close, and still; hot summer nights were dark and still as well and the quiet was disturbed only by the drone of mosquitos and rhythmic call of katydids.

My 87-year-old mother has lived her entire life in homes without air conditioning, and actually has trouble adjusting to air conditioned environments. But, with the extreme heat the entire country is experiencing this summer, she’s here with me in my air conditioned Kentucky home.

Despite the access to AC, this unprecedented heat wave presents other challenges to keeping our cool and enjoying the summer. What do we watch out for, how do we keep safe, and how can we still have hot fun in the summertime?

What to watch out for

 Health risks associated with heat exposure can range from milder conditions such as heat cramps to heat strokes, which can be fatal. Let’s get familiar with the symptoms of heat-related illnesses to head off potential problems.

  • Mild dehydration and heat cramps — muscle pain or spasms — may be early signs that your body is not reacting well to the environment, said Matthew Levy, an associate professor of emergency medicine at Johns Hopkins University School of Medicine.
  • Heat exhaustion symptoms are more worrisome. These can include heavy sweating, elevated heart rate, nausea and vomiting, headaches, dizziness, fatigue and generally feeling unwell. Some people who are experiencing heat exhaustion might also faint. “This is where things are getting dangerous fast,” Levy said.
  • If heat exhaustion is left untreated, it may progress to heat stroke, which means the body’s core temperature has reached the point where cellular damage may start to occur.
    • The key feature of heat stroke is central nervous system dysfunction – confusion and possible seizures.
    • Another sign is lack of sweat. A dry person who’s not thinking clearly is at big risk and should seek help ASAP.

 How to stay safe

  •  Keep cool and hydrated.
  • Stay in spaces with air conditioning. If you only have a fan, experts recommend misting yourself with a spray bottle of cold water.
  • Spend time at indoor public places such as malls or libraries.
  • Go to a park, which can be five to 10 degrees cooler than indoor space.
  • When outdoors, dress in loose, lightweight, light-colored clothing and protect yourself from the sun with hats, sunglasses and sunscreen.
  • Drink plenty of water, but don’t guzzle it; drinking too much water could cause a potentially fatal condition known as hyponatremia.
  • Don’t drink excessive amounts of alcohol or caffeine, both of which can be dehydrating. A good way to know whether you’re adequately hydrated is to pay attention to the color of your urine. Dark yellow is not good; very pale yellow or clear is ideal.
  • Limit outdoor exercise to less intense workouts, and do them early in the morning or in the evenings.

 Who is at increased risk?

 Although anyone can be negatively affected by hotter temperatures if they’re not careful, certain populations are more vulnerable, including the elderlyyoung childrenathletespeople who have chronic medical conditionspregnant people and those who may be struggling with mental health issues.

If you know anyone who might be at increased risk, check in on them during heat waves and make sure they’re equipped to stay safe.

  • Invite an elderly relative to stay with you (like me and my mom!).
  • Help someone get to a community cooling center.
  • Stop by people’s homes to make sure their air conditioners are working or to bring them cold drinks.
  • NEVER leave young children or pets in cars on hot days, even if the windows are open.
  • Pets are at risk, too! Click here for tips on keeping your pet safe in the summer.

 What to do if you or someone else is sick from the heat

  •  Get into a cooler environment — preferably some place with air conditioning — as quickly as possible.
  • Lower the body’s core temperature by removing clothing and wetting skin with cold water.
  • Hydrate with cold fluids, such as water or electrolyte drinks.
  • For more severe problems like heat stroke, seek medical help immediately.
    • While waiting for assistance to arrive, it’s critical to take action. Get the person out of the heat and either into air conditioning or shade. The fastest way to cool someone down in an urgent situation is cold-water immersion — the colder, the better. If that’s not possible, pour cold water on the person’s head and clothing.

Ideas to have fun despite the heat

  • Go to a pool in your community if available. Bring water in non-glass containers.
  • Visit your neighborhood library or indoor shopping mall
  • Go the movies
  • Visit a local museum
  • Stay inside and read a good book
  • Eat ice cream
  • Go bowling
  • Try an escape room

Above all, remember that cool fun in the autumn-time will be here before you know it.

How about another shameless plug for our hard-working team of Fath Properties service professionals who are always there to keep your place cool so you can Love The Place You Live?

Resources: Washington Post, CDC

Summer Safety for Furry Friends


Some areas of the USA are experiencing record-setting high temperatures this summer while others have more rain than they can handle. Me thinks Mother Nature is a wee bit perturbed with the way we treat Mother Earth. That is a story for another day. Today we’ll talk about pet care and safety tips for the summer heat.

The news is loaded with ways to keep us humans safe during a heat wave, but what about our furry friends? We think of them in human terms as well, don’t we? Yes (emphatically), we do. But our fur babies can’t cool off by sweating like we do. Below are some summer safety tips for our furry friends.

Car Rides

“Wanna go for a ride?” is like music to most pup’s ears. But summer rides can be deadly. Watch veterinarian Ernie Ward show how quickly temperatures rise in a parked car. YIKES. Never, ever, EVER leave a pup in a parked car. Not even for a minute! Not even with the car running and air conditioner on. On a warm day, temperatures inside a vehicle can rise rapidly to dangerous levels. On an 85-degree day, for example, the temperature inside a car with the windows opened slightly can reach 102 degrees within 10 minutes. After 30 minutes, the temperature will reach 120 degrees. Your pet may suffer irreversible organ damage or die.

Although Fido may be miffed at being left at home and may munch on your favorite kicks in retribution, do it. He’ll get over it, and you wanted to buy a new pair of shoes anyway. If you’re driving with your dog in the car, bring water and a portable water dish (or this nifty water/bowl combo) and take Gus with you when you leave the car.

Download the Humane Society’s PDF for more information.

Paws

You’ve heard the phrase, “It’s hot enough to fry an egg on the sidewalk!” Yep, concrete sidewalks, asphalt, and metal can get blisteringly hot. Try to keep Moose off hot surfaces; not only can it burn paws, but it can also increase body temperature and lead to overheating. And please don’t drive around with your dog in the bed of a truck. It does not make you look cool and the hot metal can burn paws quickly. Worse yet, your dog can fall out or be injured or killed in an accident. See? Not cool. Avoid walking pups in the heat of the day and walk them on the grass. If outdoor walking on hot surfaces can’t be helped, consider some stylin’ booties or paw wax to protect those sweet Fritos-scented feets.

Water and Shade

Bring a portable doggie dish and plenty of water available to avoid dehydration. Relax in the shade as much as possible or bring your own.

Pet Sunscreen

Even very furry dogs can also be prone to sunburn if their nose, ears, belly, and other sensitive areas aren’t covered with pet sunscreen. Hairless breeds must be protected when outdoors, as they are more susceptible to sunburn and skin cancer. Never use human grade sunscreen on pets as it is toxic. Opt for a sunscreen suitable for pets.

Protective Clothing

Putting Cookie Crumb in a shirt may seem counterintuitive (but adorable!) when it is hot outside. However, some doggie clothes can help keep Ollie cool and shaded. If Rascal has short fur, light colored fur, or is hairless, you can opt for sunscreen clothing for pets. Dogs that are sensitive to the sun’s rays might enjoy doggles, or pet sunglasses.

Haircuts

Should you shave your dog’s fur or hair? WAIT! If you have a double-coated breed like a Golden Retriever, Border Collie, Aussie, Sheltie, Newfoundland or Bernese Mountain Dog, the answer is NOPE. Ready all about it here. For other breeds, read this before giving FiFi a new do.

Cookouts & Picnics

They will beg. They will plead. They will droll. So much. While dining al fresco is loads of fun, the food and drinks offered can be bad for dogs. Keep Lily and Poppy away from alcohol and foods like grapes, onions, and chocolate and other foods Taxi should not consume.

Fireworks

Many dogs are fearful of loud noises, especially fireworks. The dangers are obvious – pets are at risk for fatal injuries and painful burns if they are allowed to run around freely when fireworks are being used. Some fireworks also contain chemicals toxic to pets like potassium nitrate and arsenic. And remember, their hearing is many times better than ours. Don’t believe me? Try whispering, “Chicken?” and see what happens.

Keep Chester indoor with the TV or music playing to lessen the disruption. Your vet can also recommend something that will calm your pup if he’s very, very afraid.

Indoor Fun

Those days when it’s just too dang hot to go anywhere, perhaps a game of the Invisible Food Challenge could be fun?

So while you are enjoying Hot Fun In The Summertime, keep Peanut Chillin’ In The Summertime.


Resources: Humane Society, Pet Health Network, Shiloh Veterinary Hospital, ASPCA, 5 Points Animal Hospital, Pets WebMD

Home Office 2021 Edition

Designated Home Office Space

“I get to work from home in my jammies?!? Hurrah!” That’s what you were thinking when your company sent you home to work because of the 2020 Pandemic, right? It’s what we were all thinking. Here we are over a year later and you have to admit – the thrill is gone. While many of us are back to work, many of us are still working remotely full-time or part-time. We miss our co-workers, lunches out, happy hours after work, wearing something other than sweats, and being able to just work without all the distractions working at home bring. And the guilt. You know, “As long as I am home, shouldn’t I prepare a great meal for dinner this evening? Why am I behind on my laundry? Where did all this dust come from?”  We feel you, and hopefully can help.

HAVE A DESIGNATED SPACE

Keeping your “work” space separate from your “living” space really helps when you work from home. If you’re renting a new apartment and know you’ll be working from home, look for one that has one more bedroom, a den, a larger living room or a cozy nook than can become your office. Having a designated space will allow you to feel like you’re at work, while also making it easier to “turn off” at night and maintain a strong work-life balance. Investing in a decent chair will really helps to avoid the inevitable fanny fatigue you’ll suffer from sitting in a dining chair. If a  new chair is out of reach, a chair pad can make all the difference (plus you can take it on road trips!).

TAKE BREAKS

Sitting at a desk all day can drain your energy and motivation. Set up intervals where you can take quick breaks, even if it’s just to get up and stretch your legs or make a coffee. Taking small breaks every 90 minutes or so actually increases productivity, so don’t be afraid to step away from your work to help you focus better and keep your sanity while you’re at your desk.

SCHEDULE YOUR DAY

Working at home means working on your own more often. This cuts down on the distractions that tend to happen in an office environment, but it can also be difficult to keep yourself on track with no one else around. Planning your day and following a solid task list is a great way to hold yourself accountable. While completing a task, try not to take phone calls, answer emails, or shift from that task until it is finished.

KEEP A ROUTINE

Having a regular routine will help you stay productive. This extends outside of your work hours to include a regular bedtime, wake-up time, and work time. Choose a time that you will start work each day, and stick to it. Plan everything else around it, including your meals. Take time to get ready each morning and take a lunch break every day just as you would if you went to an office for work. And wear something nice to work at least once a week. Give your jammies a rest.


Don’t Be Them

Frowning Mom and Son Sit on Couch with Closed Eyes and Plugged Ears from Upstairs Noise

What’s Going On Up There?!?

As an apartment dweller, you share at least one wall with another resident. And, you probably hear your neighbor from time to time. It’s to be expected. Have you ever seen the video Everyone’s Upstairs Neighbor? Back when it was created, The Washington Post wrote:

            Chances are what’s causing the movements of humans above you to sound like a giant’s conga line is a thin or poorly-insulated ceiling. But when the thumping begins at all the wrong times, you know you can’t help but wonder: are they doing that on purpose?

The experience is universal enough that when comedy writer Matt Moskovciak pretended the answer was yes, it’s on purpose, he created the most successful online video of his career.

Of course the video is hilariously exaggerated, but it does make one wonder: “Is that how I sound to my neighbors?” Yikes.

Keeping that in mind, strive to be the neighbor you wish you would always have.

  • Offer a smile and a wave to your neighbors when you see them.
  • Step outside your apartment and listen to the volume of your music, TV, gaming, etc. If you can hear it, bet your neighbors can, too. Consider using headphones after 10:00 PM and before 9:00 AM if you like to pump up the volume.
  • Planning to throw a party? Let your neighbors know what to expect and for how long – and perhaps extend them an invitation to join in the fun.

These simple steps can go a long way toward shared enjoyment of life in your apartment building and apartment community.

On the other hand, what can you do if it’s your neighbors making too much noise and commotion on their side of the wall? The simplest (though not always easiest) solution is to knock on their door and ask them to keep down any noise that they can control (electronics, a barking dog, etc.). You can explain you need your sleep, that you’re working from home, etc. A heart-to-heart with your neighbor will always be better received than getting management involved. But if you are faint of heart, another option is to contact your management company and ask them to issue a general email to all residents about noise. This keeps you (or your neighbor) from being singled out, but ideally will get the message across. If that fails, you can have your management company contact your neighbor directly, without implicating you. A good set of ear plugs and a white noise machine or app on your phone can also work wonders.

Be a great neighbor and get one in return. Without the bowling balls.


Out, Damned Spot; Out I Say!

illustrates damage from red wine spills

Out Damned Spot

Racked with guilt over her complicity in murder, Shakespeare’s Lady Macbeth famously exclaims, “Out, damned spot; out I say!” while wringing her hands to remove a hallucinated bloodstain. You may be tempted to say something similar – or much worse – when you’re suddenly faced with a horrifying spill of red wine on your carpet.

It’s always a sad moment when that delicious glass of red winds up on the floor instead of in your belly. My good friend Stacy never fails to drip, dribble, spill, or splash whenever we get together. I have honestly never met anyone as clumsy with food and drink as she. Fortunately for us both, she is also a wizard at removing stains from everything – including carpet – with products you already have in your home.  Her advice?

  • Blot Up ASAP. Gently blot with paper towels from the outside edge of the spill to the center. Act quickly before the wine’s natural dyes and acids work their way into the carpet fibers.
  • Select a Solution. See four options below:
    • Straight club soda.
    • One tablespoon each of white vinegar and liquid dish soap mixed in two cups warm water.
    • Table salt – enough to cover the spill.
    • Wine removal product such as Wine Away (under $10 from Amazon).
  • Test Solution. Test the solution on a small inconspicuous area for colorfastness.
  • Dab and Blot. Dab your solution of choice in small amounts on the spill with a soft, clean white cloth (an old T-shirt will do nicely!), again working your way from the outside of the spot to the center. Don’t be tempted to dump the mixture all over the stain as it will cause it to spread and may damage the carpet’s backing.
    • NOTE: If using salt, cover the stain, let sit until dry, then vacuum.
  • Rinse. Rinse the cloth frequently to avoid spreading or reintroducing the wine to the area.
  • Rest. Let everything sit for five to 10 minutes.
  • Rinse Again. Rinse the area with cold water.
  • Blot and Repeat. Blot with a white towel. Repeat until no more color transfers to the towel.

Theoretically, you can use white wine to remove a red wine stain following the steps above. If wasting any wine on a spill shocks you to your core, consider having vinegar or salt or Wine Away at the ready before you pop the cork.

Cheers!


The Easy Way to Clean a Dirty Oven

If there is one chore no one enjoys doing, it’s cleaning the oven.

But it really doesn’t have to be all that difficult. Yes, there are tons of products out there for cleaning your oven but they can often be harmful to your oven’s interior finish as well as harmful to breathe in. A self-cleaning oven option is a great feature. However, if you don’t have that option, cleaning the oven doesn’t have to be difficult or harmful.

Taking a dirty oven and making it a clean oven can be done in less than one hour and without any harsh chemicals!

Check out this quick video for a super easy way to clean a dirty oven.


Step by Step Instructions:

  1. Mix about 3 Tbsp baking soda, a bit of water and some vinegar in an oven safe dish until it forms a paste.
  2. Dab the dirtiest areas with the mixture.
  3. Sit the remaining mixture in the oven safe bowl in the center of your center oven rack.
  4. Turn the oven to around 212 degrees fahrenheit.
  5. Leave the mix in for around 45 minutes.
  6. Turn the oven off and allow to cool for a bit.
  7. Wipe down the oven and remove all the build up easily!

Be sure your oven is cool and hasn’t been used recently before beginning this process.
Do not do the cleaning process while the oven is in use for baking.

If you ever have questions about cleaning your oven, best products to use, or how it operates, give your leasing office a call and we will be happy to send a maintenance technician to your home or answer any questions.

How to Keep a Squeaky Clean Shower

Need some tips and tricks on keeping your shower or bath squeaky clean? We’ve got ’em!


Showers can be a hot bed for mildew and soap scum if not properly cleaned on a regular basis. Here are some tips to keep your shower fresh and clean.

Do these daily:

  1. Squeegee water off walls, floor and door. This will prevent mildew growing in the warm water left behind.
  2. Wipe all areas with a dry towel of any remaining condensation.
  3. Run a vent fan during your shower or bath and up to 30 minutes afterward. This will help remove any humidity remaining in your bathroom.
  4. Leave the shower door or curtain slightly open to release any remaining humidity in the shower and to help dry moisture.

Regular, weekly cleaning with ensure a clean shower and bath. You can use a gentle cleanser that can be purchased at most stores. However, be sure to check the bottle to make sure it is okay to use on your surface. A list is also provided in your move-in packet to all our residents at Fath Properties. If you need a copy, please contact the leasing office.

If you want an easy, non-toxic cleaner, try this. Mix white cleaning vinegar and a few drops of tea tree oil in a bottle. For every 2 ounces of vinegar, add one drop of tea tree oil. The vinegar helps to remove soap scum and slime while the tea tree oil fights mildew and mold. Vinegar can be found at numerous grocery stores while tea tree oil can be found at organic retailers like Whole Foods or online at Amazon.com. To use this vinegar-oil cleaner, simply spray on all walls, doors and floor and let it sit for 20 minutes. Rinse off with warm water. For hard to clean areas, apply baking soda and scrub with vinegar to the problem area, and let sit for 20 minutes before rinsing. Repeat as necessary.

Other tips and tricks:

  • Clogged shower head? Tie a baggy filled with white cleaning vinegar around the shower head. Leave on overnight. Remove the bag and run the shower to remove built up particles. This also works well on faucets in the kitchen and bathroom that may not flow smoothly.
  • Don’t sit bottles on the floor. Often times water can get stuck under the bottles and create a slime or mildew on the floor. Always keep bottles and other products in a shower caddy or shelf off the floor.
  • Magic erasers works wonders. If you have a hard to clean area between grout or in corners, try using a Mr. Clean Magic Eraser or similar product. It’s a non-toxic product and can even be used while you’re in the shower.
  • Funny colors appearing? If you see colors like pink, orange or yellow appearing in your shower, check your products. Some shampoos, conditioners or soaps have dyes that will leave residue in your shower.
  • Drop the bar. Go for gel. Bar soap will often leave soap scum and build up in your shower. Switch to a shower gel which is far less likely to result in similar build up.

Following these simple tips and tricks will keep your shower and bath clean and fresh!

As always, if you ever need assistance or would like a maintenance technician to check out your shower, feel free to call the leasing office or put in a service request online. We are happy to help!

Heat

Want to improve energy savings in the winter? Here are some tips!

Fath Properties’ goal is to provide seventy (70) degree heat to all apartments where we control the heat.  The majority of residents find this to be a comfortable temperature, and it allows us to sensibly manage our costs and do our part to conserve energy.  If your apartment’s temperature is between sixty-nine (69) and seventy-one (71) degrees, your heating system is probably working fine.  Apartment temperatures will vary slightly from unit to unit.  If your apartment is cooler than seventy (70) degrees, and no other problems exist with the system, there are several things you can do to maximize the temperature:

  • Furniture or other items set in front of your heat registers or vents will keep the heat from circulating in the apartment. Please keep all items at least eight (8) inches away from registers or vents. Proper circulation is essential!
  • Make sure all windows and doors are tightly shut. If there are still heavy drafts around windows or gaps in doors, please call your leasing office to have this addressed.
  • Make sure the vent(s) on your wall unit air conditioner(s) are in the ‘closed’ position and that there is not air sweeping in around the units.
  • It is normal for windows and the area around them to feel cold to the touch since glass is not a good insulator. Heavy insulated drapes and curtains are the best way to minimize the effect of this cold air on the apartment temperature.
  • If you have baseboard registers, make sure the metal flap inside is lifted all the way up and that you can see inside the register. This flap acts as a vent; if it is resting down on the front panel, the heat cannot escape.
  • If you have a forced air system, make sure your thermostat is set on ‘Heat’ and ‘Auto’.
  • Finally, please dress for the season, i.e. sweaters, heavy shirts, and slacks. Few people are comfortable in T-shirts or shorts, even inside, in the winter.

If you have further questions or need service for your heat, please contact your community leasing office. We will be happy to send out a maintenance technician.

Garbage Disposals

Garbage disposals operate virtually trouble-free when used properly.  These helpful procedures and tips will lead to a long life for your disposal and easy operation.

When running your garbage disposal…

  • Turn cold water to maximum flow position.
  • Flip the switch to the “on” position.
  • Push refuse through the splashguard keeping hands away from the inside chamber.
  • Continue to run the disposal until the grinding sound stops, and then flip the switch to the “off” position.
  • Continue to run cold water for two to three minutes to be sure all of the waste particles have been flushed away.

Below are some DO’s and DON’T(s) for disposal usage

 DO:

  • Grind a citrus peel or put baking soda down the drain to keep the disposal odor free.
  • Run plenty of cold water during and after operation.
  • Grind coffee grounds.

 DON’T:

  • Never put your hand down a disposal when it is running.
  • Do not use hot water when operating a disposal.
  • Never try to put too much through a disposal at once.
  • Never put any of the following items into a disposal

Fibrous materials (cornhusks, artichokes, etc.)
Clam, oyster, or nutshells
Fruit/vegetable pits or seeds
Rice
Pasta
Eggshells
Bones
Drain cleaner
Tea bags, potato or banana peels, celery, tomatoes
Grease
Wooden objects
Glass, china, plastic
Metal objects (bottle caps, aluminum foil, tin cans, utensils)
Dishrags

If the motor has stopped due to overloading, turn the disposal off.  Wait three to five minutes, and then push the reset button (located under the sink on the unit itself).  Then follow normal operating procedure.

If the disposal has jammed, turn the power switch to the “off” position before attempting to remove an object.  With tongs, remove any objects that might be obstructing the free movement of the blades.  In many cases, a broom handle can be inserted into the mouth of the disposal and turned in a circular pattern to free the blades.

Once movement has been restored to the blades, push the reset button on the disposal unit.  Then follow normal operating procedure.

Of course, if you ever run into an issue you cannot resolve yourself, our friendly maintenance team will be happy to help. Just call your leasing office and we will schedule a friendly maintenance technician to come to your apartment home.